Dash Light Dimmer Control
- Turn ignition switch to OFF position. Remove instrument panel cover from dash. See INSTRUMENT CLUSTER
under REMOVAL & INSTALLATION. Disconnect wiring from dash light dimmer control unit. Check connectors for damage or loose/corroded terminals. Repair as necessary. Ensure Black wire has continuity to ground. See Fig 1
. If continuity does not exist, repair open in Black wire and/or poor ground connection.
- Turn headlight switch on. Check Red/Black wire for battery voltage at dimmer control harness connector. See Fig 1
. If battery voltage exists, go to next step. If battery voltage does not exist, check fuse No. 30 (7.5-amp) in fuse/relay box under instrument panel. Check combination light switch. See COMBINATION LIGHT SWITCH under COMPONENT TESTS in appropriate STEERING COLUMN SWITCHES article. Check for open in Red/Black wire between dash light brightness control and fuse No. 30 (7.5-amp) in underdash fuse/relay box. See WIRING DIAGRAMS
. Repair as necessary.
- With headlight switch on, ground Red wire. Dash lights should illuminate at full brightness. If lights operate as specified, circuits are okay. If dash lights still do not work correctly, check for high resistance or open circuit in Red wire between dash light brightness control and dash lights. See WIRING DIAGRAMS
.
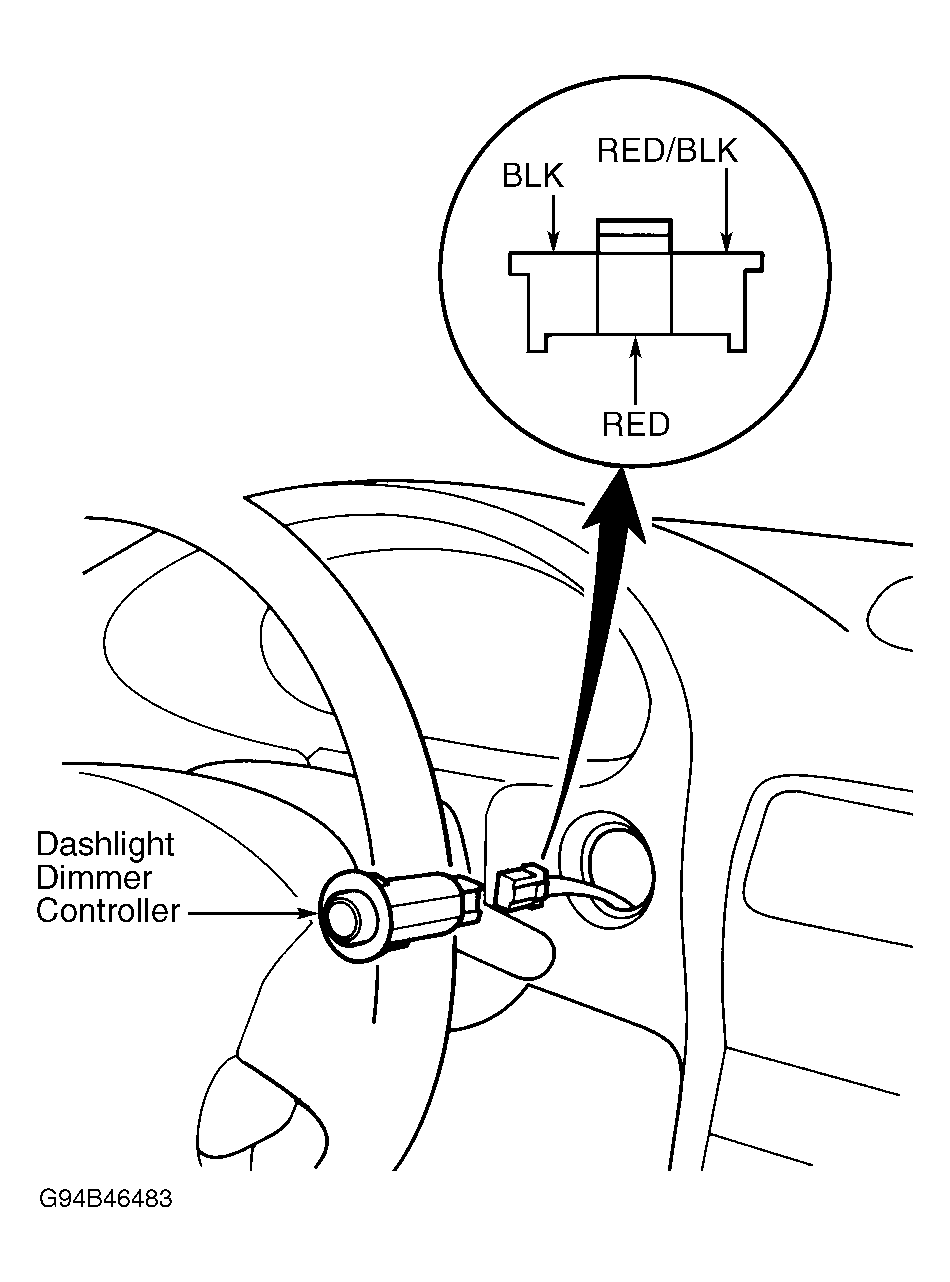 Courtesy of AMERICAN HONDA MOTOR CO., INC.