Alternator Removal and Installation: Removal
- Make sure you have the anti-theft codes for the audio system and navigation system. Make sure the ignition switch is OFF.
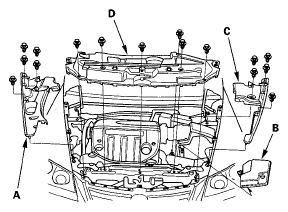
- Remove the right upper fender trim (A), battery trim (B), left upper fender trim (C), then remove the upper grille cover (D).
 Courtesy of AMERICAN HONDA MOTOR CO., INC.
- Disconnect the negative cable from the battery.
- Raise the vehicle on the lift to full height.
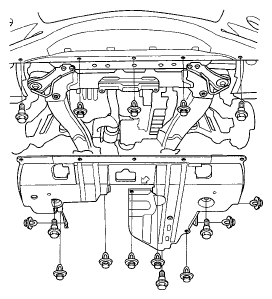
- Remove the splash shield.
 Courtesy of AMERICAN HONDA MOTOR CO., INC.
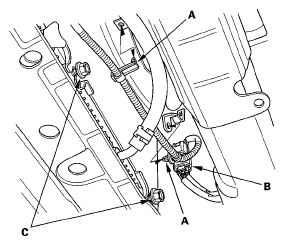
- Remove the harness clamps (A) and connector (B) from the A/C condenser fan shroud.
 Courtesy of AMERICAN HONDA MOTOR CO., INC.
- Loosen the two bolts (C) securing the A/C condenser fan shroud.
- Lower the vehicle on the lift.
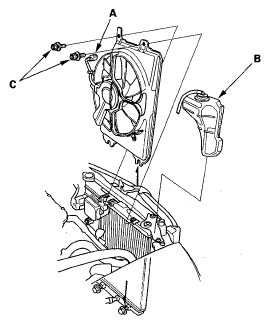
- Disconnect the fan motor connector (A), and remove the reserve tank (B).
 Courtesy of AMERICAN HONDA MOTOR CO., INC.
- Remove the two bolts (C), then remove the A/C condenser fan shroud.
- Remove the drive belt (see DRIVE BELT REPLACEMENT
).
- Disconnect the alternator connector (A) and BLK wire (B) from the alternator.
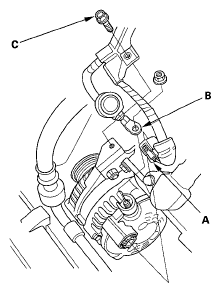 Courtesy of AMERICAN HONDA MOTOR CO., INC.
- Remove the bolt (C) securing the harness holder.
- Remove the mounting bolt (A) and alternator bracket mounting bolt (B), then remove the alternator.
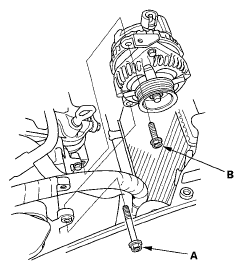 Courtesy of AMERICAN HONDA MOTOR CO., INC.