Park Pin Switch Replacement
- Remove the shift lever (see SHIFT LEVER REMOVAL
).
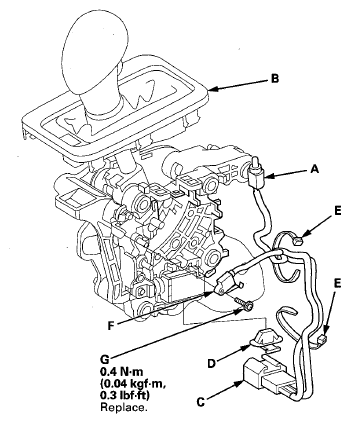
- Move the A/T gear position indicator panel up from the shift lever, and remove the A/T gear position indicator panel light bulb socket (A) from the indicator panel (B).
 Courtesy of AMERICAN HONDA MOTOR CO., INC.
- Remove the park pin switch/A/T gear position indicator panel light connector (C), then remove the connector clamp (D) from the connector.
- Remove the harness wire ties (E), and remove the park pin switch (F) and A/T gear position indicator panel light bulb socket.
- Install the park pin switch, and secure the switch with a new screw (G).
- Install the connector clamp on the park pin switch/A/T gear position indicator panel light connector, and install the connector on the shift lever.
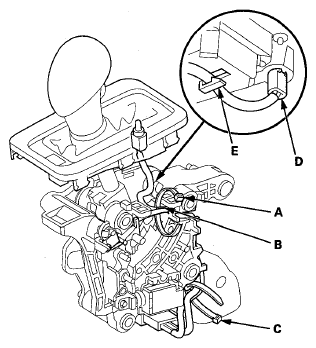
- Route the park pin switch harness and indicator panel light harness, and secure the harnesses with the harness wire tie (A); tie the indicator panel light harness at the white tape (B) with the harness wire tie.
 Courtesy of AMERICAN HONDA MOTOR CO., INC.
- Secure the harnesses with the harness wire tie (C).
- Install the indicator panel light socket (D) in the indicator panel, and install the harness in the clamp (E).
- Install the indicator panel on the shift lever.
- Install the shift lever (see SHIFT LEVER INSTALLATION
).