A/C Condenser Replacement
- Recover the refrigerant with a recovery/recycling/charging station (see REFRIGERANT RECOVERY
).
- Remove the upper grille cover (see
UPPER GRILLE COVER REPLACEMENT
).
- Do the battery removal procedure (see
BATTERY REMOVAL AND INSTALLATION
).
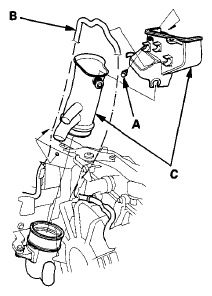
- Remove the clip (A) and the harness (B), then remove the air intake ducts (C).
 Courtesy of AMERICAN HONDA MOTOR CO., INC.
- Remove the bolt, then disconnect the receiver line (A) from the A/C condenser.
 Courtesy of AMERICAN HONDA MOTOR CO., INC.
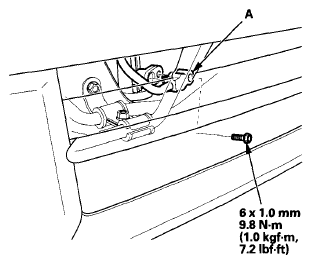
- Remove the bolt, then disconnect the discharge hose (A) from the A/C condenser.
 Courtesy of AMERICAN HONDA MOTOR CO., INC.
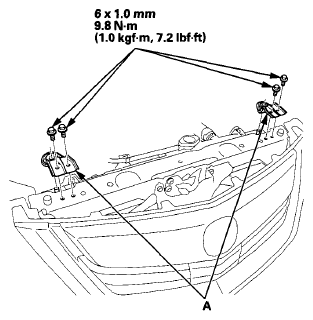
- Remove the bolts and the radiator upper mount brackets (A).
 Courtesy of AMERICAN HONDA MOTOR CO., INC.
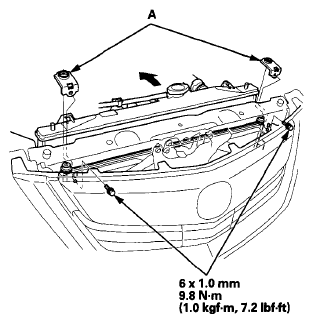
- Remove the bolts and the A/C condenser upper mount brackets (A).
 Courtesy of AMERICAN HONDA MOTOR CO., INC.
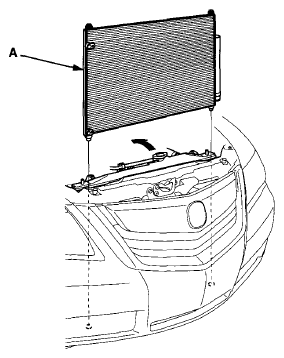
- Remove the A/C condenser (A) by lifting it up. Be careful not to damage the radiator and the A/C condenser fins when removing the A/C condenser.
 Courtesy of AMERICAN HONDA MOTOR CO., INC.
- Install the A/C condenser in the reverse order of removal, and note these items:
- If you're installing a new A/C condenser, add refrigerant oil (DENSO ND-OIL 8) (see A/C REFRIGERANT OIL REPLACEMENT
).
- Replace the O-rings with new ones at each fitting, and apply a thin coat of refrigerant oil before installing them. Be sure to use the correct O-rings for HFC-134a (R-134a) to avoid leakage.
- Immediately after using the oil, reinstall the cap on the container, and seal it to avoid moisture absorption.
- Do not spill the refrigerant oil on the vehicle; it may damage the paint; if the refrigerant oil contacts the paint, wash it off immediately.
- Be careful not to damage the radiator and the A/C condenser fins when installing the A/C condenser.
- Charge the system (see SYSTEM CHARGING
).
- Do the battery installation procedure (see
BATTERY REMOVAL AND INSTALLATION
).