Installation-A/T model
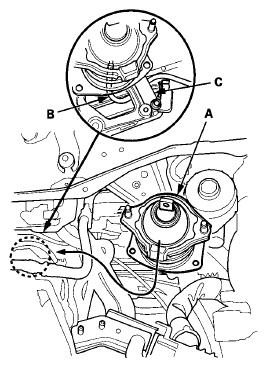
- Install the rear engine mount (A) from the top by sliding it into place from the driver's side and route the vacuum hose (B) through the hole in the mount base bracket (C).
 Courtesy of AMERICAN HONDA MOTOR CO., INC.
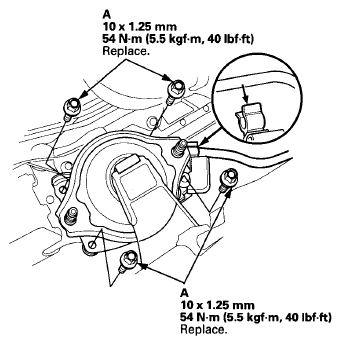
- Align the rear engine mount with its mounting holes and install the new rear engine mount mounting bolts (A).
 Courtesy of AMERICAN HONDA MOTOR CO., INC.
- Remove the jack and the wood block.
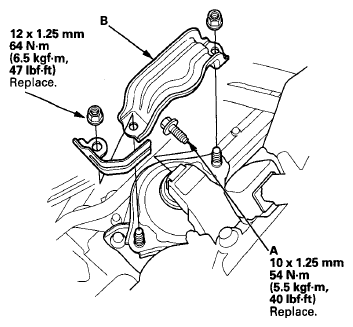
- Tighten the new rear engine mount bolt (A), then install the rear engine mount stop (B) using new nuts.
 Courtesy of AMERICAN HONDA MOTOR CO., INC.
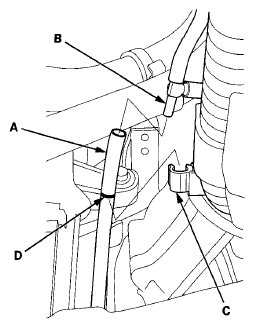
- Connect the vacuum hose (A) to the three way valve (B) and install the vacuum hose on its clamp (C) at the mark (D).
 Courtesy of AMERICAN HONDA MOTOR CO., INC.
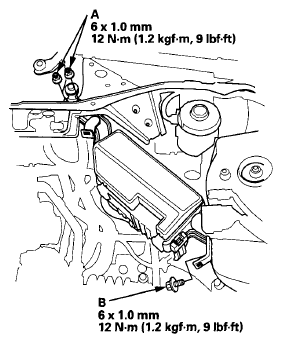
- Install the under-hood fuse/relay box with the mounting bracket, and tighten the two mounting nuts (A) and the mounting bolt (B).
 Courtesy of AMERICAN HONDA MOTOR CO., INC.
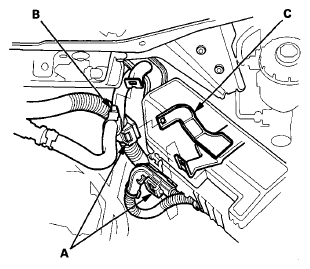
- Install the two harness clamps (A) and the brake booster vacuum hose clamp (B) to the under-hood fuse/relay box mounting bracket (C).
 Courtesy of AMERICAN HONDA MOTOR CO., INC.
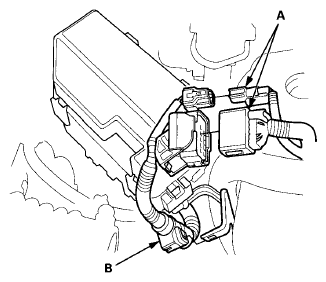
- Connect the harness connectors (A), then install the harness clamp (B) on the left strut tower.
 Courtesy of AMERICAN HONDA MOTOR CO., INC.
- Install the strut brace (see
FRAME BRACE REPLACEMENT
).
- Install the cowl cover (see
FRONT BULKHEAD BRACE COVER REPLACEMENT
).
- Install the air cleaner (see
THROTTLE BODY CLEANING
).
- Do the battery installation procedure (see
BATTERY REMOVAL AND INSTALLATION
).
- Install the engine compartment covers (see
ENGINE COMPARTMENT COVER REPLACEMENT
).