Steering Column Removal and Installation: Removal
- Tilt the steering column at the way up, and move it all the way in.
- Do the battery terminal disconnection procedure (see
BATTERY TERMINAL DISCONNECTION AND RECONNECTION
).
- Remove the driver's airbag (see
DRIVER'S AIRBAG REPLACEMENT
), and the steering wheel (see STEERING WHEEL REMOVAL
).
- Remove the driver's dashboard undercover (see
DRIVER'S DASHBOARD UNDERCOVER REMOVAL/INSTALLATION
).
- Remove the column covers (see
SIDE DEFOGGER VENT TRIM REMOVAL/INSTALLATION
).
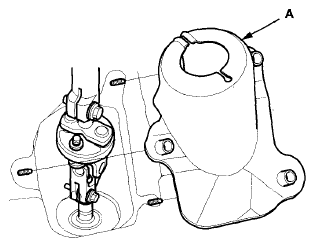
- Remove the steering joint cover (A).
 Courtesy of AMERICAN HONDA MOTOR CO., INC.
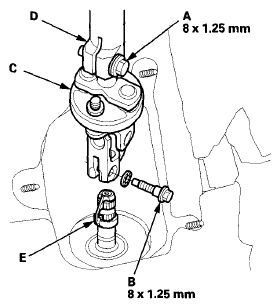
- Loosen the upper steering joint bolt (A), and remove the lower steering joint bolt (B). Disconnect the steering joint (C) by sliding the steering joint into the column shaft (D). Tighten the upper steering joint bolt to hold the steering joint in place.
NOTE:
- Do not disconnect the steering joint from the column shaft.
- If the center guide (E) is in place and has not moved, leave it in place.
- If the center guide has come off, discard it.
 Courtesy of AMERICAN HONDA MOTOR CO., INC.
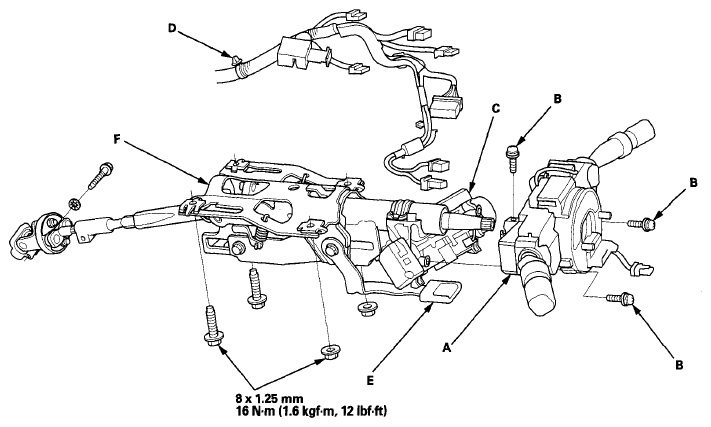
- Disconnect the wire harness connectors from the combination switch assembly/cable reel (A).
 Courtesy of AMERICAN HONDA MOTOR CO., INC.
- Remove the combination switch assembly/cable reel from the steering column shaft by removing the three screws (B).
- Disconnect the connectors from the ignition switch (C), and release the wire harness clip (D) from the steering column.
- Make sure that the lock lever (E) is in the locked position. Remove the steering column (F) by removing the attaching nuts and bolts, and carefully guide it out of the dashboard.