ELD Replacement
- Do the battery terminal disconnection procedure (see
BATTERY TERMINAL DISCONNECTION AND RECONNECTION
).
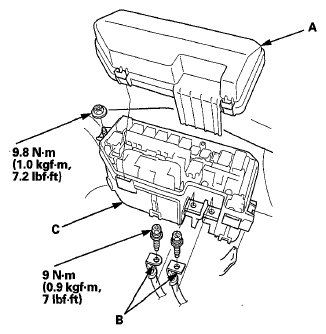
- Remove the upper cover (A), then remove the two positive (+) terminals (B).
 Courtesy of AMERICAN HONDA MOTOR CO., INC.
- Remove the under-hood fuse/relay box (C) from the bracket.
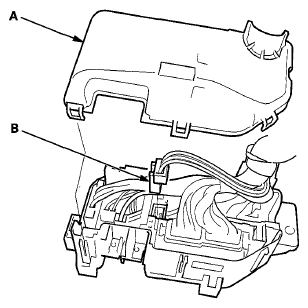
- Remove the lower cover (A).
 Courtesy of AMERICAN HONDA MOTOR CO., INC.
- Disconnect the ELD 3P connector (B).
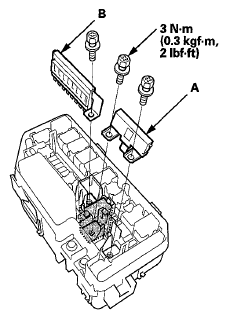
- Remove the fuses (A, B).
 Courtesy of AMERICAN HONDA MOTOR CO., INC.
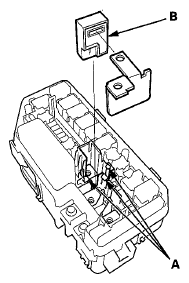
- Release the three lock tabs (A), then remove the ELD (B).
 Courtesy of AMERICAN HONDA MOTOR CO., INC.
- Install the parts in the reverse order of removal.
- Do the battery terminal reconnection procedure (see
BATTERY TERMINAL DISCONNECTION AND RECONNECTION
).