Injector Replacement
- Relieve the fuel pressure (see
FUEL PRESSURE RELIEVING
).
- Remove the engine cover.
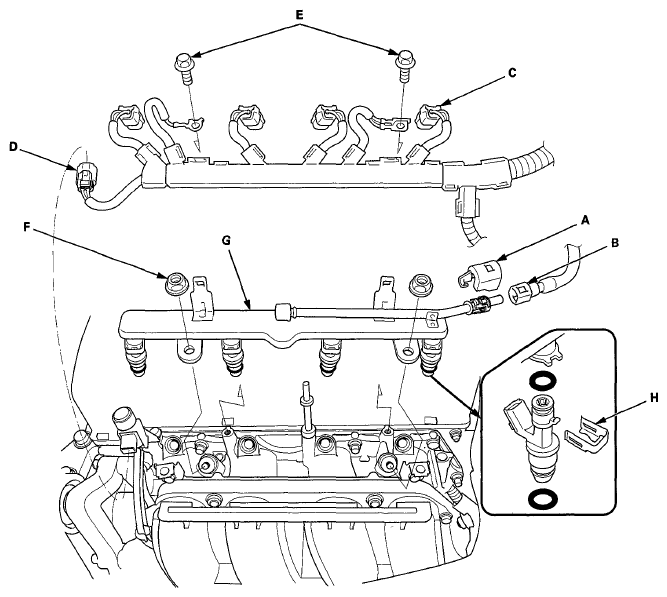
- Remove the quick-connect fitting cover (A), then disconnect the quick-connect fitting (B).
 Courtesy of AMERICAN HONDA MOTOR CO., INC.
- Disconnect the injector connectors (C) and the engine mount control solenoid valve connector (D).
- Remove the ground cable bolts (G101 and G102) (E).
- Remove the fuel rail mounting nuts (F) from the fuel rail (G).
- Remove the fuel rail and the injectors from the injector base.
- Remove the injector clips (H) from the fuel rail.
- Remove the injectors from the fuel rail.
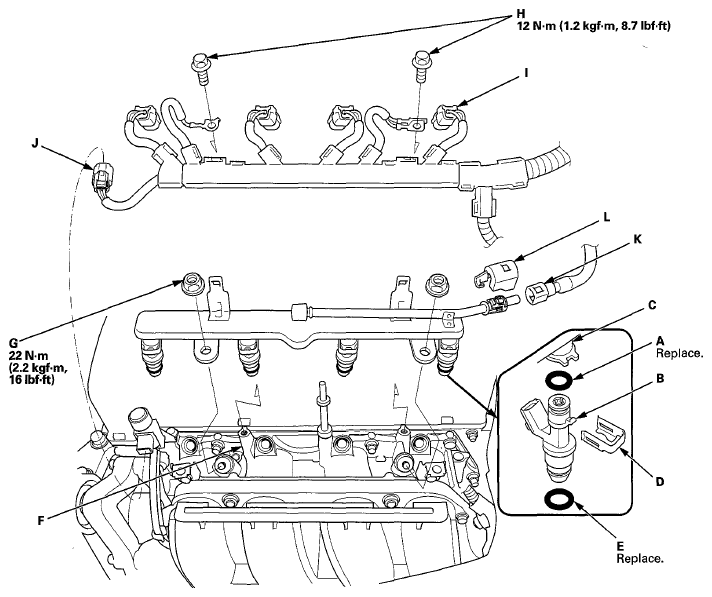
- Coat the new O-rings (black) (A) with clean engine oil, and insert the injectors (B) into the fuel rail (C).
 Courtesy of AMERICAN HONDA MOTOR CO., INC.
- Install the injectors clips (D).
- Coat the new O-rings (brown) (E) with clean engine oil.
- Install the fuel rail and the injectors in the injector base (F).
- Install the fuel rail mounting nuts (G) and the ground cable bolts (G101 and G102) (H).
- Connect the injector connectors (I) and the engine mount control solenoid valve connector (J).
- Connect the quick-connect fitting (K), and quick-connect fitting cover (L).
- Turn the ignition switch to ON (II), but do not operate the starter. After the fuel pump runs for about 2 seconds, the fuel rail will be pressurized. Repeat this two or three times, then make sure there are no fuel leaks.
- Reinstall the engine cover.