Front Lower Control Arm Bushing Replacement
 Courtesy of GENERAL MOTORS COMPANY
 Front Lower Control Arm Bushing Replacement
| Callout |
Component Name |
|
Preliminary Procedures
- Raise and support the vehicle. Refer to Lifting and Jacking the Vehicle
.
- Remove the tire and wheel. Refer to Tire and Wheel Removal and Installation
.
- Remove the front compartment splash shield. Refer to Front Compartment Splash Shield Replacement
.
- Remove the lower control arm. Refer to Lower Control Arm Replacement .
|
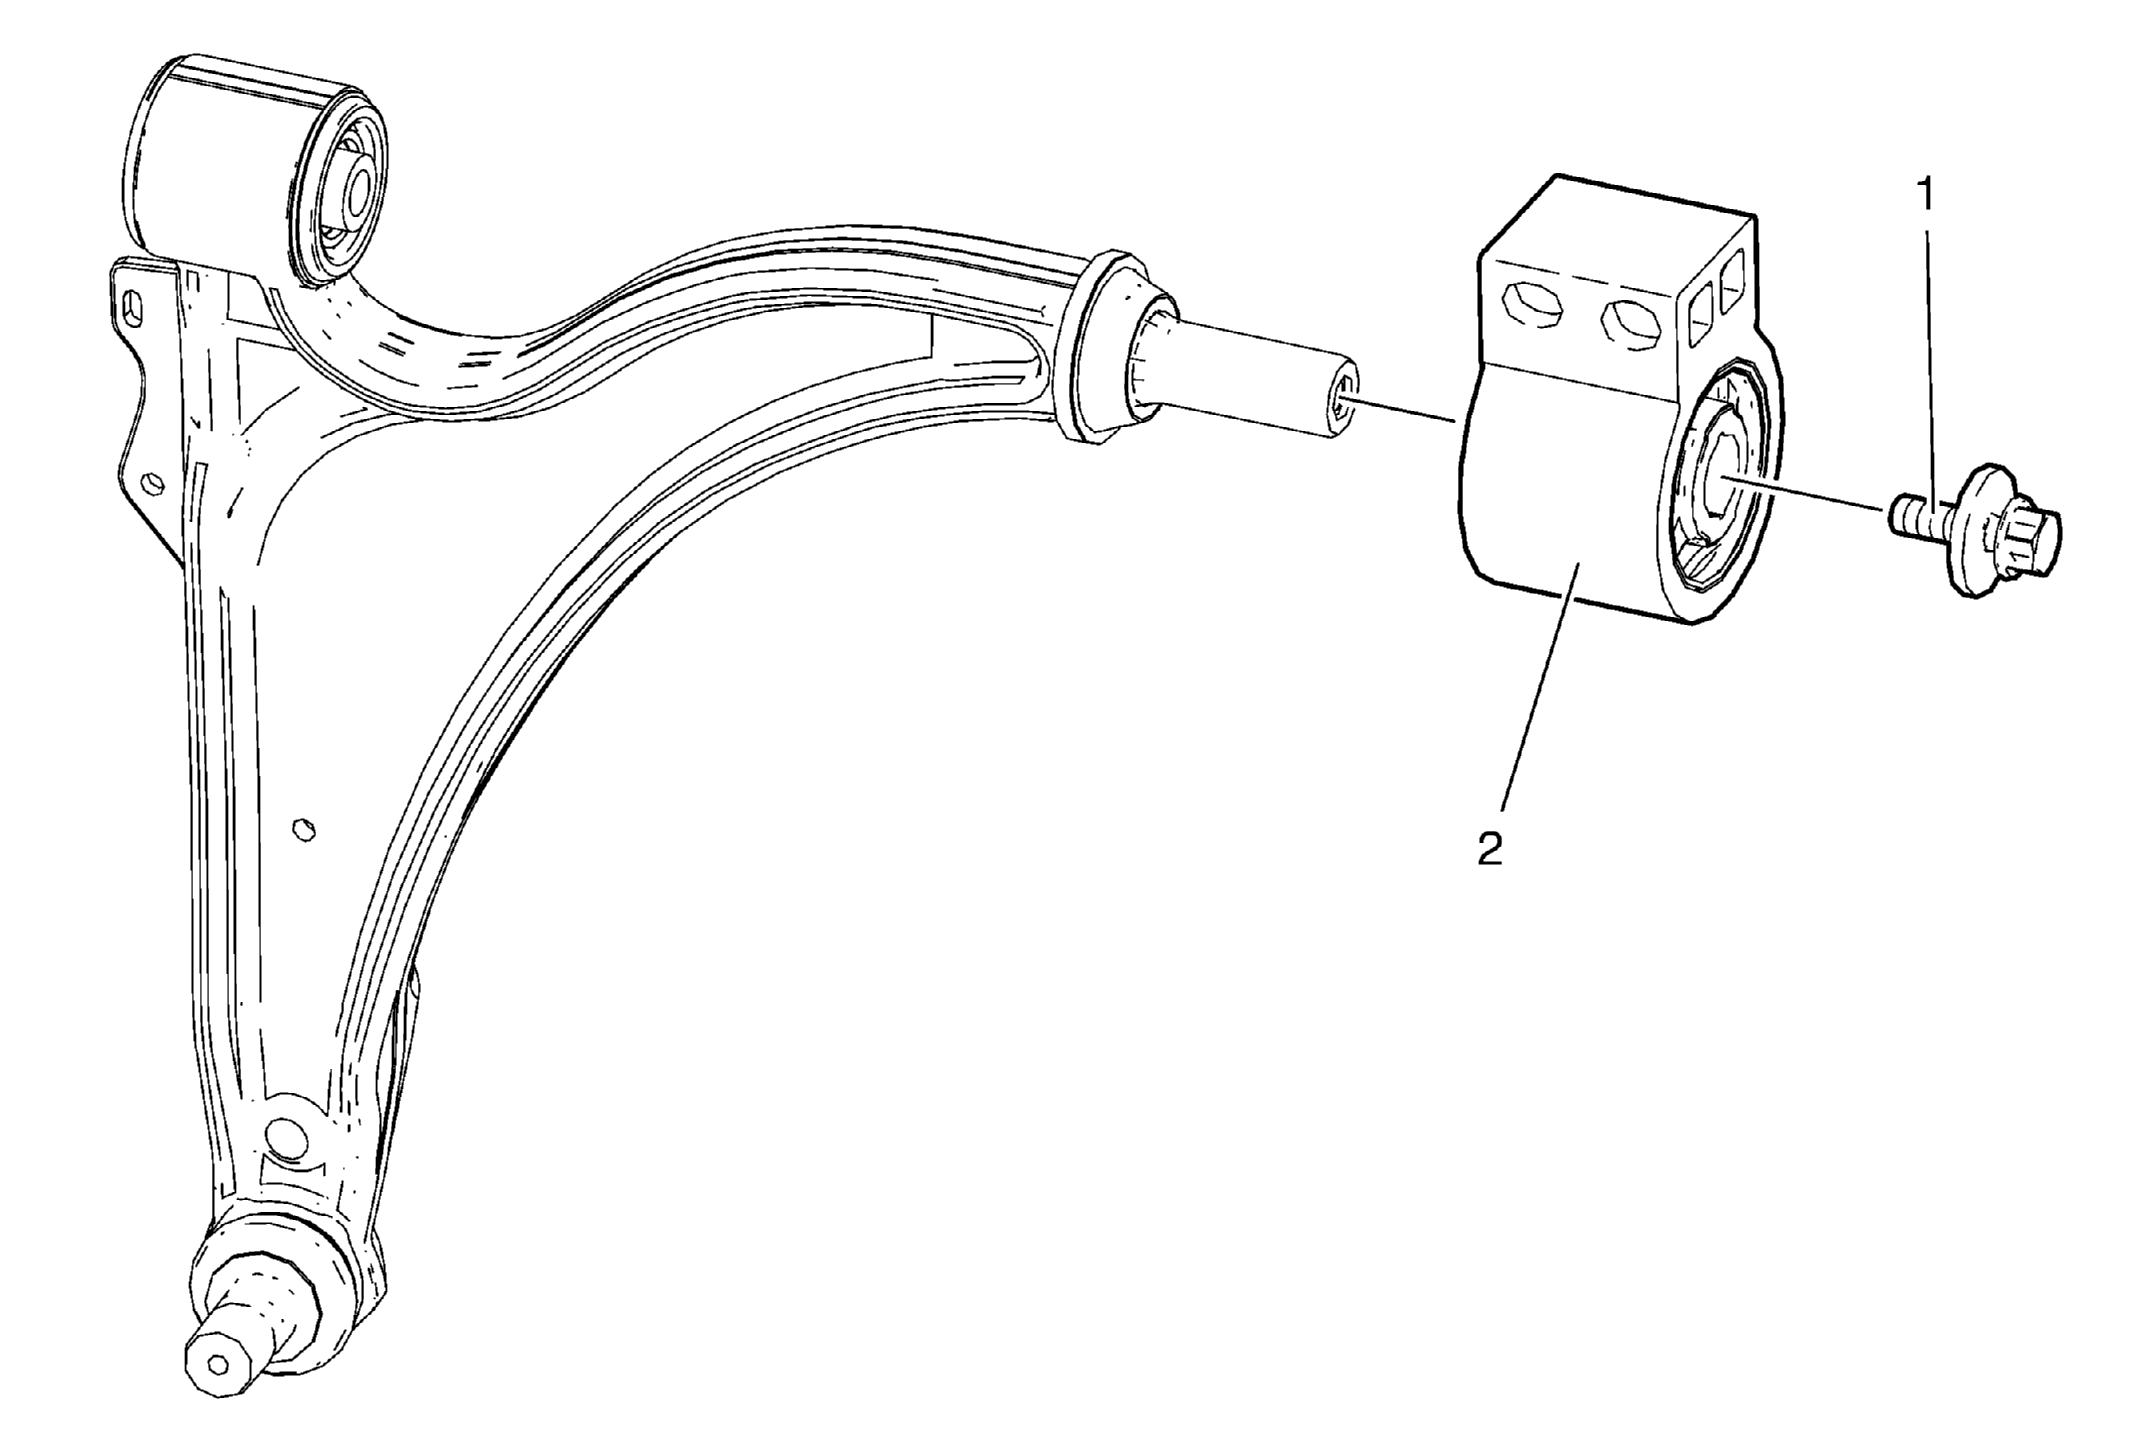
| 1 |
Front Lower Control Arm Rear Bushing Bolt
Procedure
- Install and hand tighten the NEW front lower control arm bushing bolt. Do NOT reuse the old bolt.
- Reinstall the front lower control arm to the vehicle. Refer to Lower Control Arm Replacement .
- Tighten the front lower control arm bushing bolt in two passes after the front lower control arm is supported with a hydraulic jack and lifted to a horizontal position.
Tighten
- First Pass: 55 (41 lb ft)
- Final Pass: 45 to 60 degrees
Special Tools
EN-45059
Angle Meter
For equivalent regional tools, refer to Special Tools . |
| 2 |
Front Lower Control Arm Rear Bushing |