Removal Procedure
- Remove the rear compartment side trim panel door.
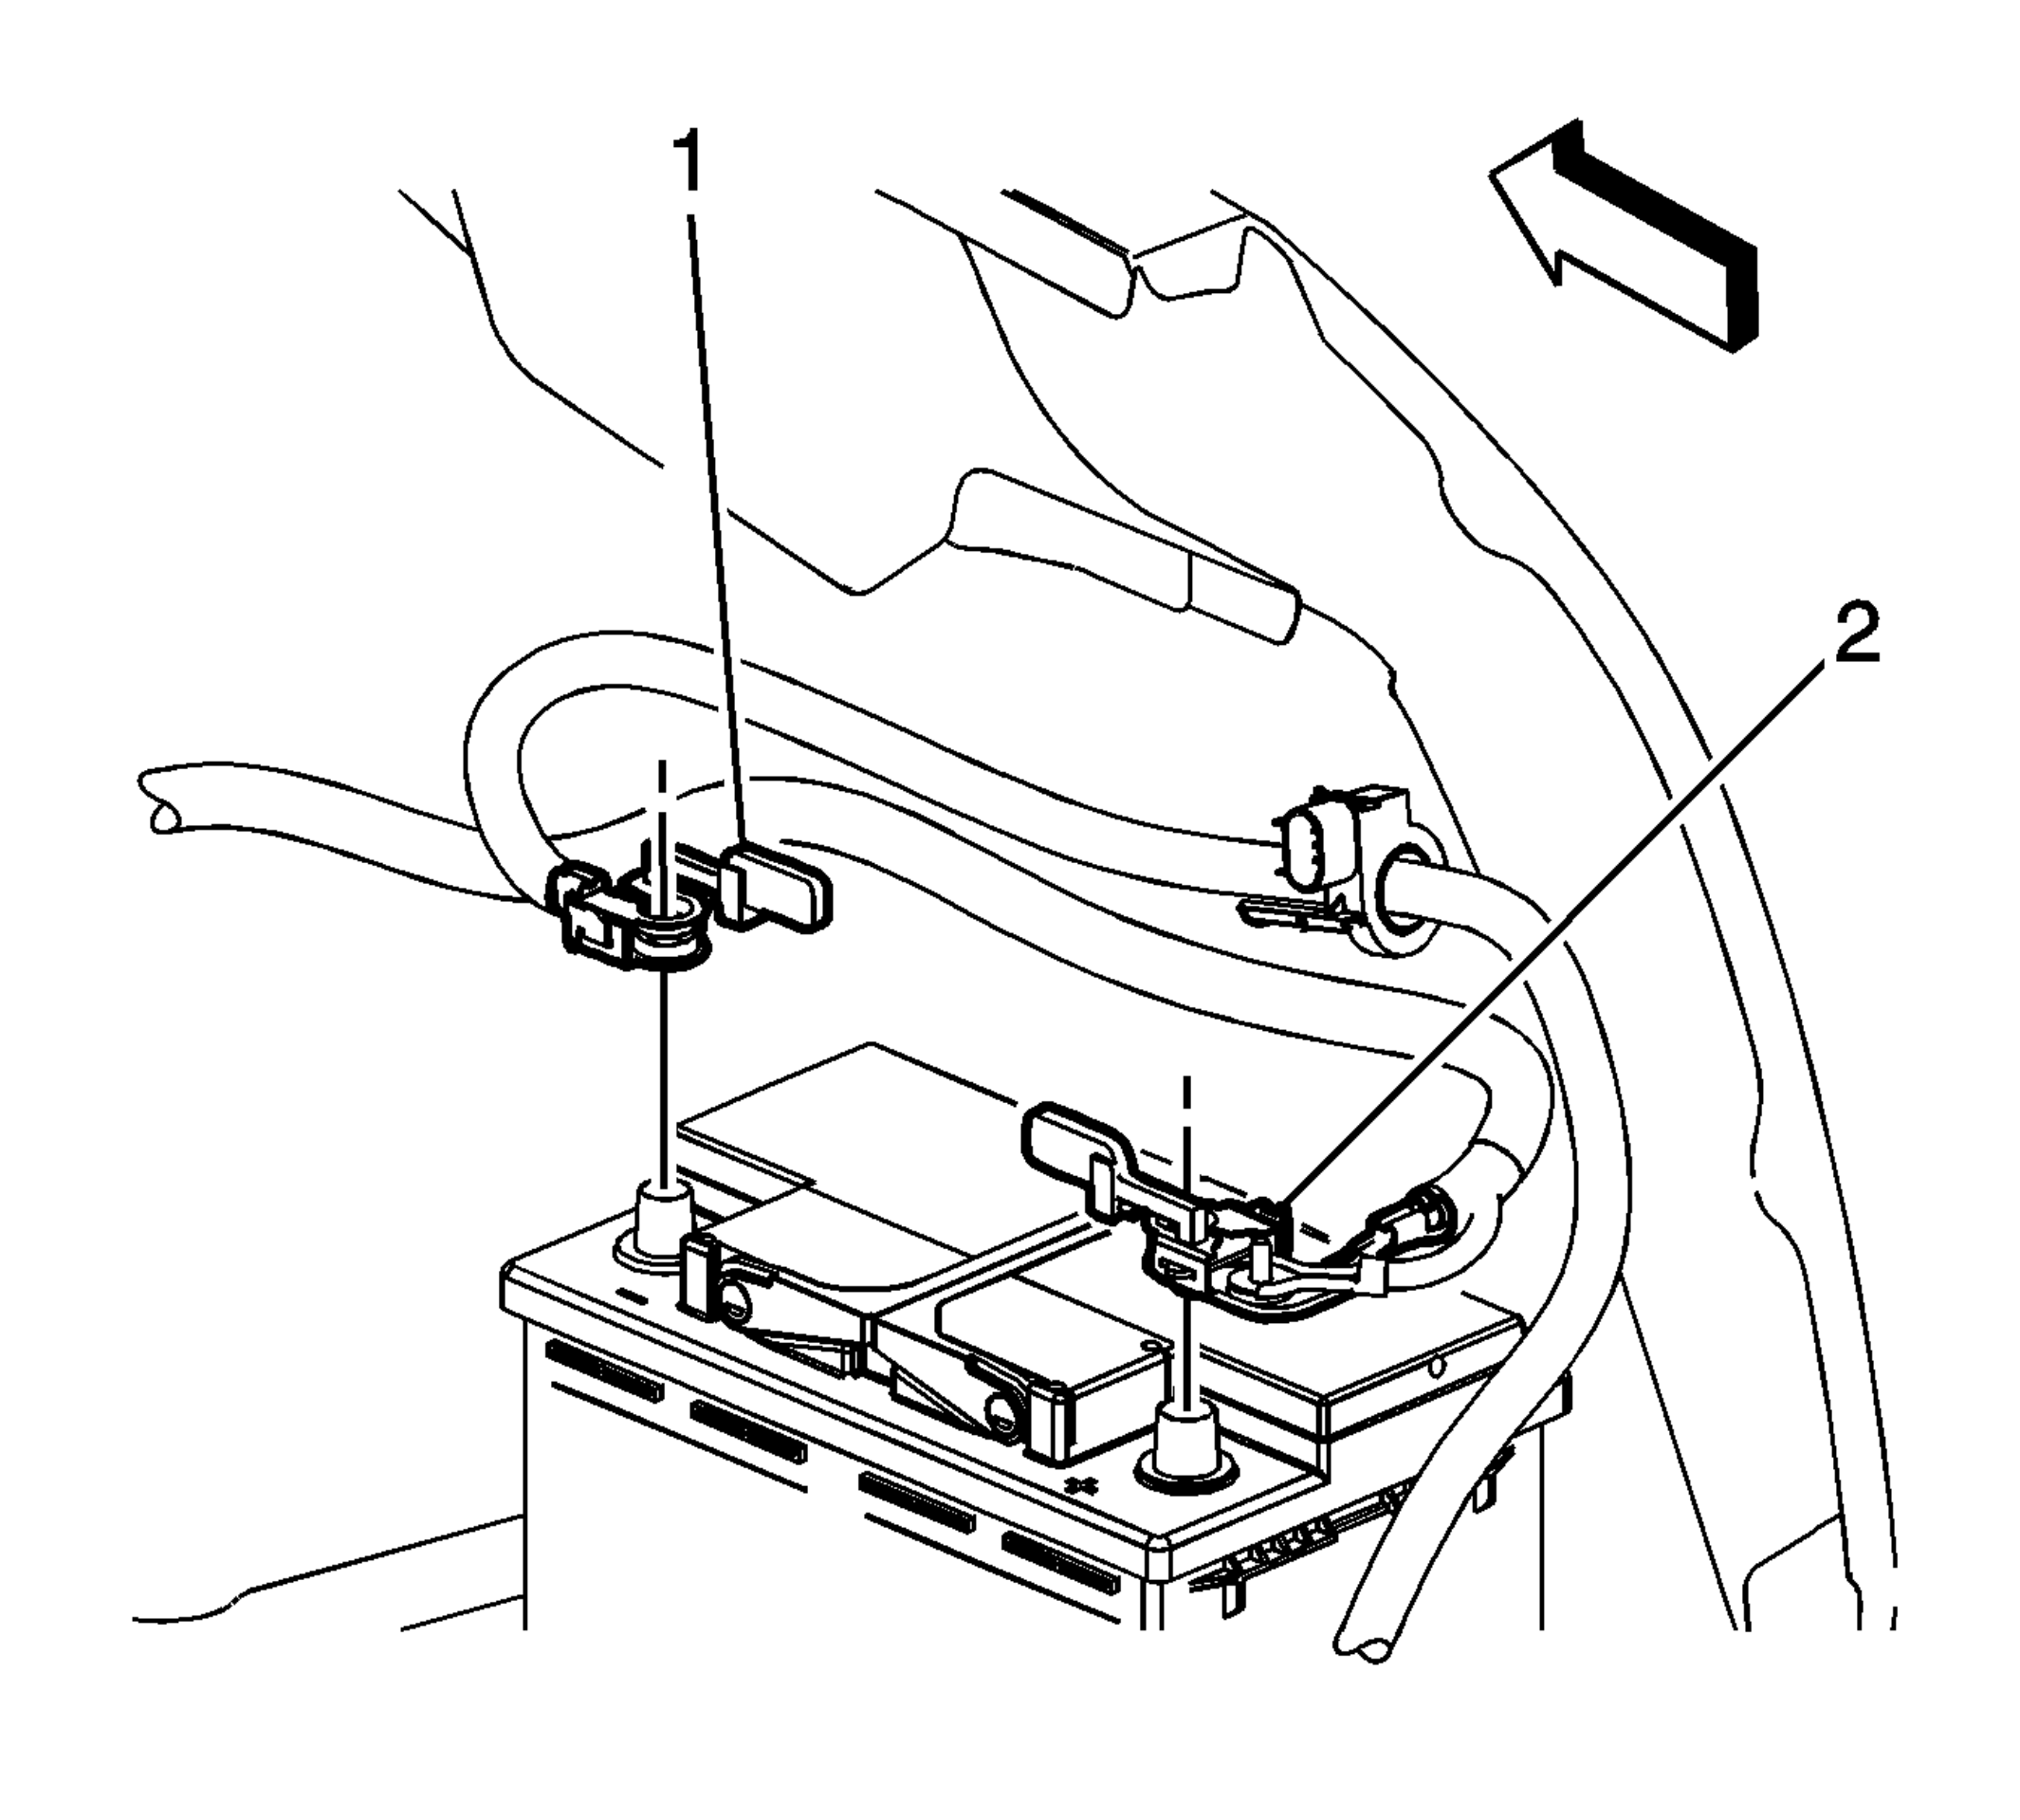 Courtesy of GENERAL MOTORS CORP.
- Turn the battery negative cable handle (1) to release the clamping force and remove battery negative cable from the battery negative post.
- Turn the battery positive cable handle (2) to release the clamping force and remove battery positive cable from the battery positive post.
- Remove the rear compartment side trim panel. Refer to Rear Compartment Side Trim Panel Replacement
.
- Remove the center pillar lower trim panel. Refer to Center Pillar Lower Trim Panel Replacement
.
- Remove the passenger side bucket front seat. Refer to Front Seat Replacement - Bucket (CTS)
or Front Seat Replacement - Bucket (W2E)
.
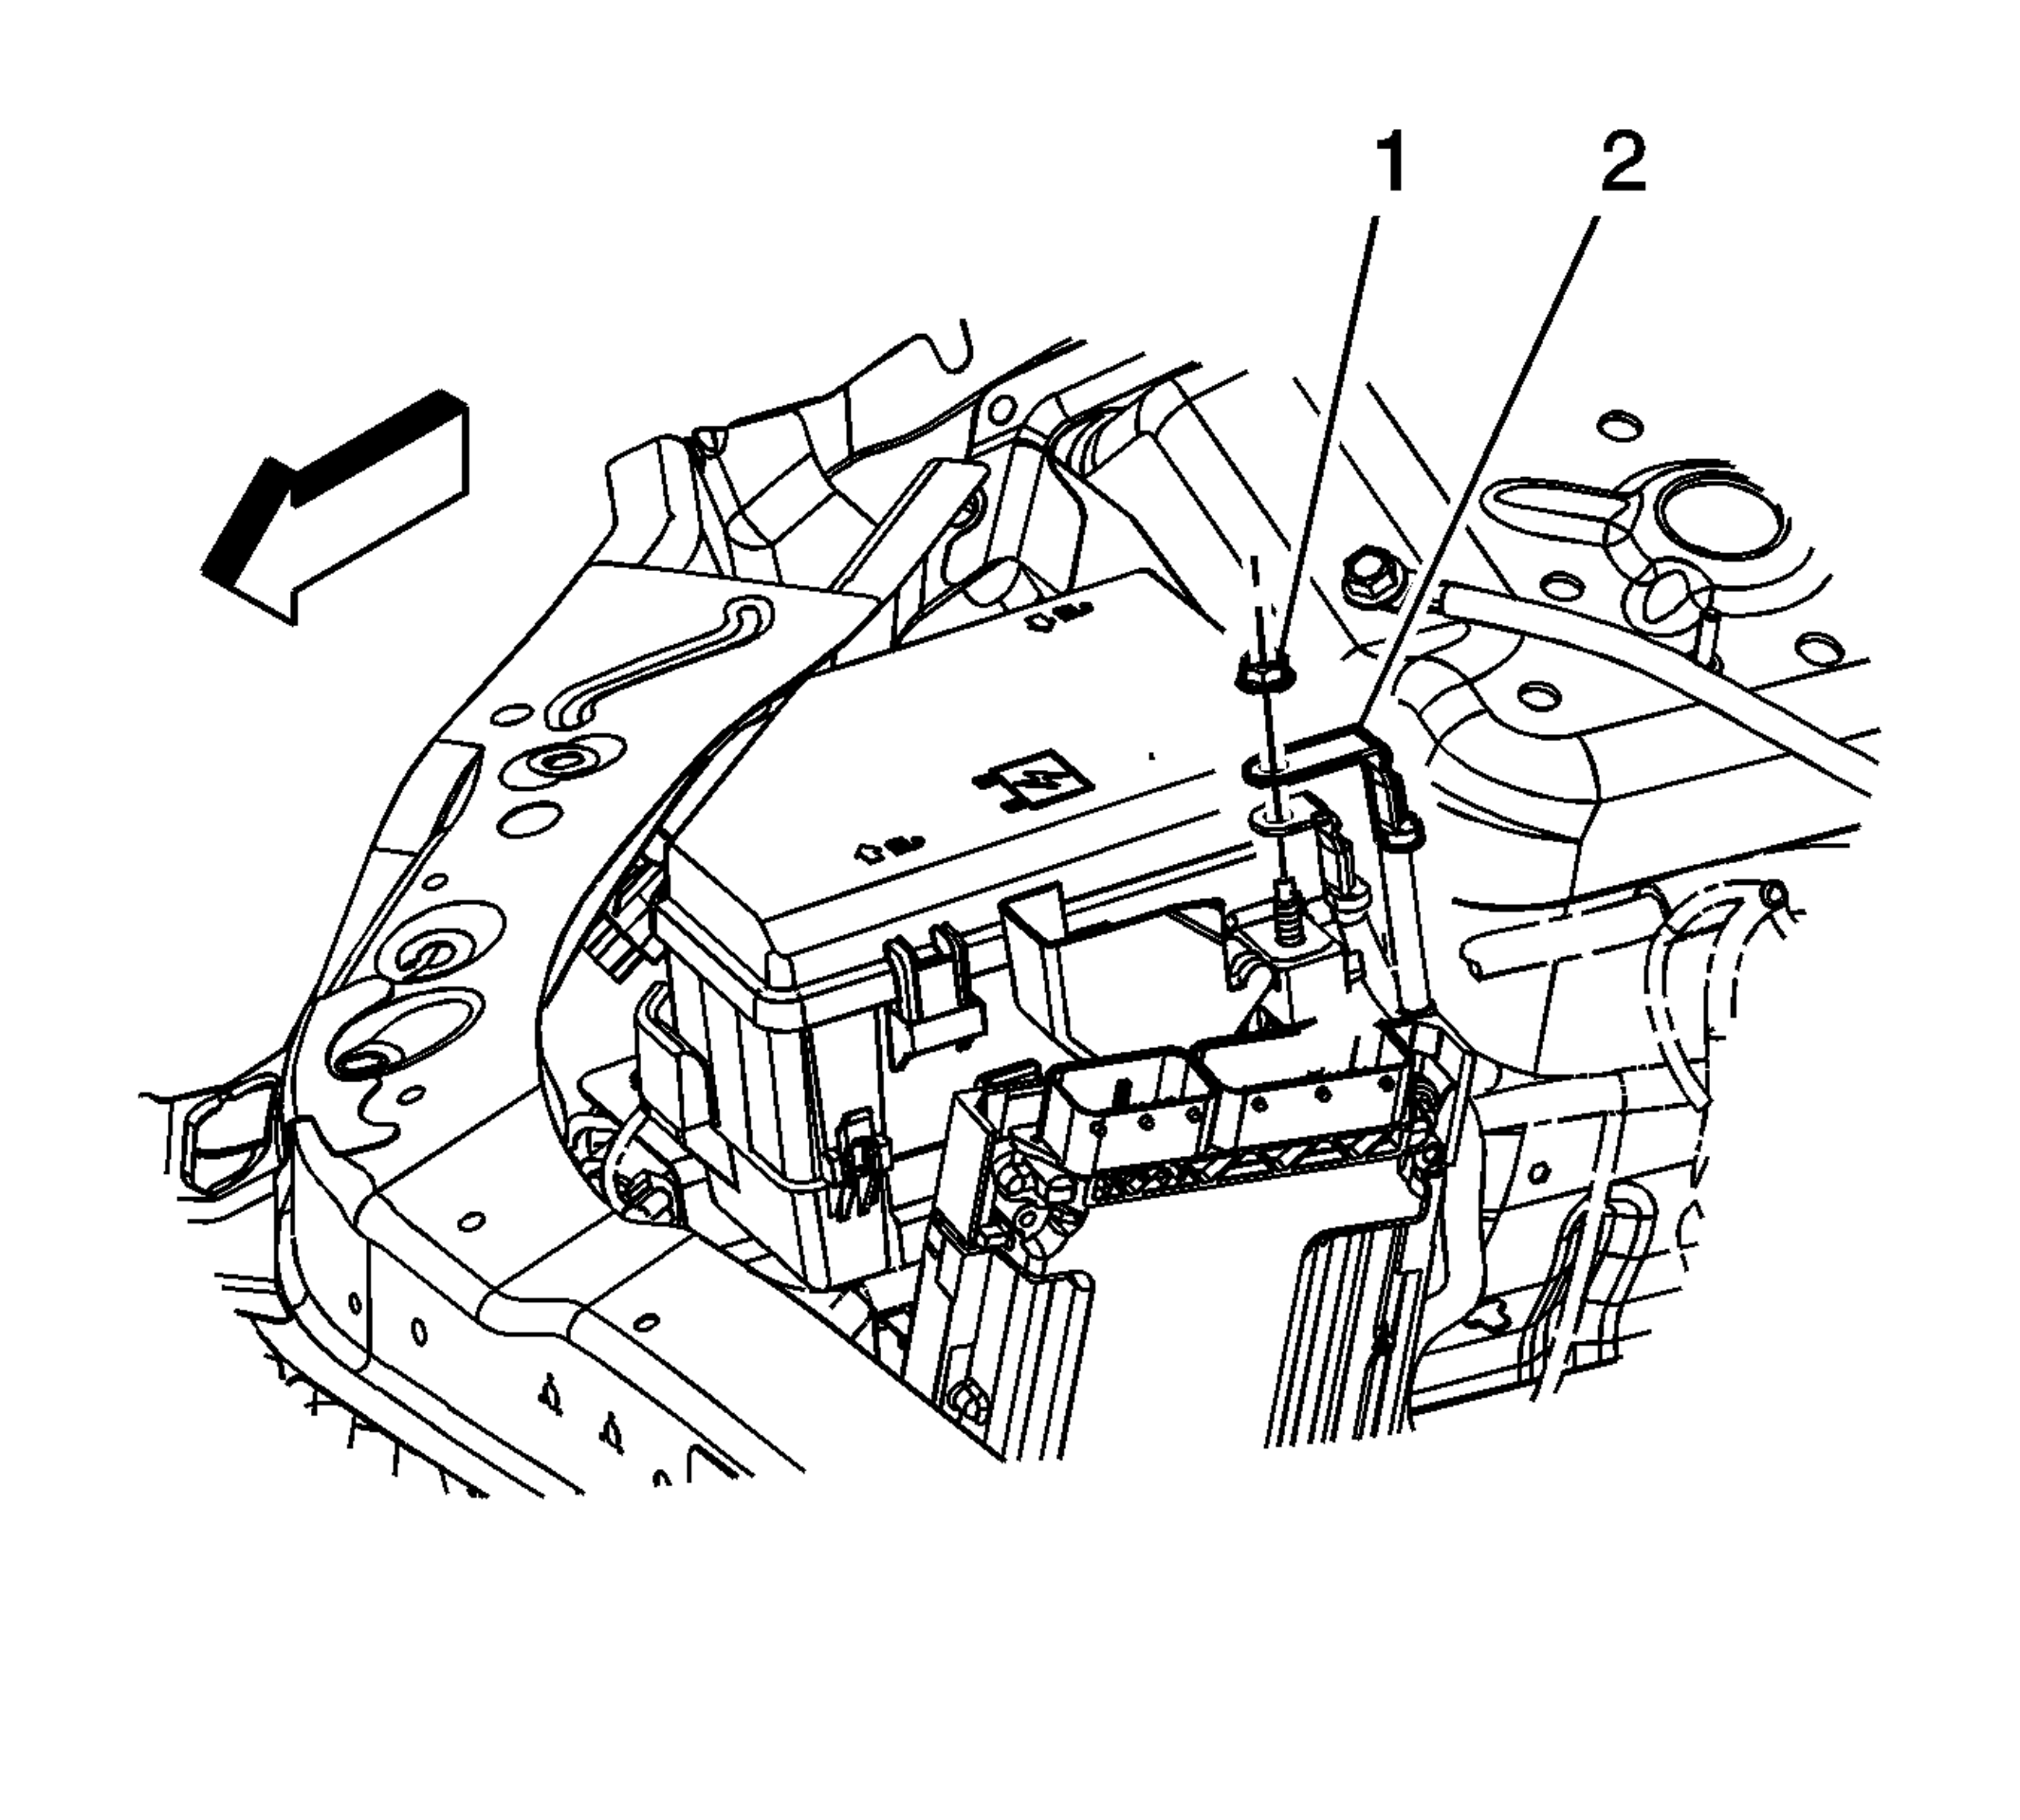 Courtesy of GENERAL MOTORS CORP.
- Remove the battery positive cable nut (1) from the front underhood electrical center or junction block.
- Remove the battery positive cable (2) from the front underhood electrical center or junction block.
- Pull the passenger side front floor panel carpet away from the right side front and rear rocker panels.
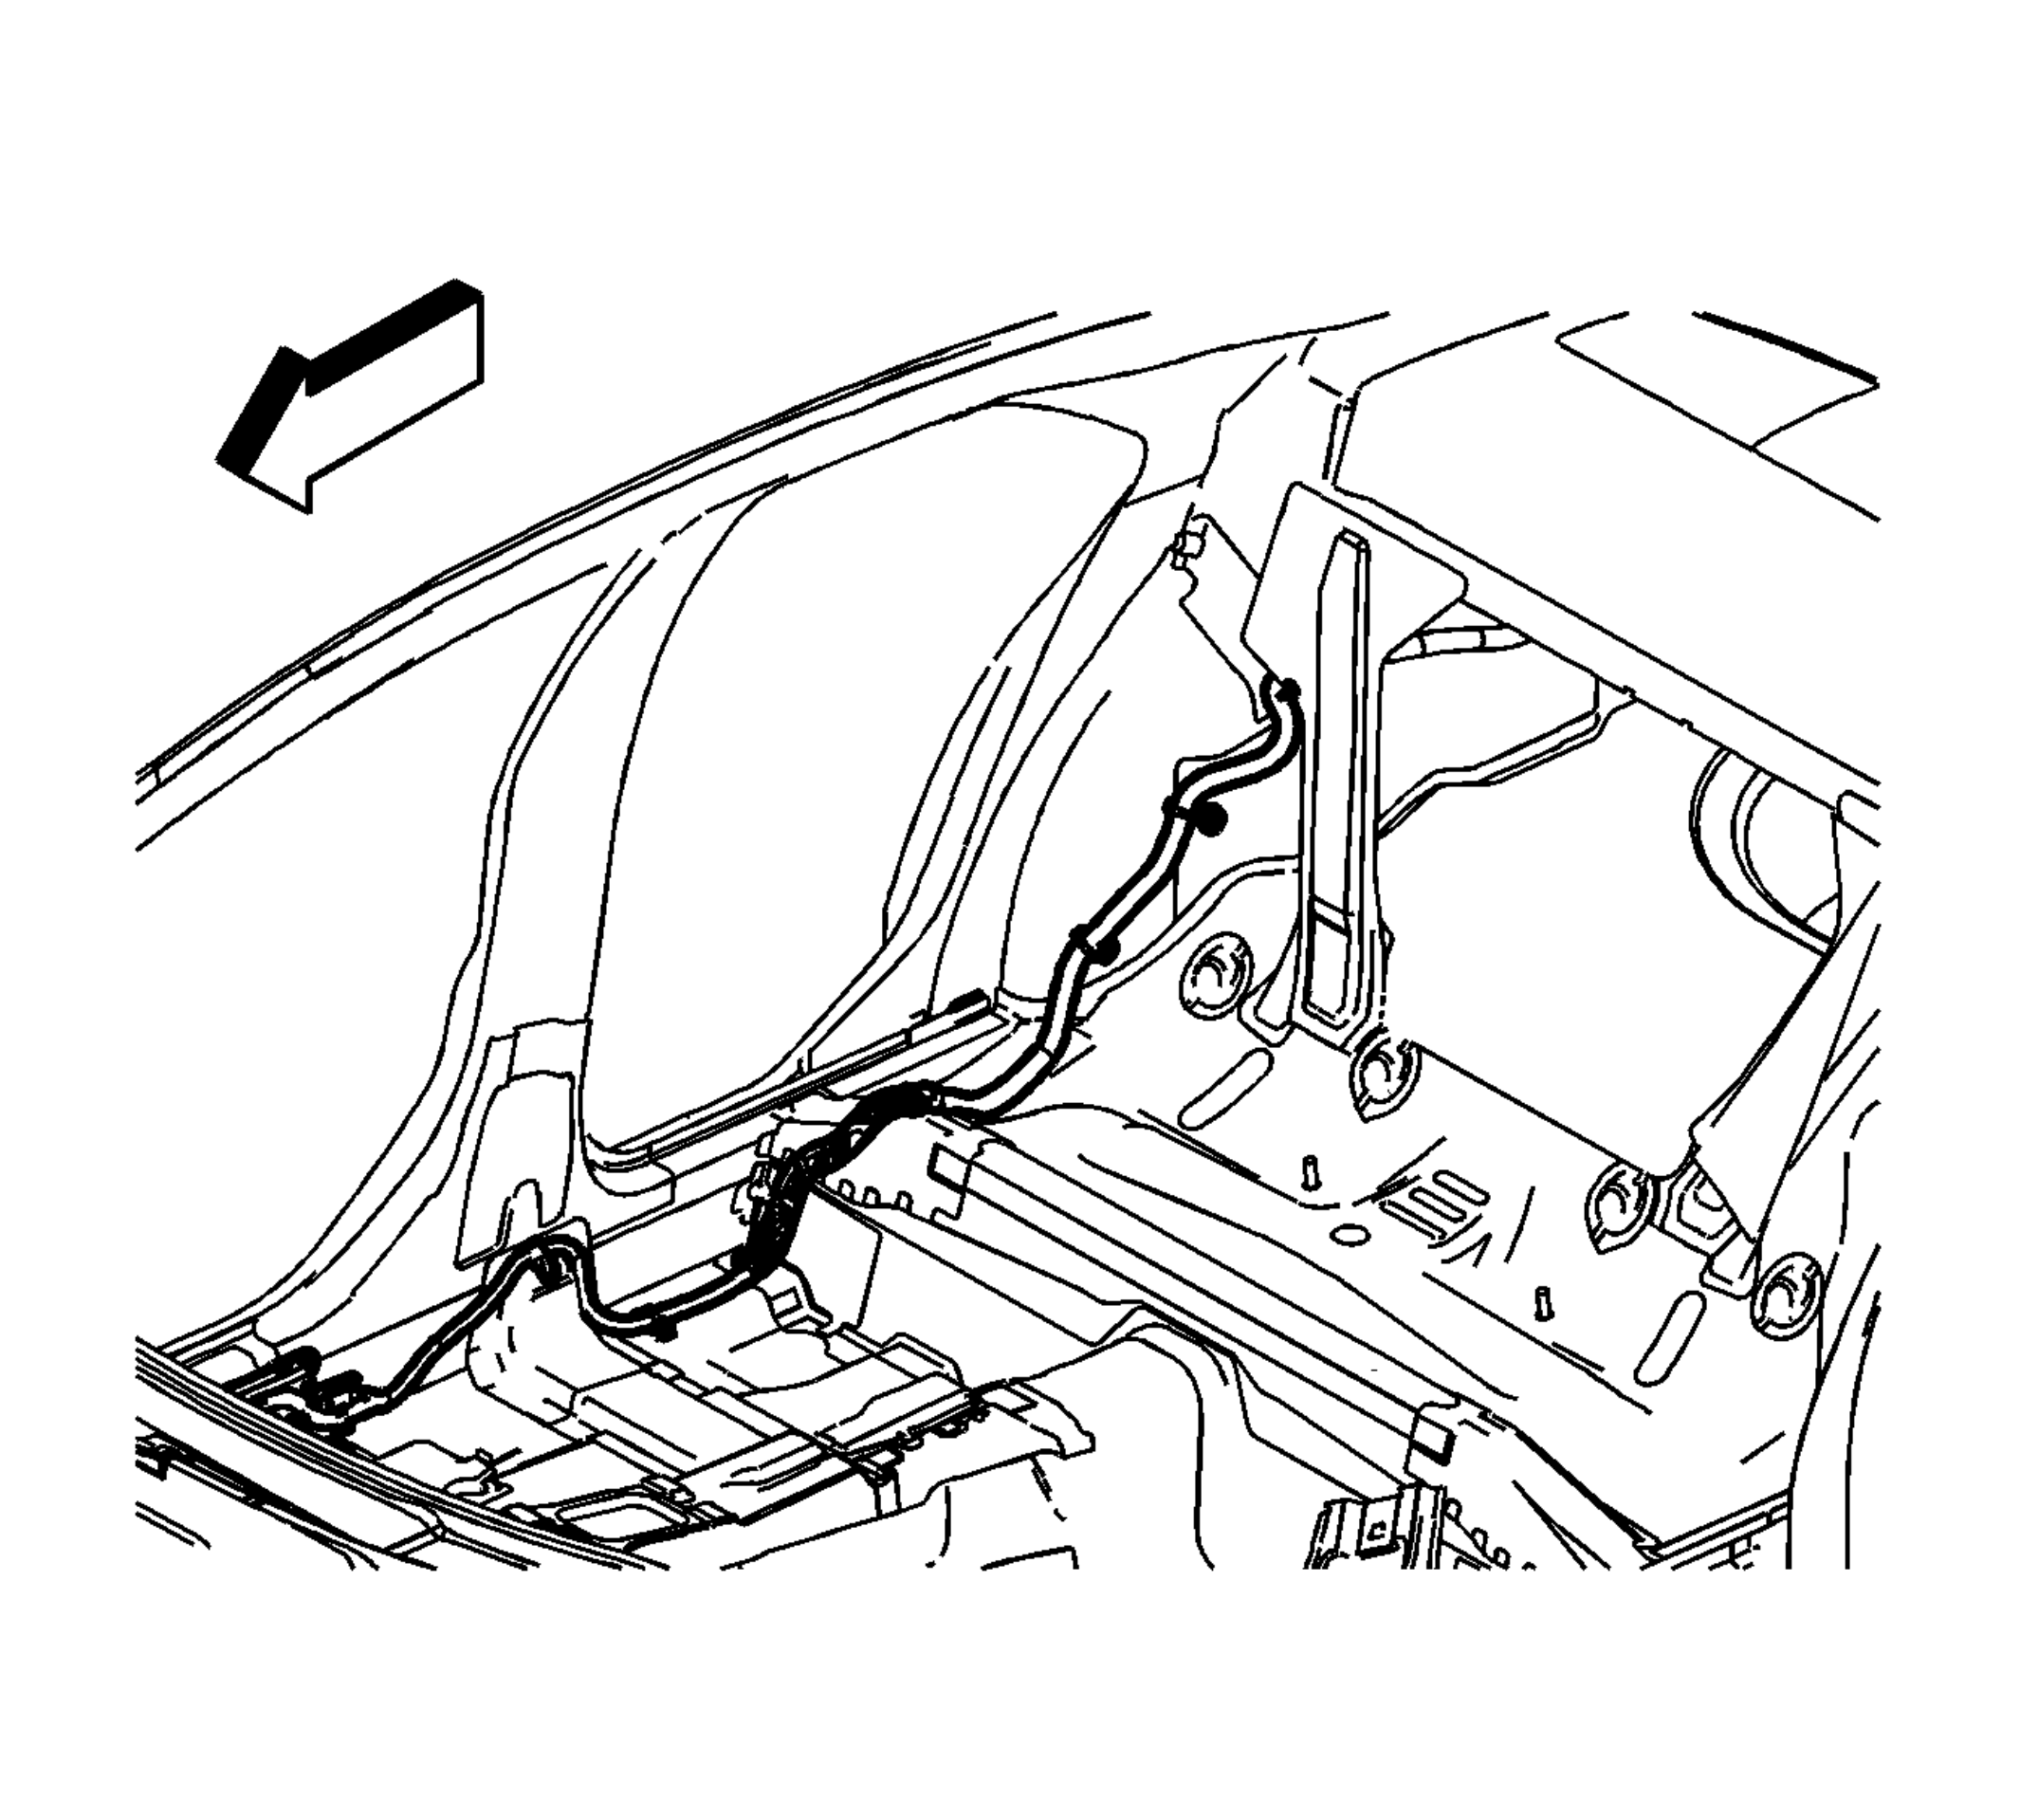 Courtesy of GENERAL MOTORS CORP.
- Starting in the rear compartment and working forward mark the location of all the retaining clips on the body harness and remove them as needed.
- Remove the body harness from any bracket assemblies as needed.
- In the passenger compartment, untape the body harness as needed and separate the battery positive cable from it.
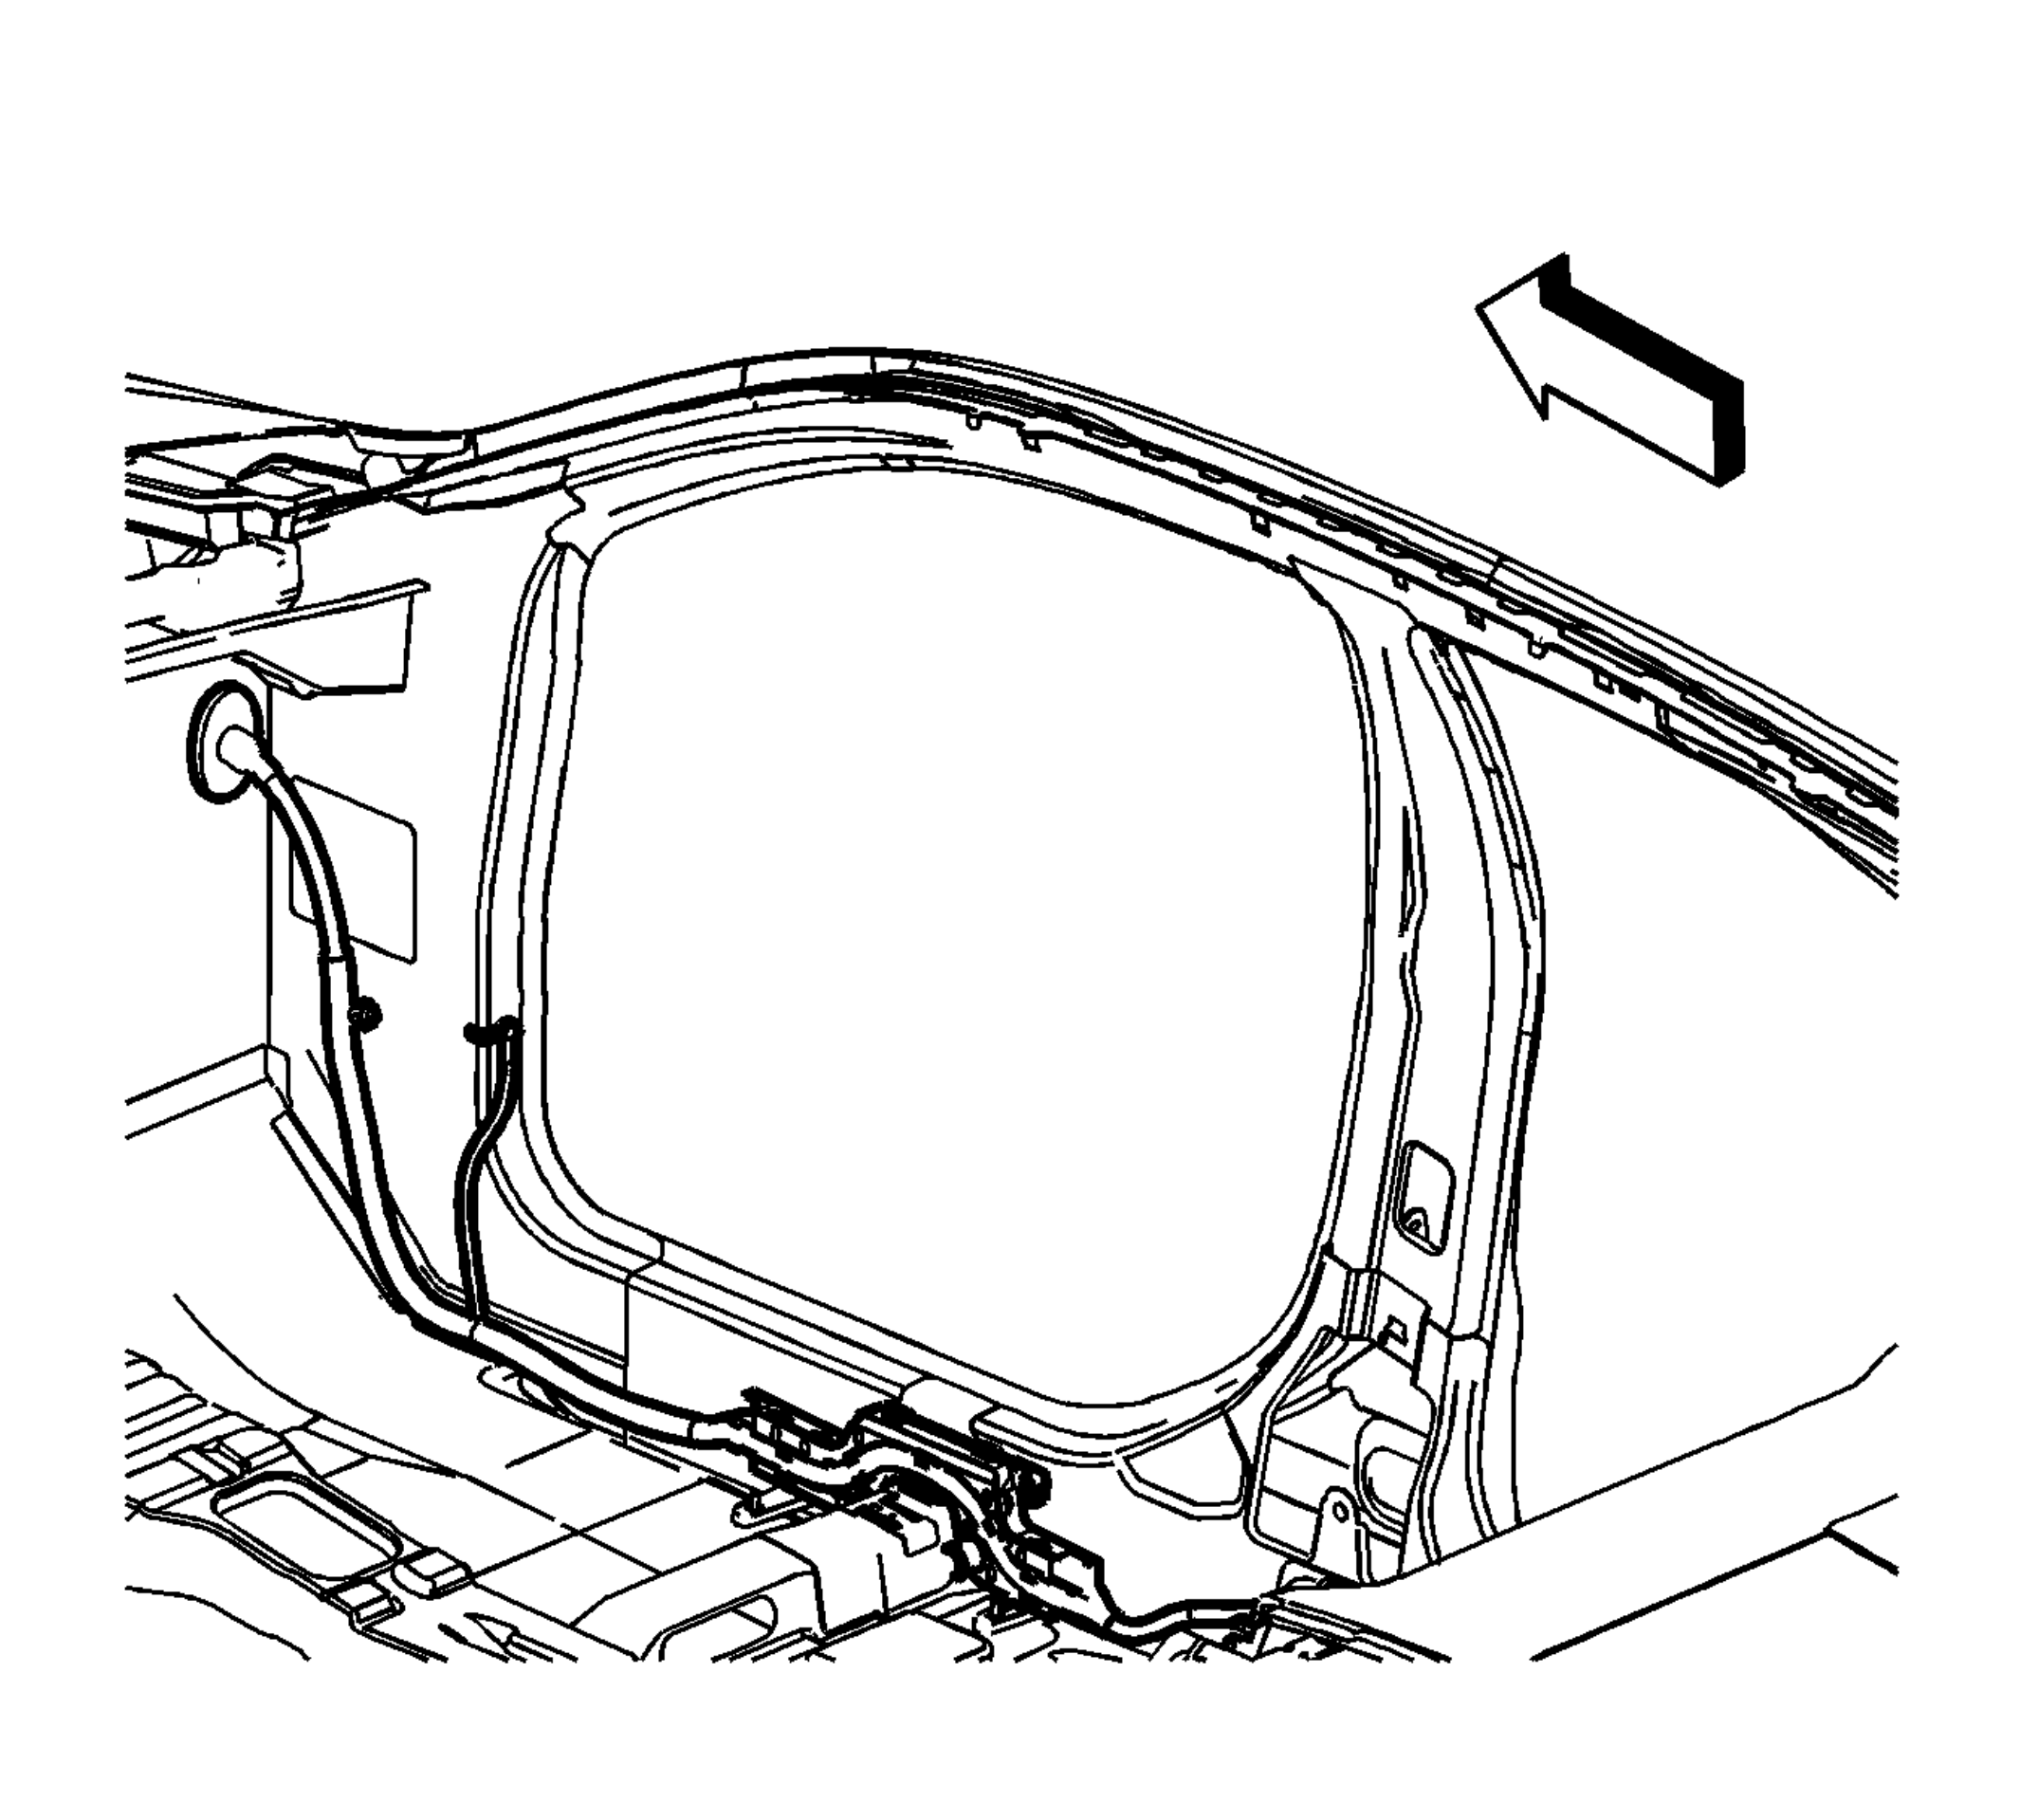 Courtesy of GENERAL MOTORS CORP.
- Push the rubber grommet in the dashboard pass-through to dislocate it from its installed position.
- Remove the windshield washer solvent heater. Refer to Windshield Washer Solvent Heater Replacement
.
- In the engine compartment, untape the body harness as needed and separate the battery positive cable from it.
- Remove the battery positive cable from the body harness and the vehicle.