Installation Procedure
- Battery Distribution Fuse Block (2)» Install
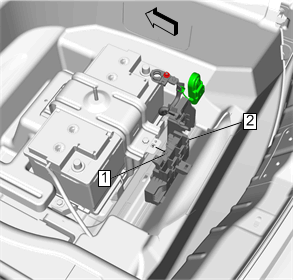 Courtesy of GENERAL MOTORS COMPANY
- Battery Distribution Fuse Block Retaining Tab (1)» Engage
- Battery Positive Cable (2)» Install
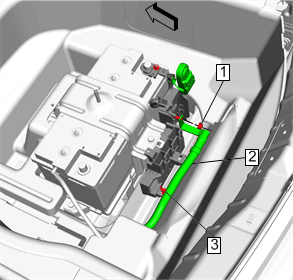 Courtesy of GENERAL MOTORS COMPANY
- Retainer (3)» Engage
- Battery Positive Cable Nut (1)» Install and tighten 15 N.m (11 lb ft)
- Electrical Connector (5)» Connect [3x]
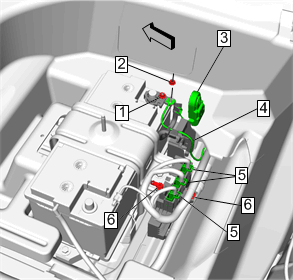 Courtesy of GENERAL MOTORS COMPANY
- Retainer (6)» Engage [2x]
- Body Harness Terminal (4)» Install
- Body Harness Ground Fastener (2)» Install and tighten 9 N.m (80 lb in)
- Battery Positive Post Clamp Nut (1)» Tighten 6 N.m (53 lb in)
- Battery Positive Post Cover (3)» Install
- Battery Distribution Fuse Block Cover (2)» Install
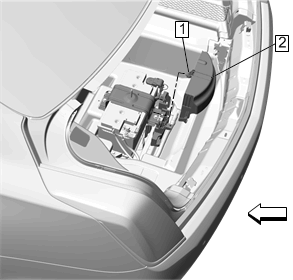 Courtesy of GENERAL MOTORS COMPANY
- Battery Distribution Fuse Block Cover Retaining Tab (1)» Engage
- Connect the negative battery cable. Refer to Battery Negative Cable Disconnection and Connection
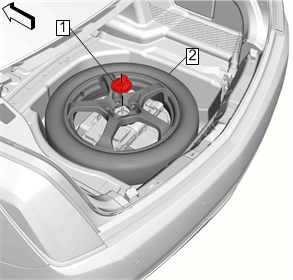
- Spare Tire (2)» Install
 Courtesy of GENERAL MOTORS COMPANY
- Spare Tire Stowage Retainer (1)» Hand tighten
- Rear Compartment Floor Panel Trim» Install - Rear Compartment Front Trim Replacement (Without HP9)