- Open the rear compartment lid.
NOTE:
Before cutting out a stationary window, apply a double layer of masking tape around the perimeter of the painted surfaces and the interior trim.
- Remove the sealing strip from the lower edge of the rear window.
- Disconnect the electrical connectors from the rear window defogger bus bar.
NOTE:
Use care around the high mount stop lamp when removing the rear window.
- Disconnect the connector from the radio antenna module.
- Lower the rear edge of the headliner this will allow the special tool S-0201964
Bonded, Glass Removing Device to cut across the top of the window and not damage the headliner edge.
- Protect the following parts from broken glass, seats and carpeting.
- Remove the rear window from the auto-adhesive as follows:
- Leave a base of urethane approximately 2 mm (0.078 in) on the pinch-weld flange.
- The only suitable lubrication is clear water.
- Use S-0201964
Bonded, Glass Removing Device.
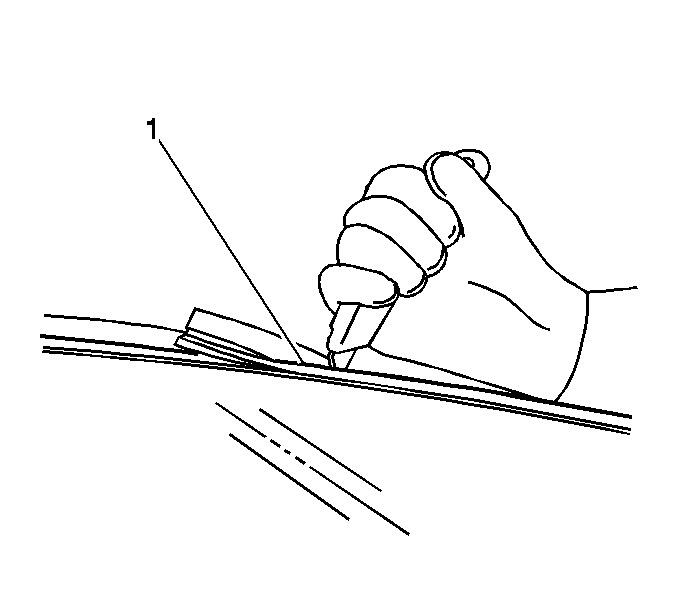
- Using the appropriate tool, carefully cut around the lace (1), start in the center working from side to side of the window to access the urethane adhesive bead, if equipped.
 Courtesy of GENERAL MOTORS COMPANY
NOTE:
If the original window is being reused the window lace is not serviceable.
- Start the cut between the center of the rear window and the roof.
- Do this from inside the vehicle, insert the tool S-0201964
Bonded, Glass Removing Device (1) between the center of the rear window and the roof, thus perforating the adhesive.
- Move the cutting wire along the outside edge of the window.
- Remove the tool S-0201964
Bonded, Glass Removing Device.
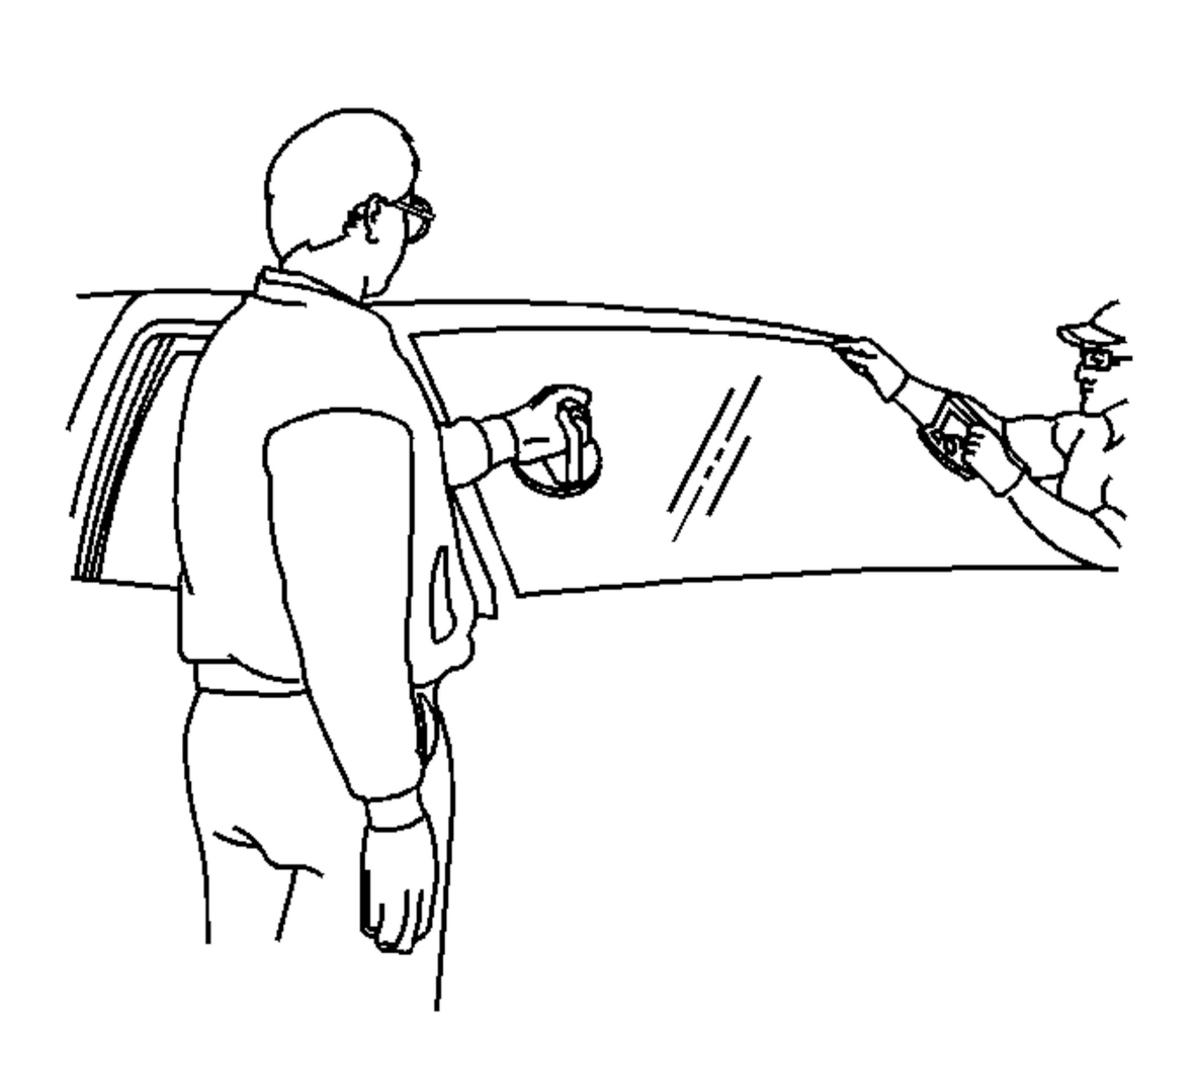
- Do this from inside the vehicle, install the cutting wire special tool S-0201964
Bonded, Glass Removing Device (1).
- Do this from outside the vehicle, install the cutting wire special tool S-0201964
Bonded, Glass Removing Device.
- With an assistant, use the special tool S-0201964
Bonded, Glass Removing Device (1) to hold the cutting wire, pull it starting from the outside, back and forth releasing the window from the adhesive.
- While cutting the window reposition the cutting wire and special tools, so as to cut the adhesive along the window completely.
- Remove the rear window from the vehicle with an assistant, use the glass handling suction cups.
 Courtesy of GENERAL MOTORS COMPANY