Installation Procedure
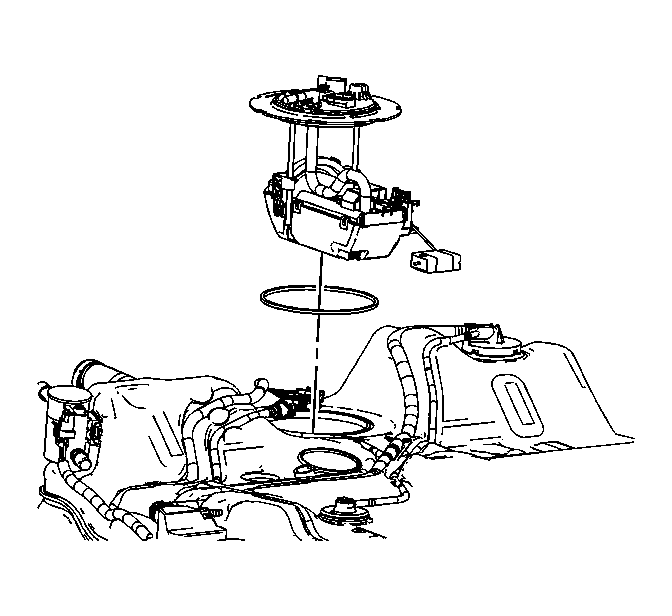 Courtesy of GENERAL MOTORS CORP.
- Install a new O-ring on the modular fuel sender to tank.
- Connect the ventilation harness inside the fuel tank to the bottom of the modular fuel sender cover.
- Align the cover "paddle" or anti-rotation feature with the corresponding feature in the top of the fuel tank.
- Slowly apply pressure to the top of the spring loaded sender cover until the sender aligns flush with the surface of the tank.
- Align the locking ring with the matching features on the fuel tank and install the J 45722
. See Special Tools and Equipment .
- Turn the lock ring until the ring seats on the second detent.
- Connect the electrical and ventilation connections to the modular fuel sender assembly cover.
- Install the fuel tank. Refer to Fuel Tank Replacement (Malibu Sedan) and Fuel Tank Replacement (Malibu MAXX) .
- Lower the vehicle.
- Refill the tank.
- Connect the negative battery cable. Refer to Battery Negative Cable Disconnect/Connect Procedure
in Engine Electrical.
- Inspect for fuel leaks through the following steps:
- Turn the ignition to the ON position for two seconds
- Turn the ignition to the OFF position for ten seconds.
- Turn the ignition to the ON position
- Check for fuel leaks.