Compressor Leak Testing: Testing
 Courtesy of GENERAL MOTORS CORP.
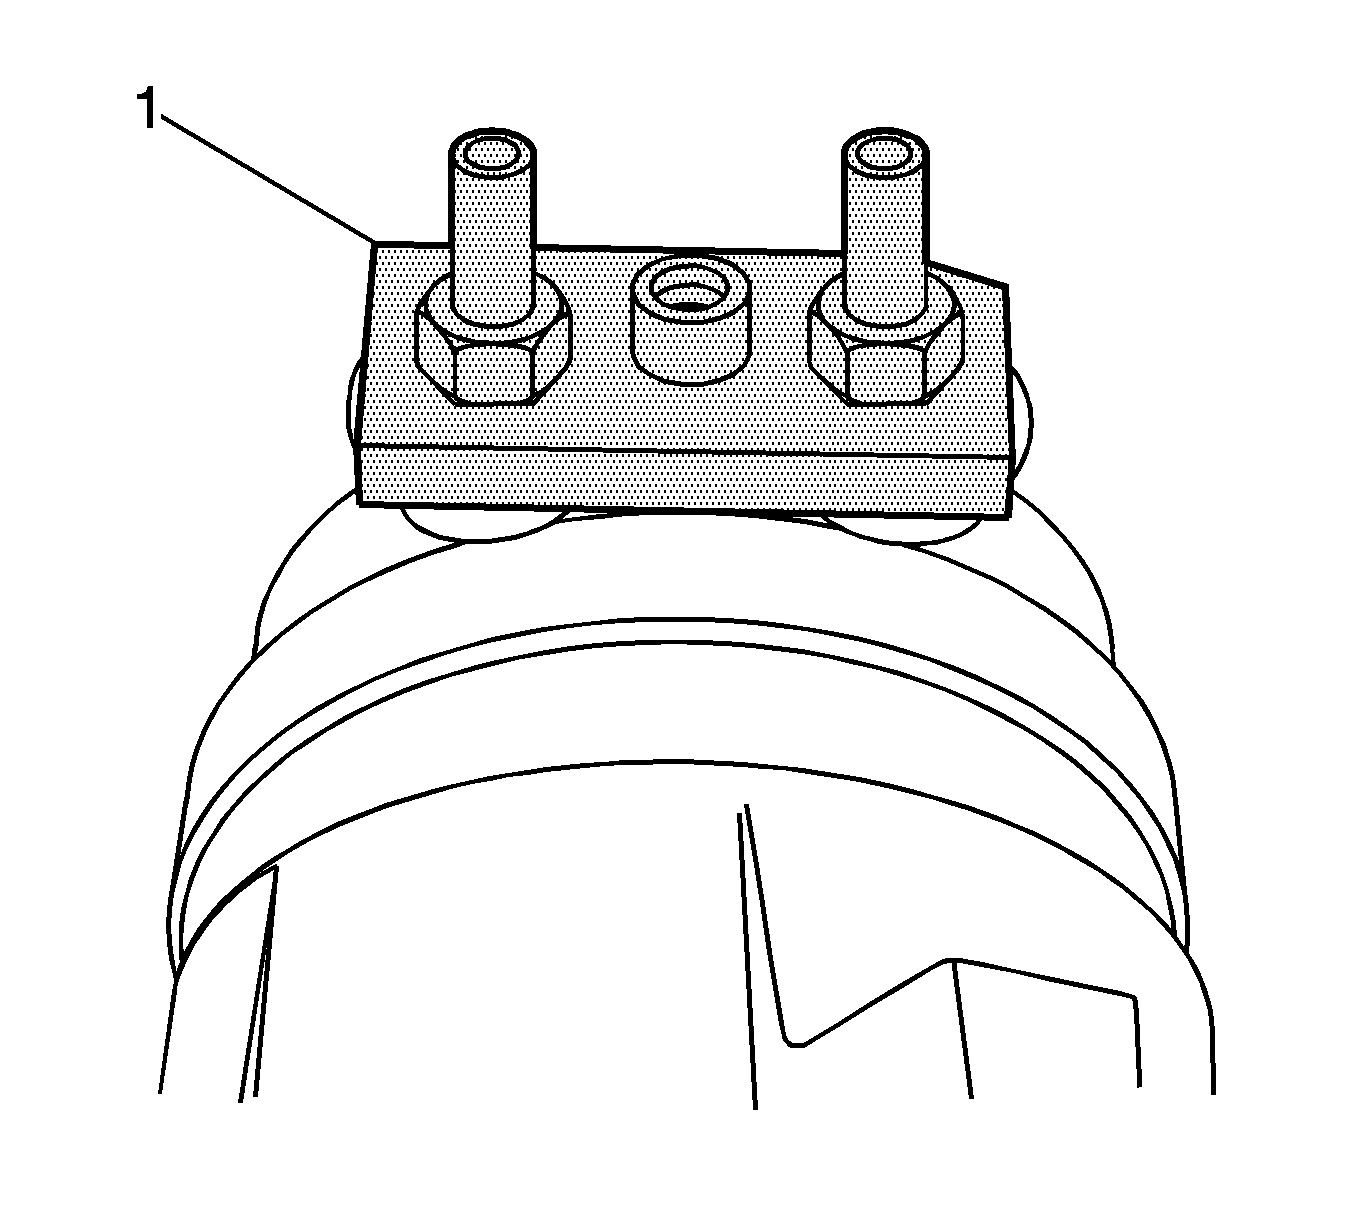
- Install the J 9625-A
(1) to the suction/discharge ports on the compressor. See Special Tools .
- Attach the center hose of the manifold gauge set on the charging station to a refrigerant drum standing in an upright position. Open the valve on the drum.
- Connect the charging station high-pressure and low-pressure lines to the corresponding fittings on the J 9625-A
, or hoses equipped with valve depressors. The suction port, low-side, of the compressor has a large internal opening. The discharge port, high-side, has a smaller internal opening into the compressor. See Special Tools .
- Open the low-pressure control, the high-pressure control, and the refrigerant control on the charging station to allow the refrigerant vapor to flow into the compressor.
- Using a leak detector, check for leaks at the high-pressure relief valve seal, the housing seal, the rear head seal, the center cylinder seal, the through-bolt gaskets, and the compressor shaft seal. After checking for leaks, shut off the low-pressure control, the high-pressure control, and the refrigerant control lines on the charging station.
- If an external leak is present, perform the necessary corrective measures and recheck for leaks to verify that the leak has been corrected.
- Loosen the manifold gauge hose connections to the gauge adapters connected to the low and high sides. Allow the vapor pressure to release from the compressor. If valve depressor-type hoses are used, loosen the hose connections at the gauge manifold to release vapor pressure from the compressor.
- Disconnect both gauge hoses. Remove the J 9625-A
. See Special Tools .