HVAC Module Assembly Replacement
WARNING: This page is about a different car, the 2006 Chevrolet Monte Carlo and 2006 Chevrolet Impala. However, it is still accessible from the selected car via links, so may be relevant.
 Courtesy of GENERAL MOTORS CORP.
 HVAC Module Assembly Replacement
| Callout |
Component Name |
|
Fastener Tightening Specifications:
Refer to Fastener Tightening Specifications
Preliminary Procedure
- Disconnect the battery negative cable. Refer to Battery Negative Cable Disconnect/Connect Procedure (RPOs LZE/LZ4/LZ9)
or Battery Negative Cable Disconnect/Connect Procedure (RPO LS4)
- Recover the refrigerant. Refer to Refrigerant Recovery and Recharging
- Drain the cooling system. Refer to Draining and Filling Cooling System (LS4 Static Fill)
or Draining and Filling Cooling System (LZE, LZ4, LZ9 Static Fill)
or Draining and Filling Cooling System (9C1, 9C3 Static Fill)
or Draining and Filling Cooling System (LS4 GE 47716 Fill)
or Draining and Filling Cooling System (LZE, LZ4, LZ9, 9C1, 9C3 GE 4771 Fill)
- Remove the inlet heater hose from the heater core. Refer to Heater Hose Replacement - Inlet (RPO LS4) or Heater Hose Replacement - Inlet (RPOs LZE, LZ4, LZ9)
- Remove the outlet heater hose from the heater core. Refer to Heater Hose Replacement - Outlet (RPO LS4) or Heater Hose Replacement - Outlet (RPOs LZE, LZ4, LZ9)
- Remove the air conditioning evaporator thermal expansion valve tube from the thermal expansion valve. Refer to Air Conditioning Evaporator Thermal Expansion Valve Tube Replacement
- Remove the evaporator drain tube from the evaporator case.
- Remove the instrument panel (I/P) carrier. Refer to Instrument Panel (I/P) Carrier Replacement
|
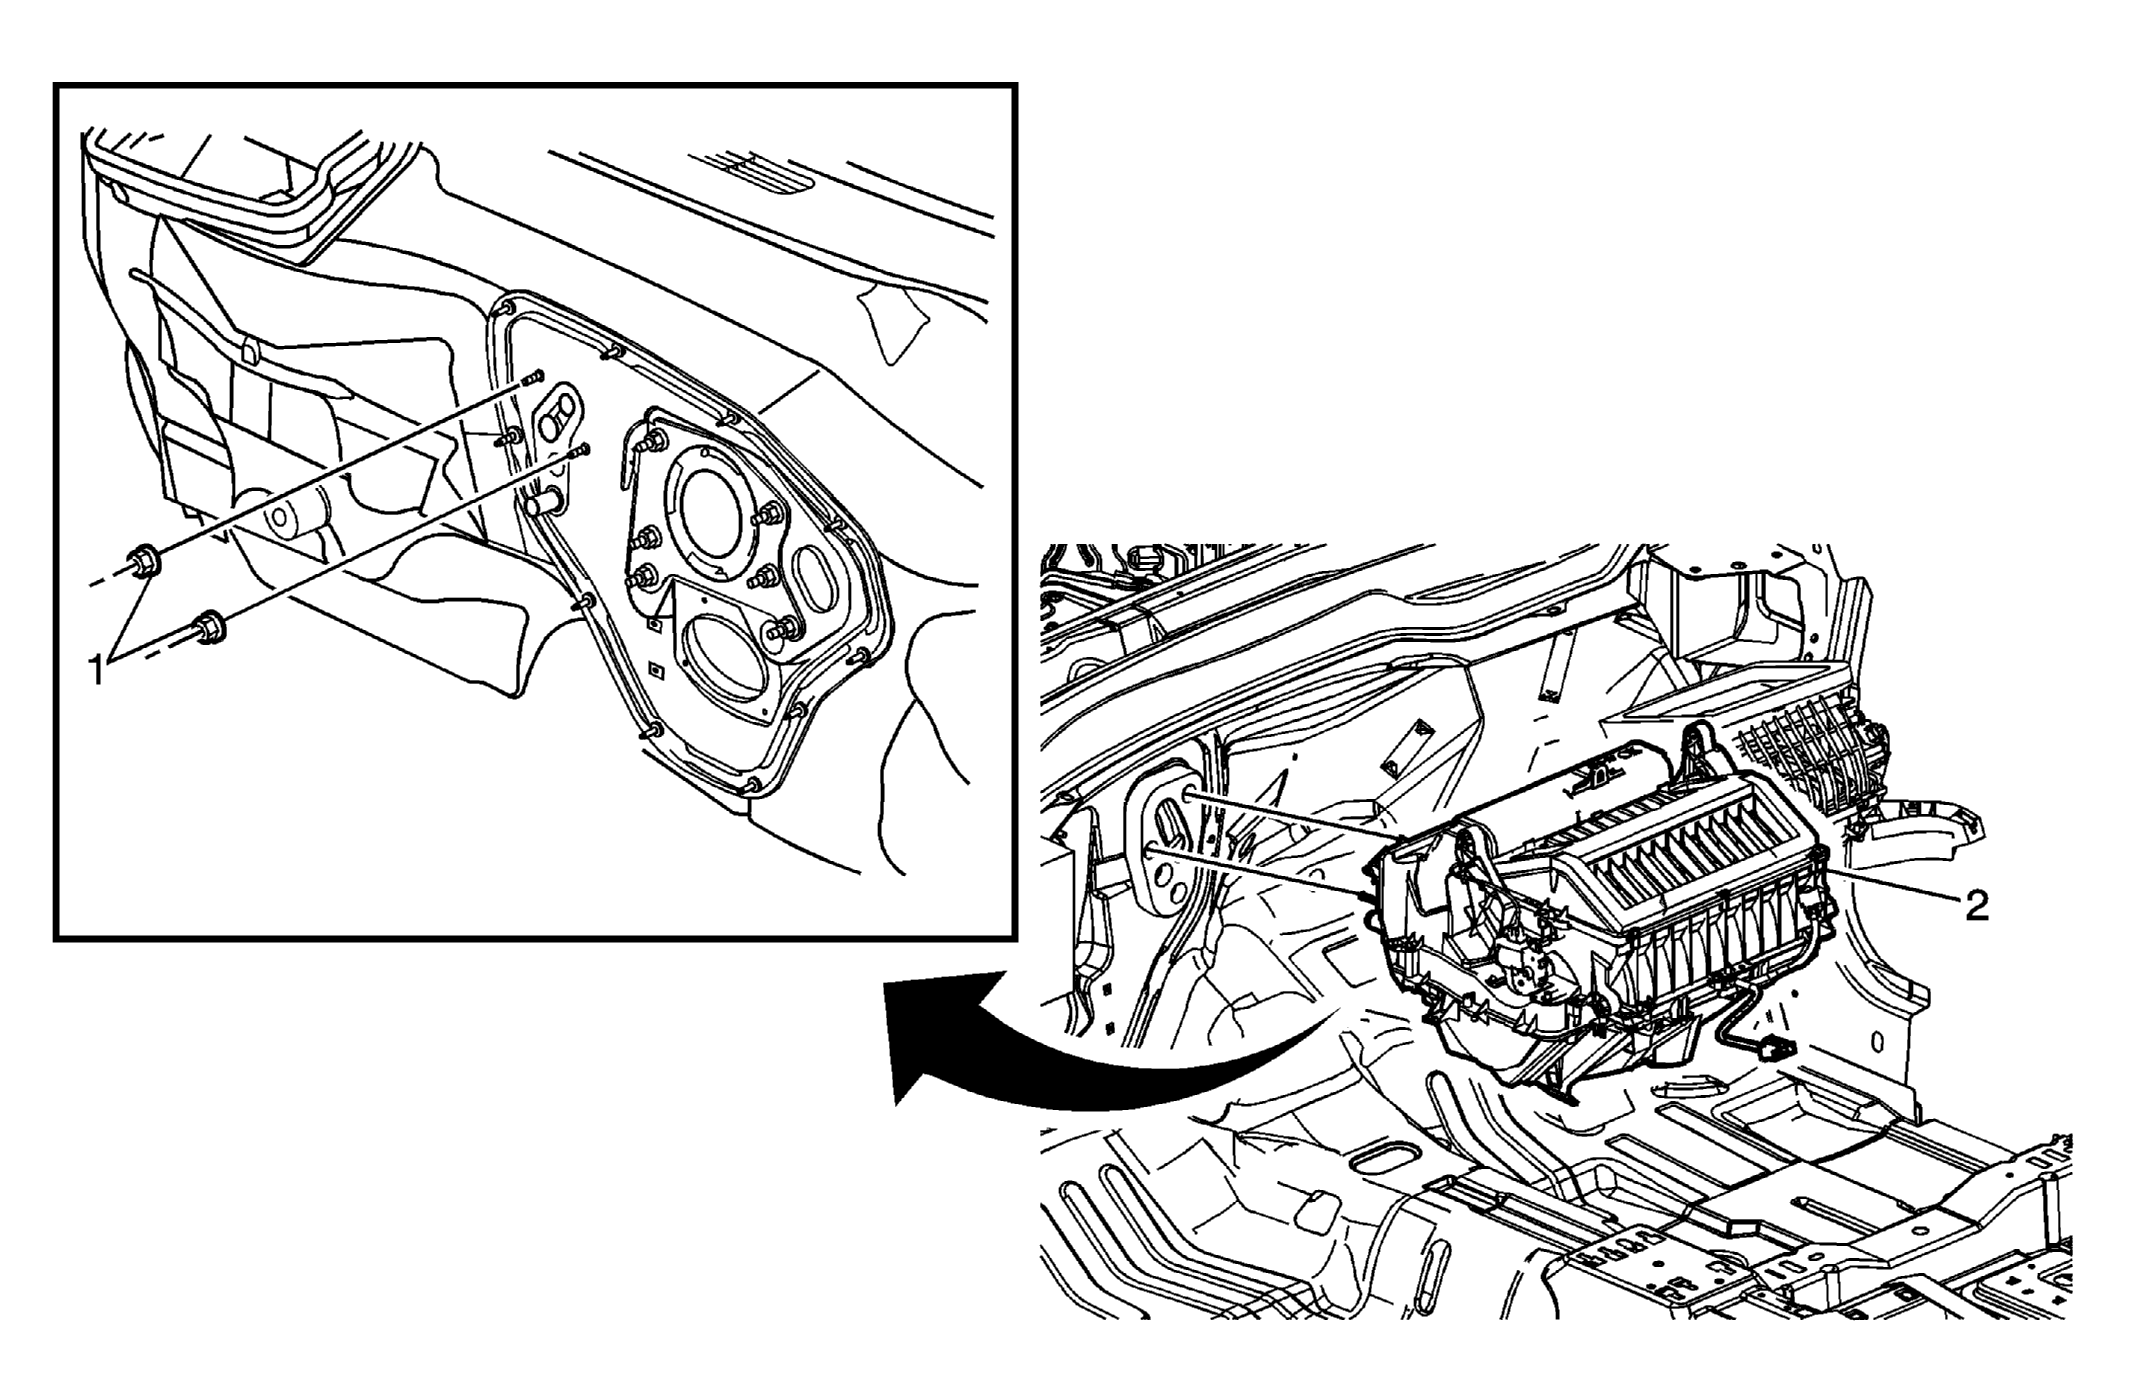
| 1 |
Nut, Heater and Air Conditioning Module Tighten:
10 N.m (89 lb in)
|
| 2 |
Module Assembly, Heater and Air Conditioning Evaporator |