Lower Control Arm Replacement
 Courtesy of GENERAL MOTORS COMPANY
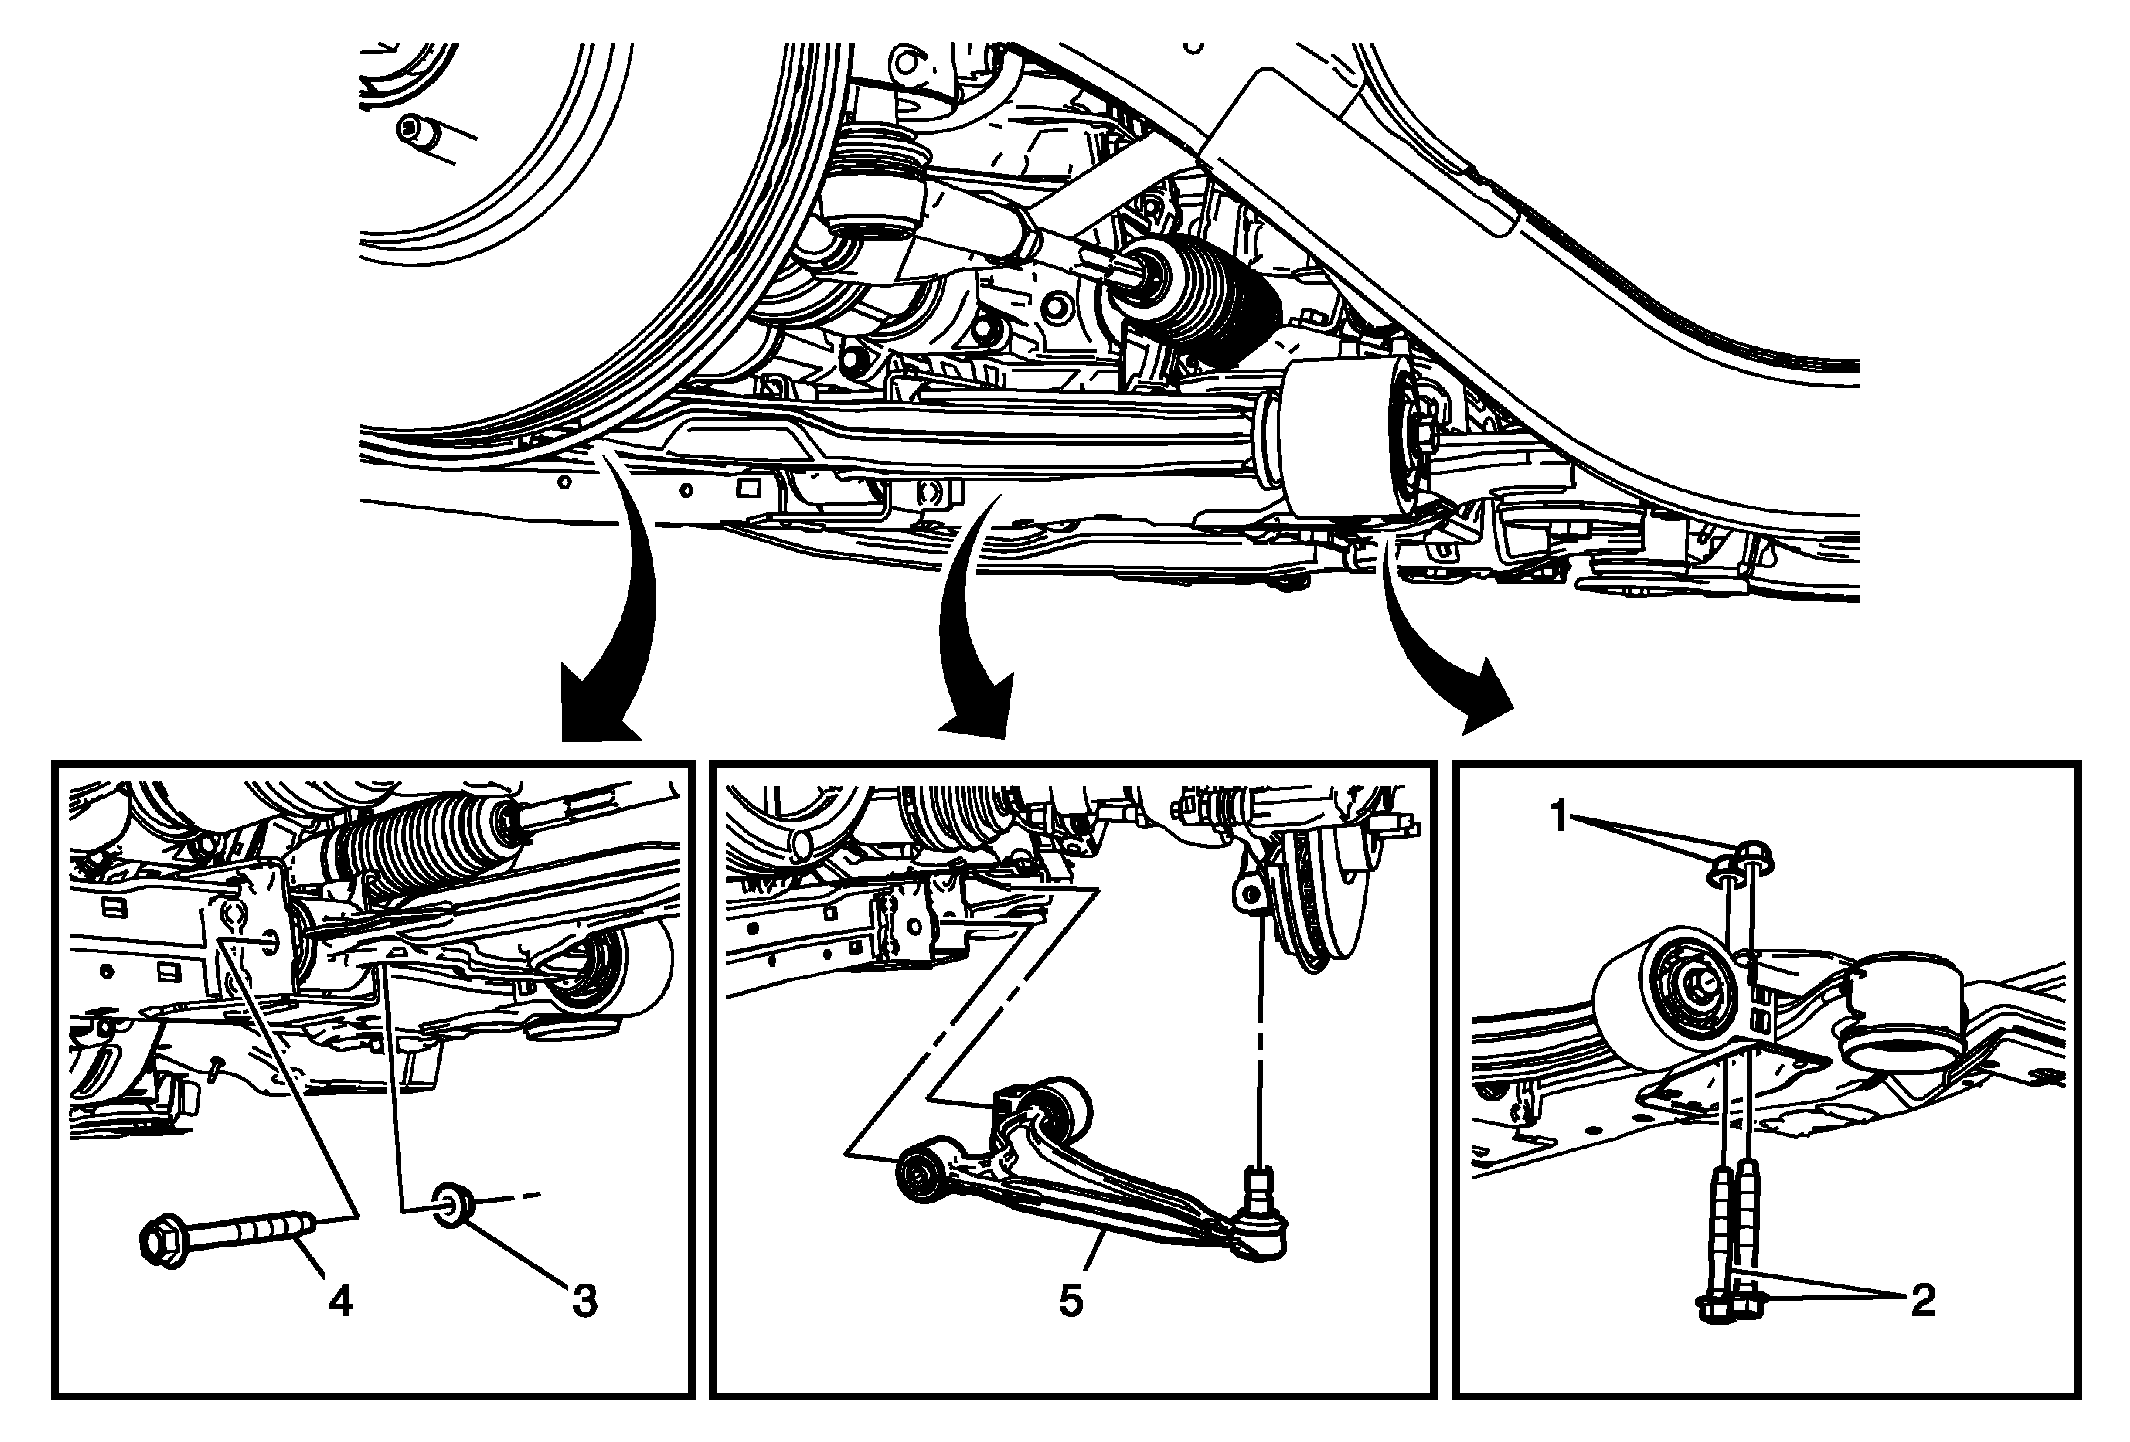
 Lower Control Arm Replacement
| Callout |
Component Name |
|
Preliminary Procedure
- Raise and support the vehicle. Refer to Lifting and Jacking the Vehicle
.
- Remove the tire and wheel assembly. Refer to Tire and Wheel Removal and Installation
.
- Remove the wheel house splash shield. Refer to Front Wheelhouse Front Liner Replacement
.
- If servicing the right lower control arm, reposition the heater water auxiliary pump and bracket to the side. DO NOT drain the cooling system. Refer to Heater Water Auxiliary Pump Replacement
.
|
| 1 |
Front Lower Control Arm Rear Nut (Qty: 2) |
| 2 |
Front Lower Control Arm Rear Bolt (Qty: 2)
Procedure
DO NOT re-use the bolts. Discard and replace with NEW only.
Tighten
- First Pass: 70 N.m (52 lb ft)
- Final Pass: plus 80 degrees
|
| 3 |
Front Lower Control Arm Front Nut |
| 4 |
Front Lower Control Arm Front Bolt
Procedure
DO NOT re-use the bolts. Discard and replace with NEW only.
Raise front lower control arm to trim height.
Tighten
- First Pass: 70 N.m (52 lb ft)
- Final Pass: plus 80 degrees
|
| 5 |
Front Lower Control Arm Procedure
- Remove the speed sensor electrical harness from the front lower control arm.
- Remove the lower control arm from the knuckle. Refer to Steering Knuckle Replacement .
NOTE:
If removing the lower control arm to service the lower control arm bushing, loosen the bolt before removing the lower control arm.
- If removing the lower control arm to service the bushing, refer to Front Lower Control Arm Bushing Replacement .
- Check and adjust the front camber. Refer to Front Camber Adjustment
.
|