Removal Procedure
- Disconnect the battery negative cable. Battery Negative Cable Disconnection and Connection
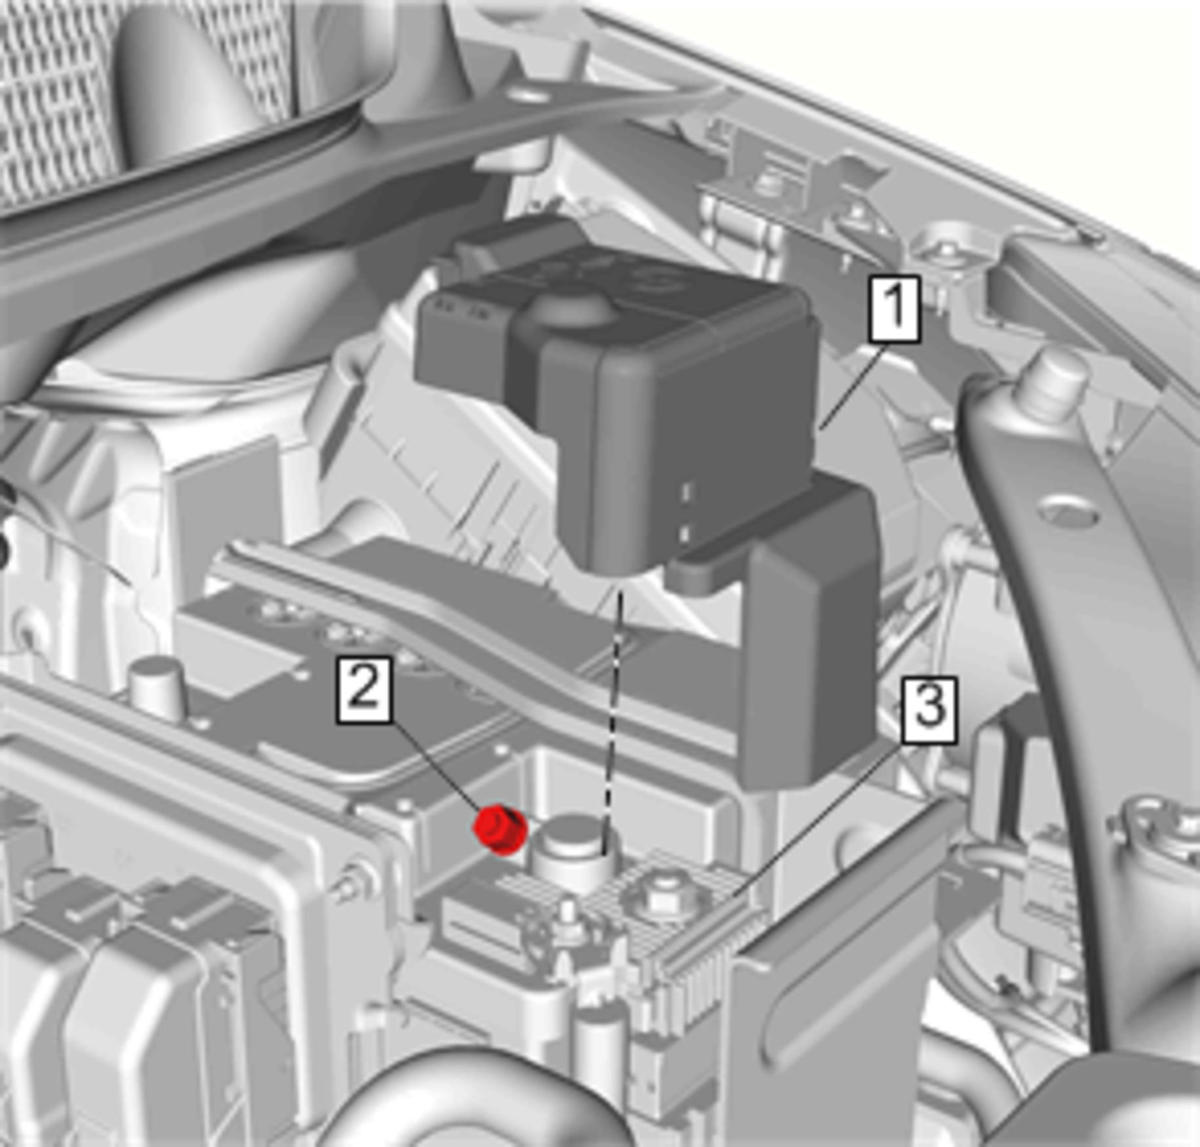 Courtesy of GENERAL MOTORS COMPANY
- Remove Battery Positive Cable Protective Cover (1)
- Loosen Battery Positive Cable Clamp Fastener
- Remove Battery Positive Cable (3) @ Battery Post
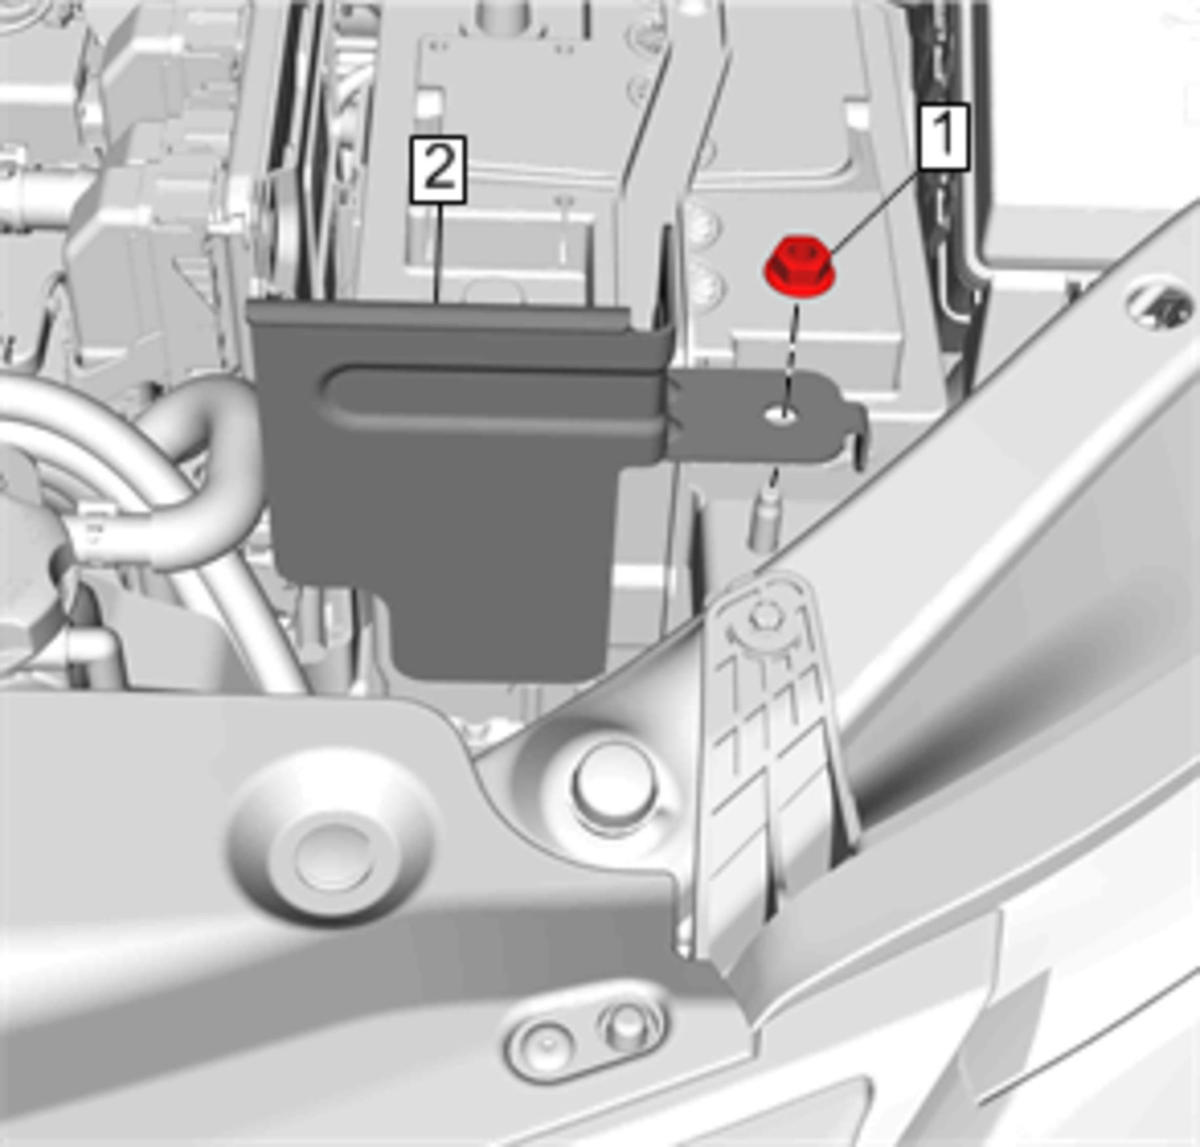 Courtesy of GENERAL MOTORS COMPANY
- Remove Battery Tray Support Nut (1)
- Remove Battery Tray Support (2)
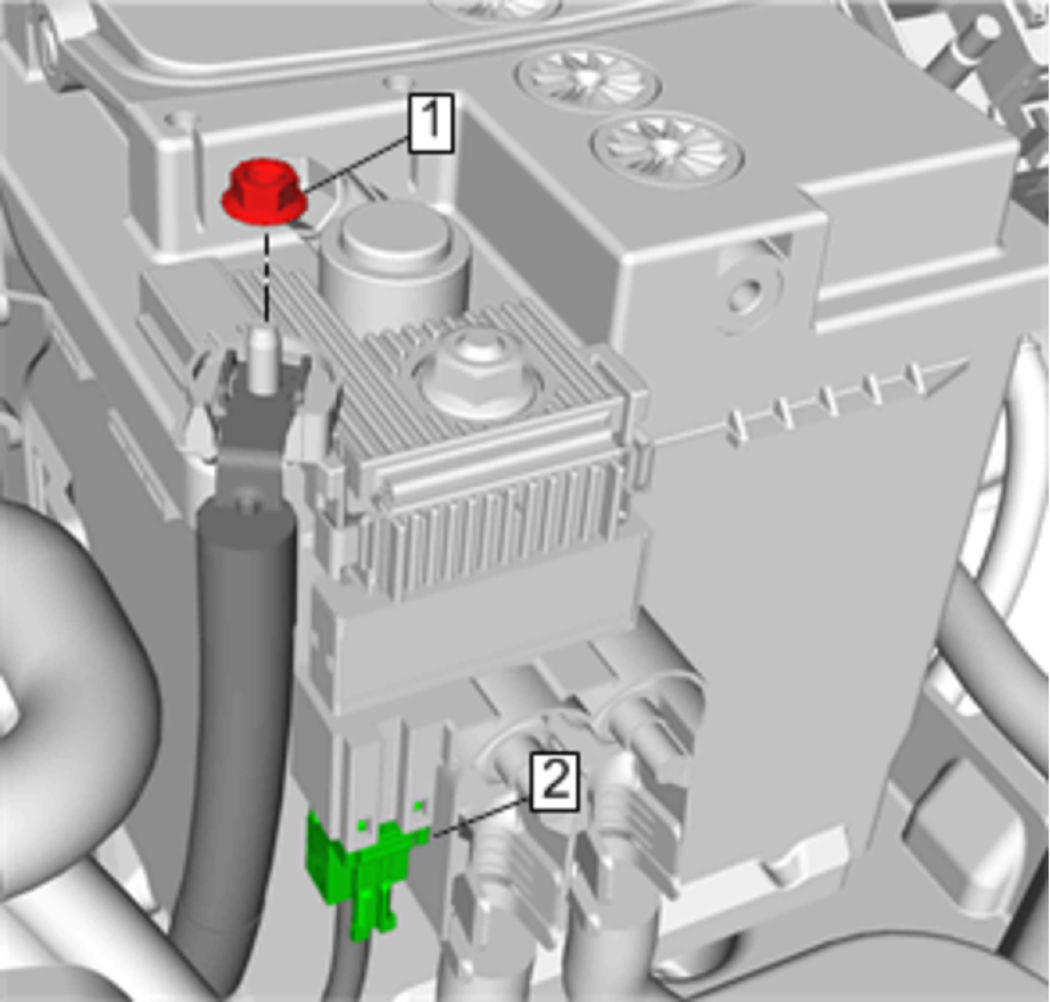 Courtesy of GENERAL MOTORS COMPANY
- Remove Body Wiring Harness Nut (1) @ Battery Distribution Fuse Block
- Disconnect Body Wiring Harness Connector (2) @Battery Distribution Fuse Block
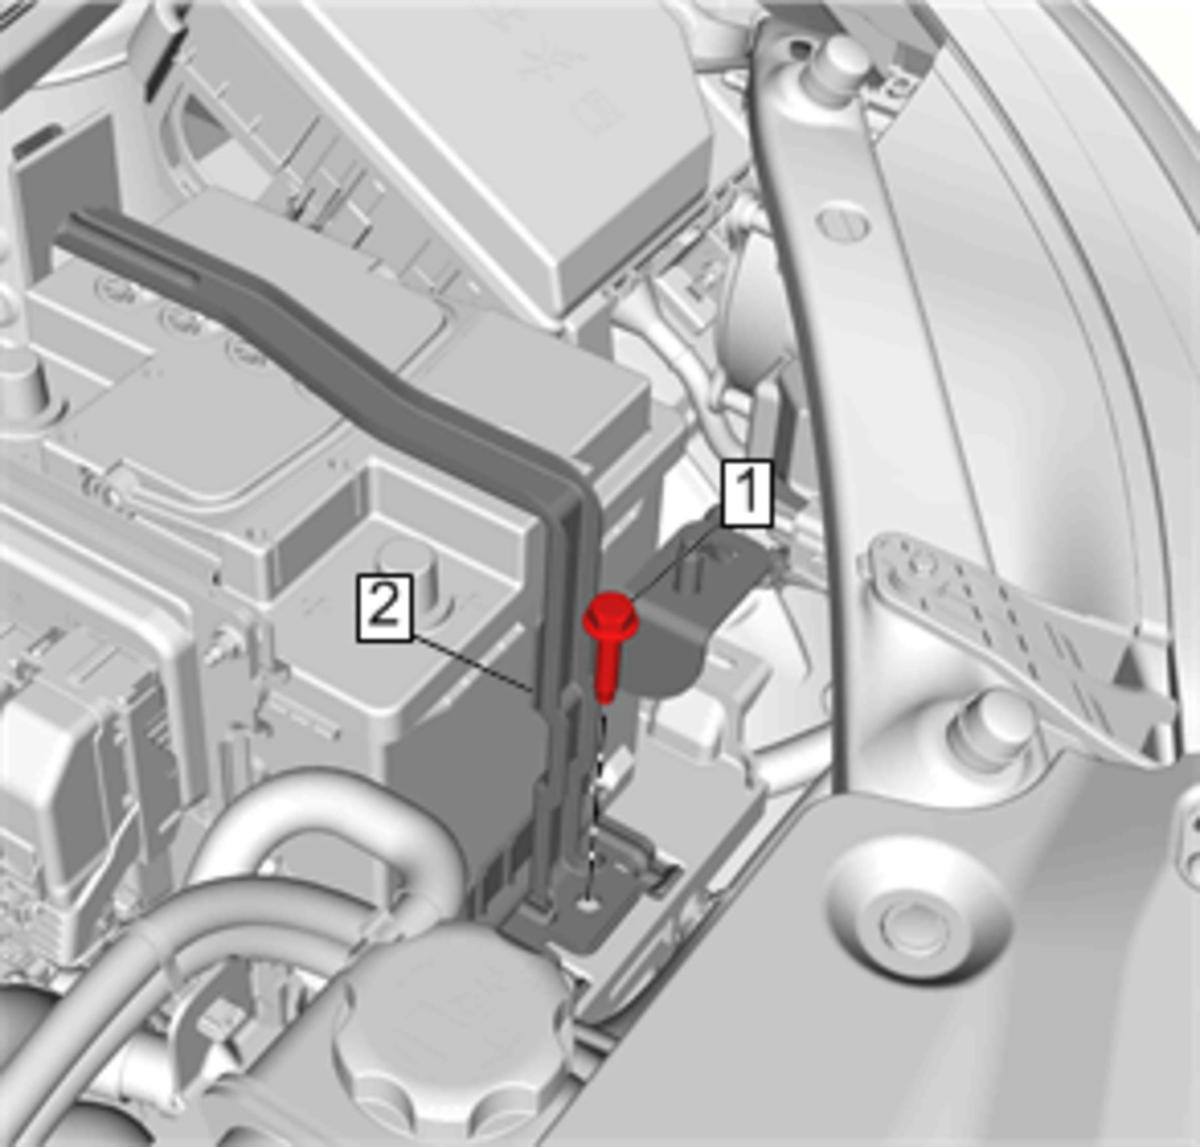 Courtesy of GENERAL MOTORS COMPANY
- Remove Battery Retainer Assembly Bolt (1)
- Remove Battery Retainer Assembly (2)
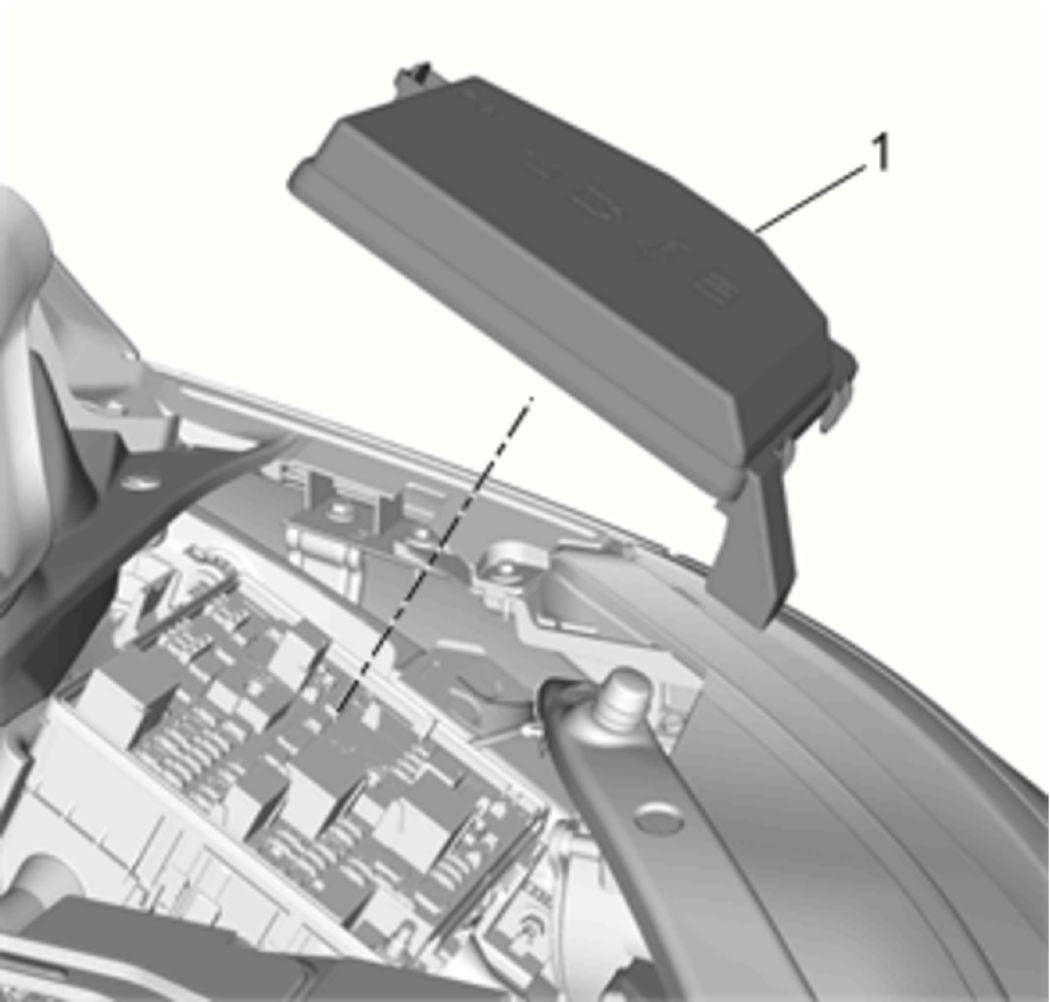 Courtesy of GENERAL MOTORS COMPANY
- Remove Remove Fuse Block Cover (1)
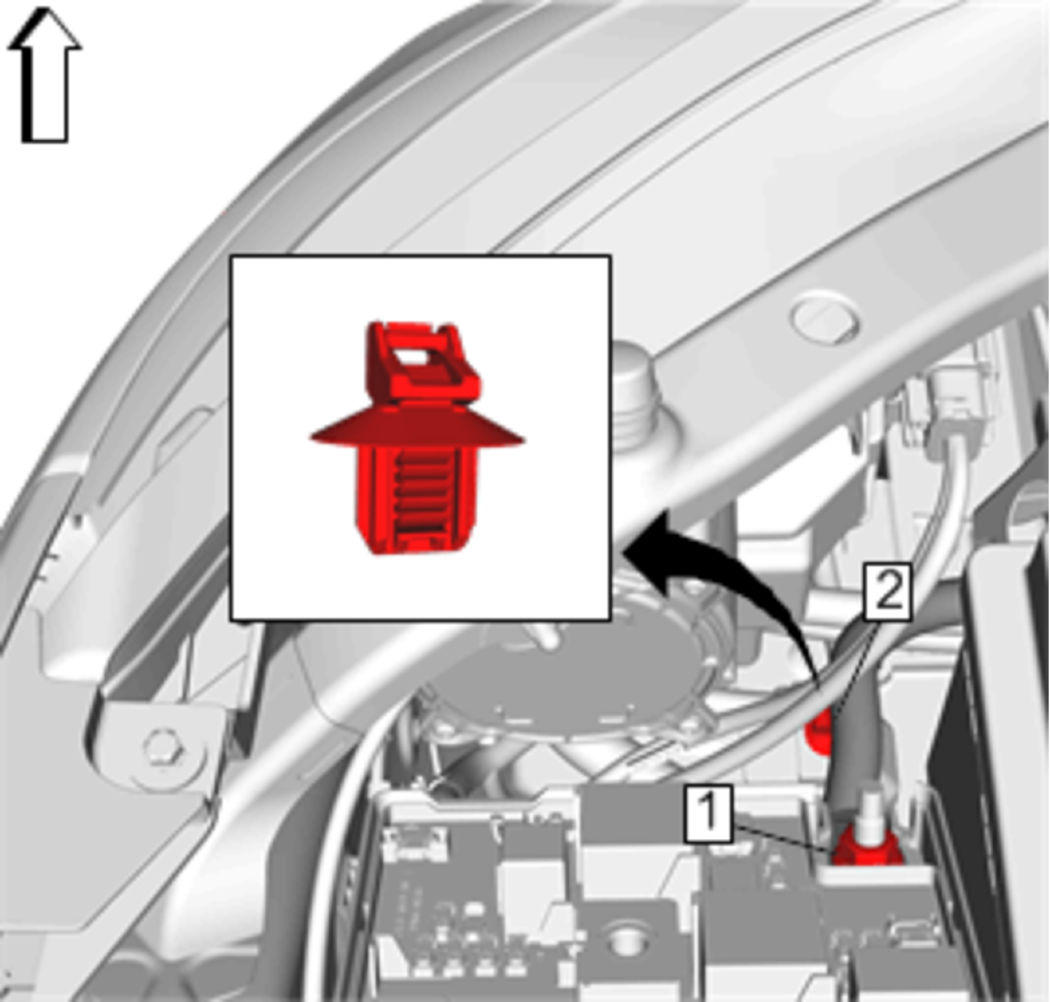 Courtesy of GENERAL MOTORS COMPANY
- Remove Battery Positive Cable Nut (1)
- Battery Positive Cable Retainer (2)
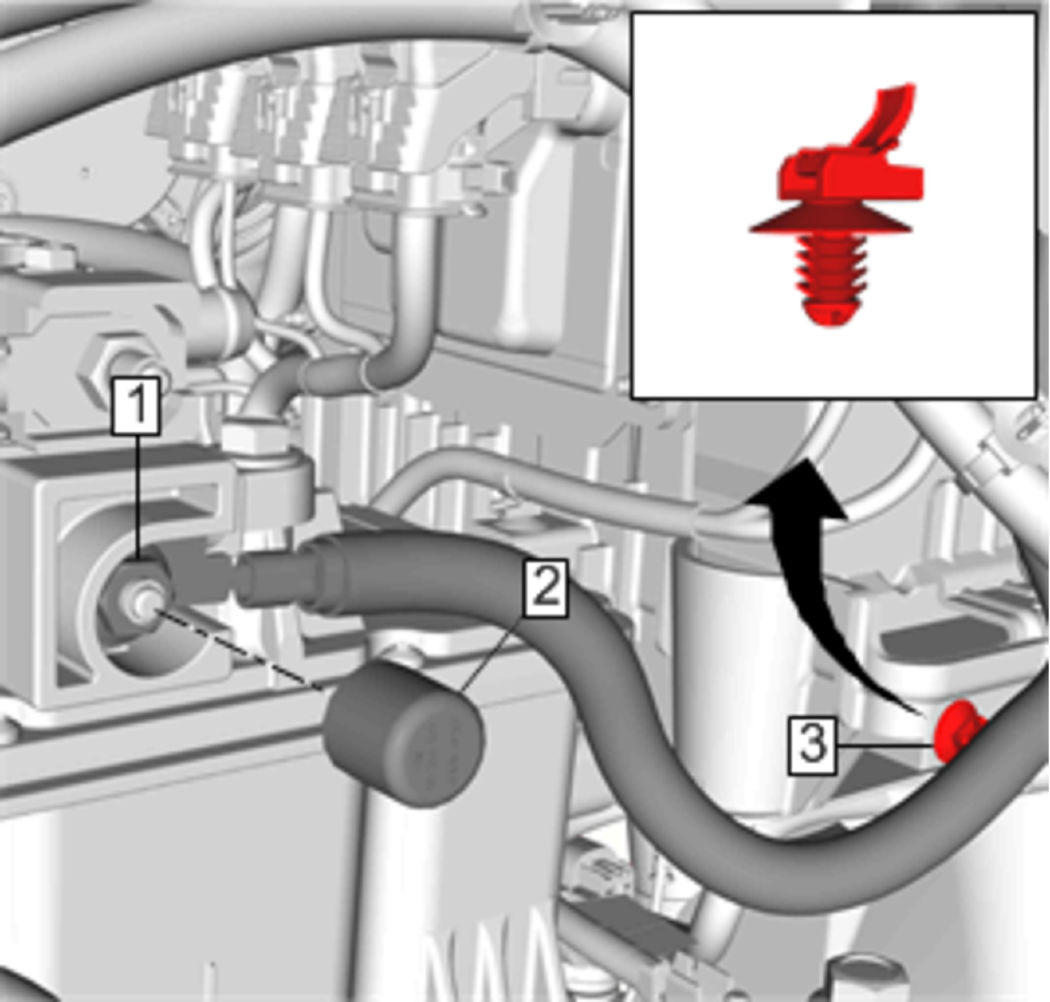 Courtesy of GENERAL MOTORS COMPANY
- Remove Battery Positive Cable Protector (2)
- Remove Battery Positive Cable Nut (1)
- Detach Battery Positive Cable Retainer (3)
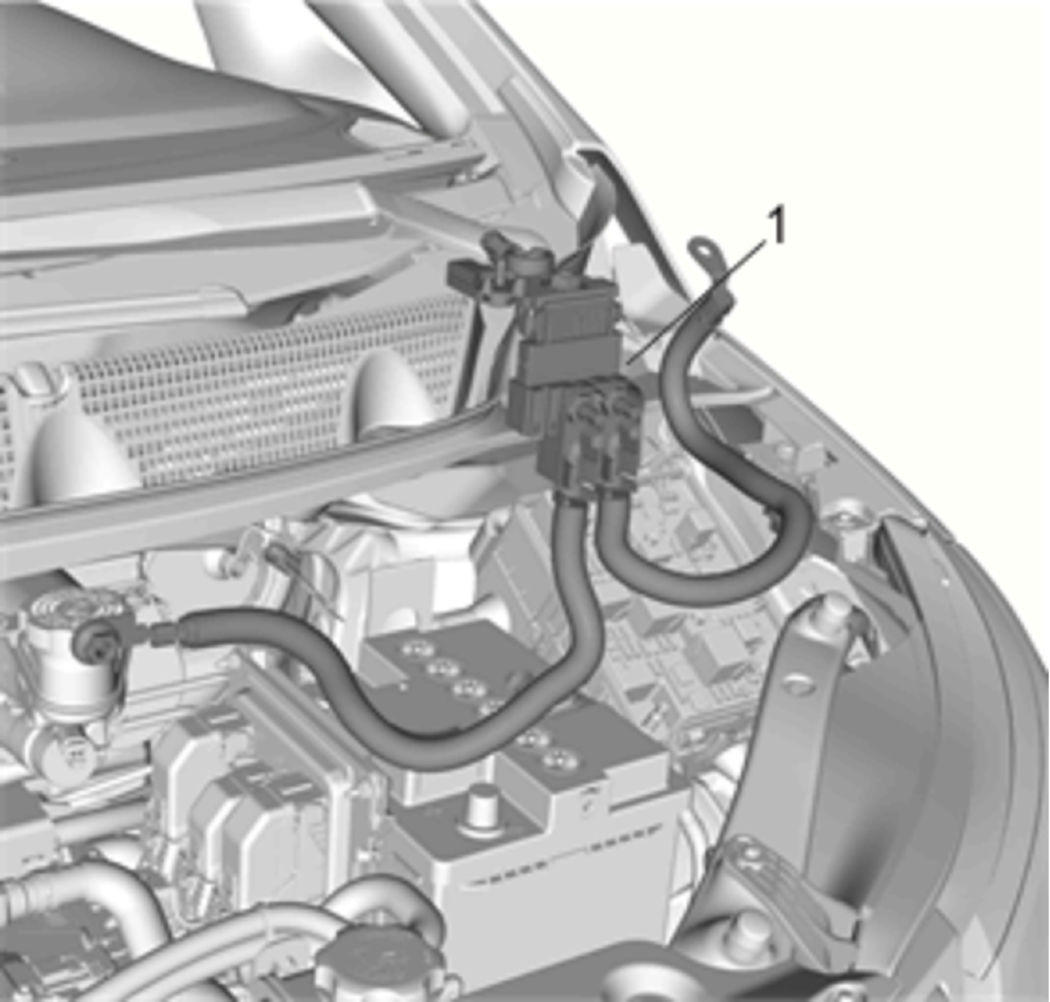 Courtesy of GENERAL MOTORS COMPANY
- Remove Battery Positive Cable (1)