Removal & Installation: Camshafts: Installation
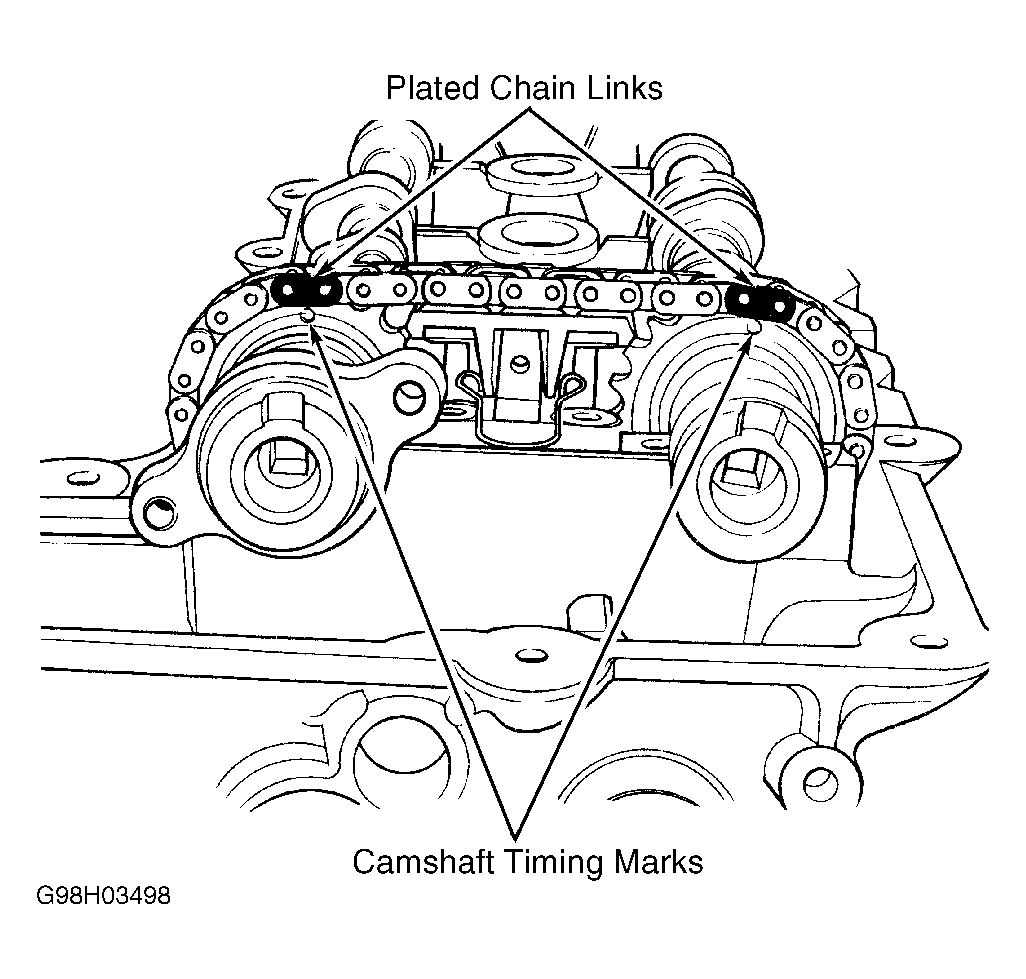
- Install secondary camshaft chain onto camshaft sprockets with plated links facing front of engine. Align plated links to dot on camshaft sprockets. See Fig 1. If secondary chain tensioner is already in compressed and locked position, go to step 4)
.
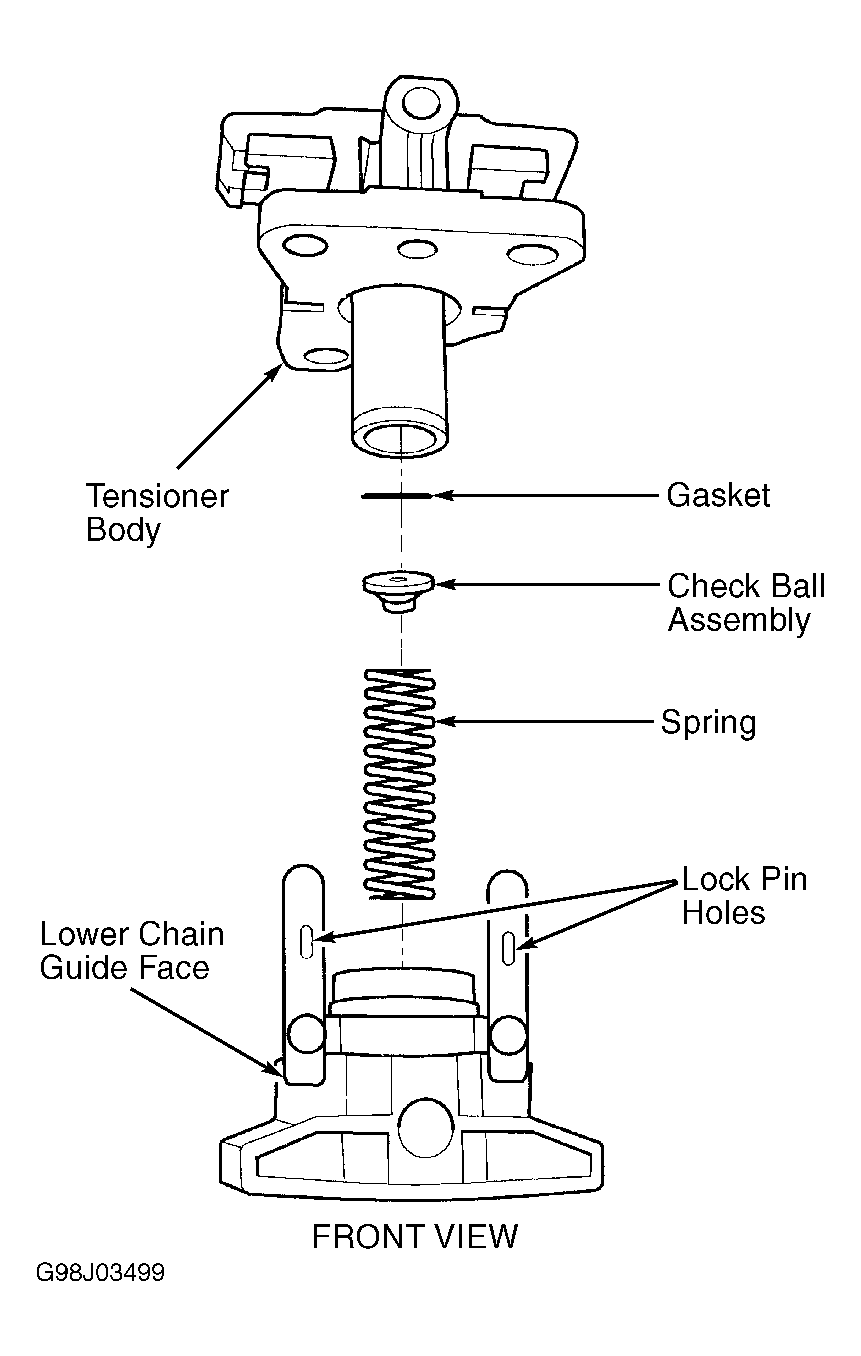
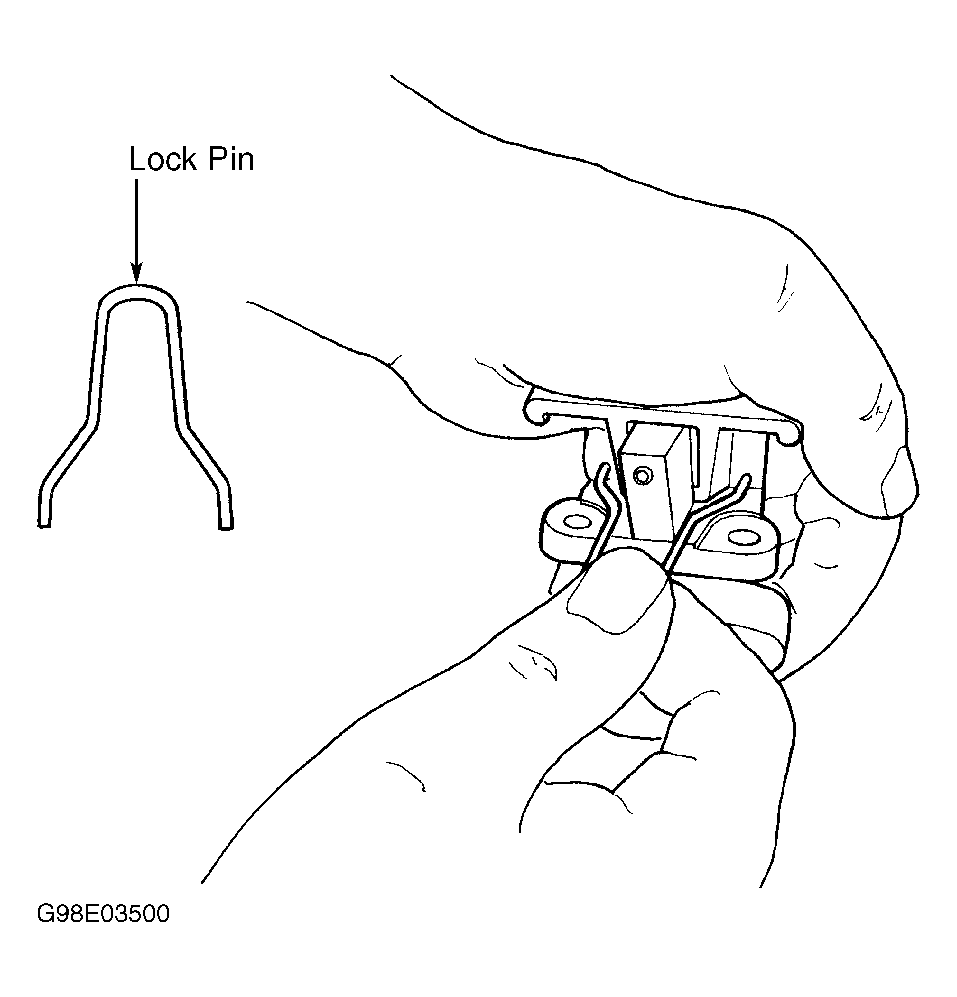
- On early build secondary camshaft chain tensioner, separate tensioner cylinder from tensioner housing. See Fig 2. Drain oil from housing. Tensioner does not need to be disassembled. Using hand pressure, compress tensioner and insert a fabricated lock pin in lock pin holes. See Fig 3.
- On late build secondary camshaft chain tensioner, place tensioner into a soft-jaw vise. Slowly compress tensioner and insert a fabricated lock pin in lock pin holes. See Fig 3.
- Install compressed and locked secondary chain tensioner. Rotate camshafts so that plated links and dots are at 12 o'clock position. See Fig 1. Install camshafts. Ensure rocker arms are correctly seated and in proper positions. Install camshaft bearing caps. Ensure bearing caps are installed in same position as removed. Tighten cam bearing cap bolts gradually, in sequence. See Figure.
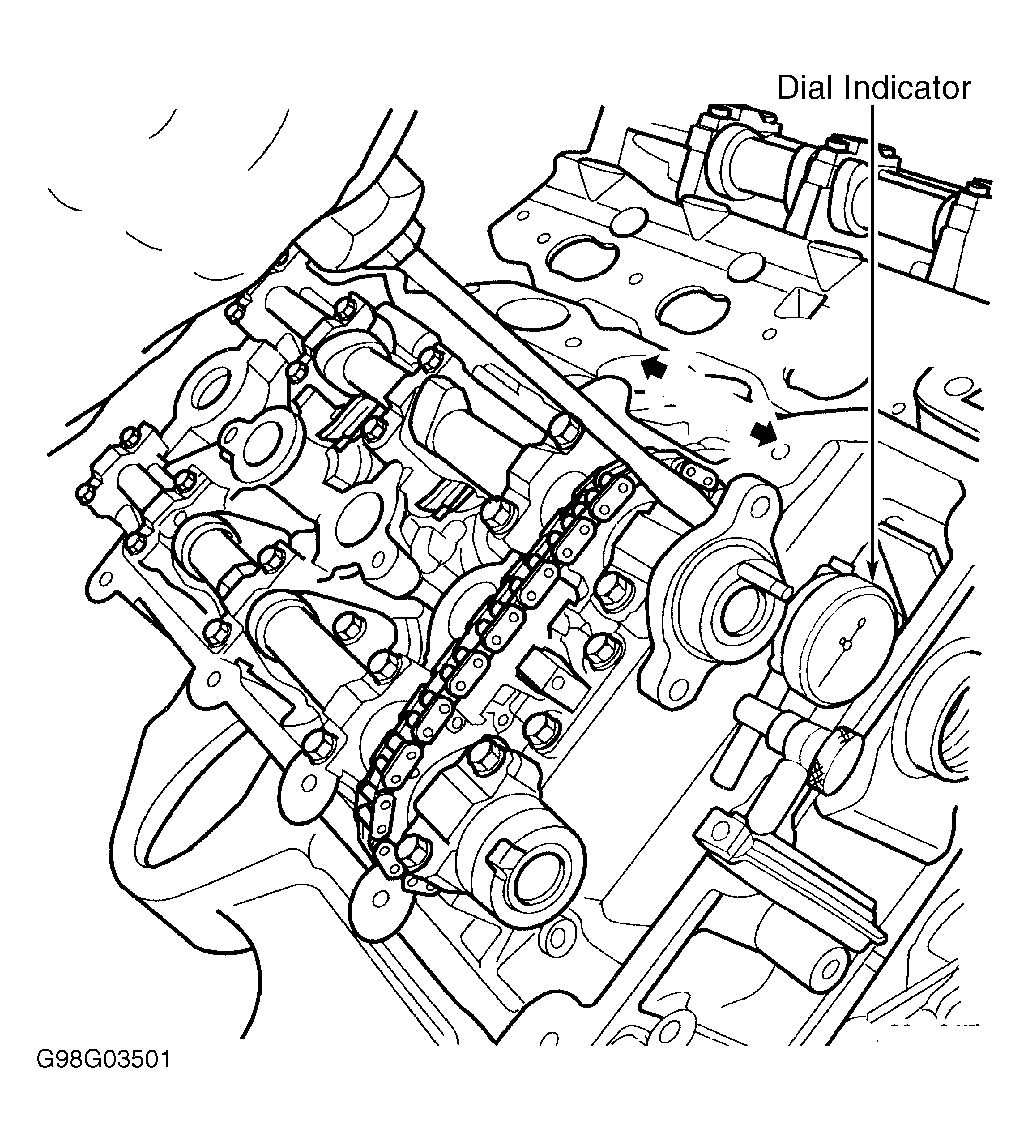
- Install and tighten secondary chain tensioner bolts to 105 INCH lbs. (12 N.m). Remove locking pin form secondary chain tensioners. Using a dial indicator, measure camshaft end play.
- Move camshaft to rear of its travel. Zero dial indicator. Move camshaft forward to limit of its travel and read dial indicator. See CAMSHAFT table under ENGINE SPECIFICATIONS. See Fig 4. Install primary timing chain. See PRIMARY TIMING CHAIN & SPROCKETS . To complete installation, reverse removal procedure.
 Courtesy of CHRYSLER CORP.
 Courtesy of CHRYSLER CORP.
 Courtesy of CHRYSLER CORP.
 Courtesy of CHRYSLER CORP.