T350 Manual Transaxle: Removal
- Raise hood.
- Disconnect both battery cables, remove battery hold down clamp and bolt, and remove battery.
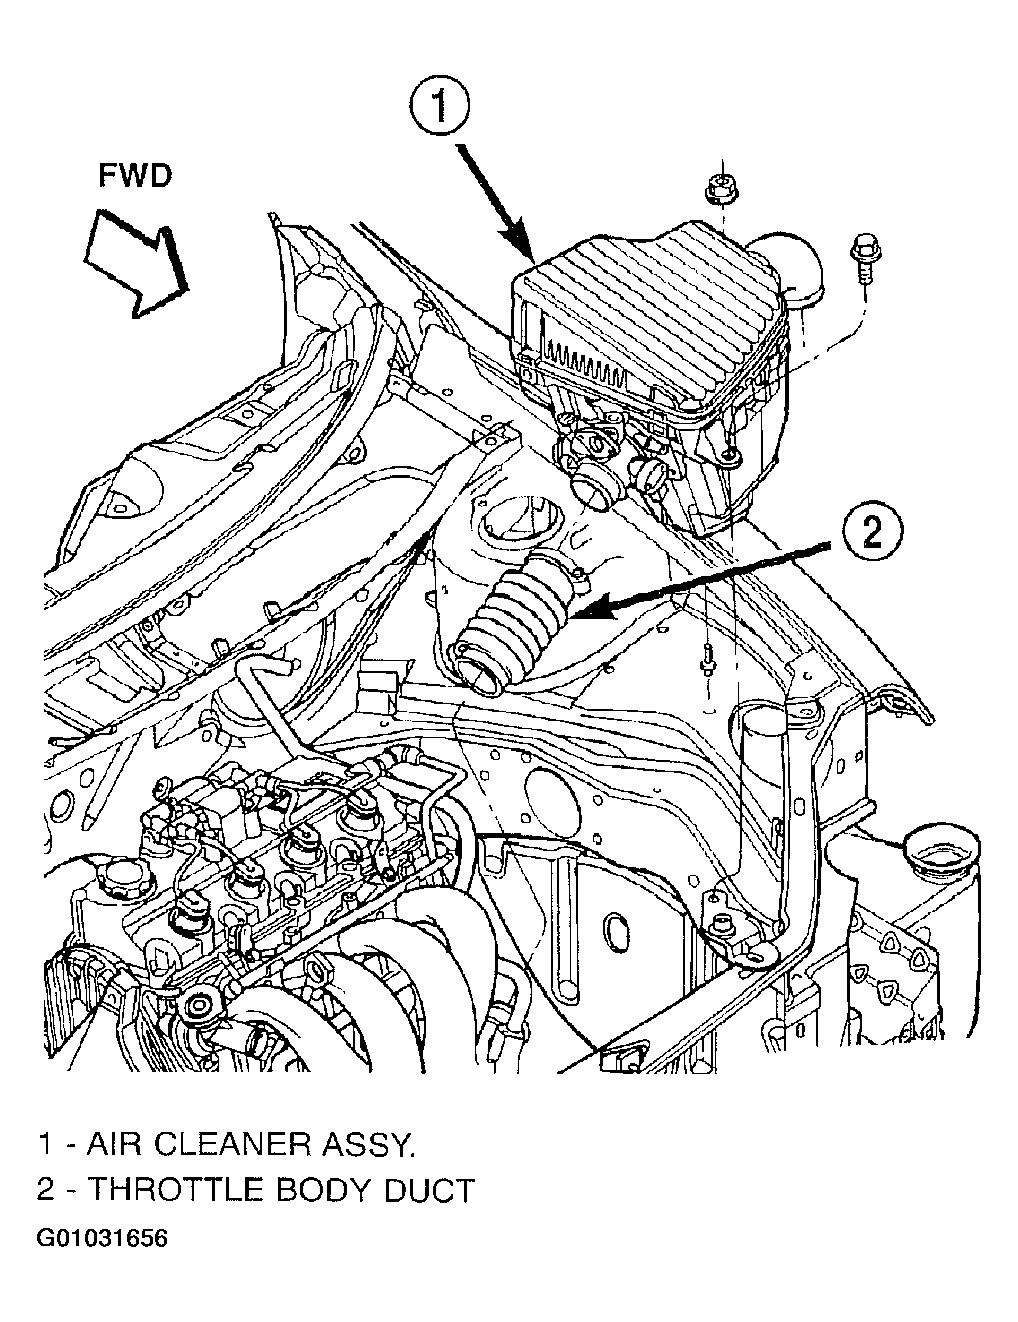
- Remove air cleaner/throttle body assembly as follows:
- Disconnect proportional purge solenoid (PPS) and crankcase vent hose from throttle body.
- Disconnect the Throttle Position Sensor (TPS) and Idle Air Control (IAC) connectors.
- Disconnect throttle body air duct at intake manifold.
- Remove mounting bolt and nut and partially remove air cleaner assembly. (Fig 1).
 Courtesy of DAIMLERCHRYSLER CORP.
- Disconnect accelerator and speed control (if equipped) cables after the assembly is removed from position. Remove air cleaner assembly from vehicle.
- Remove battery tray from bracket.
- Disconnect ground cable at battery tray bracket.
- Disconnect back-up lamp switch connector.
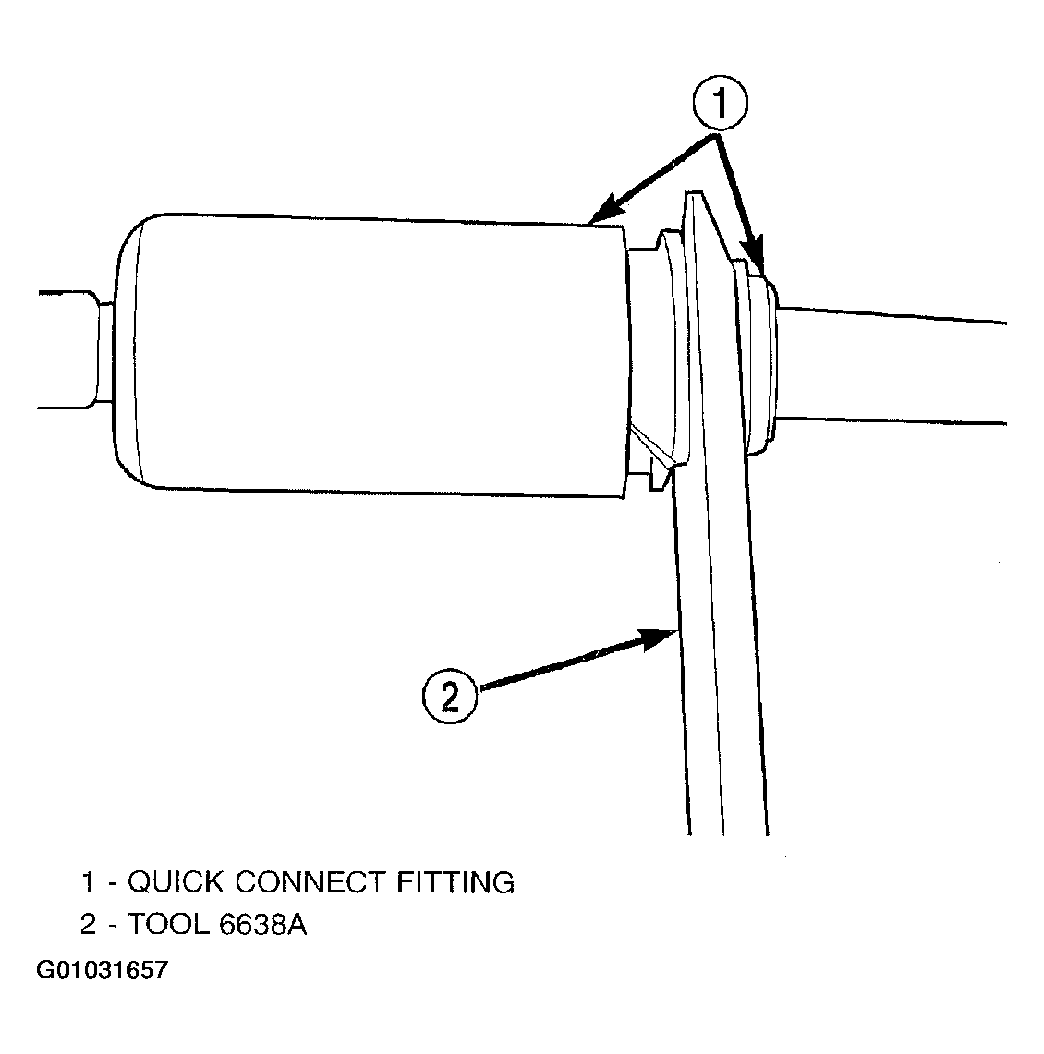
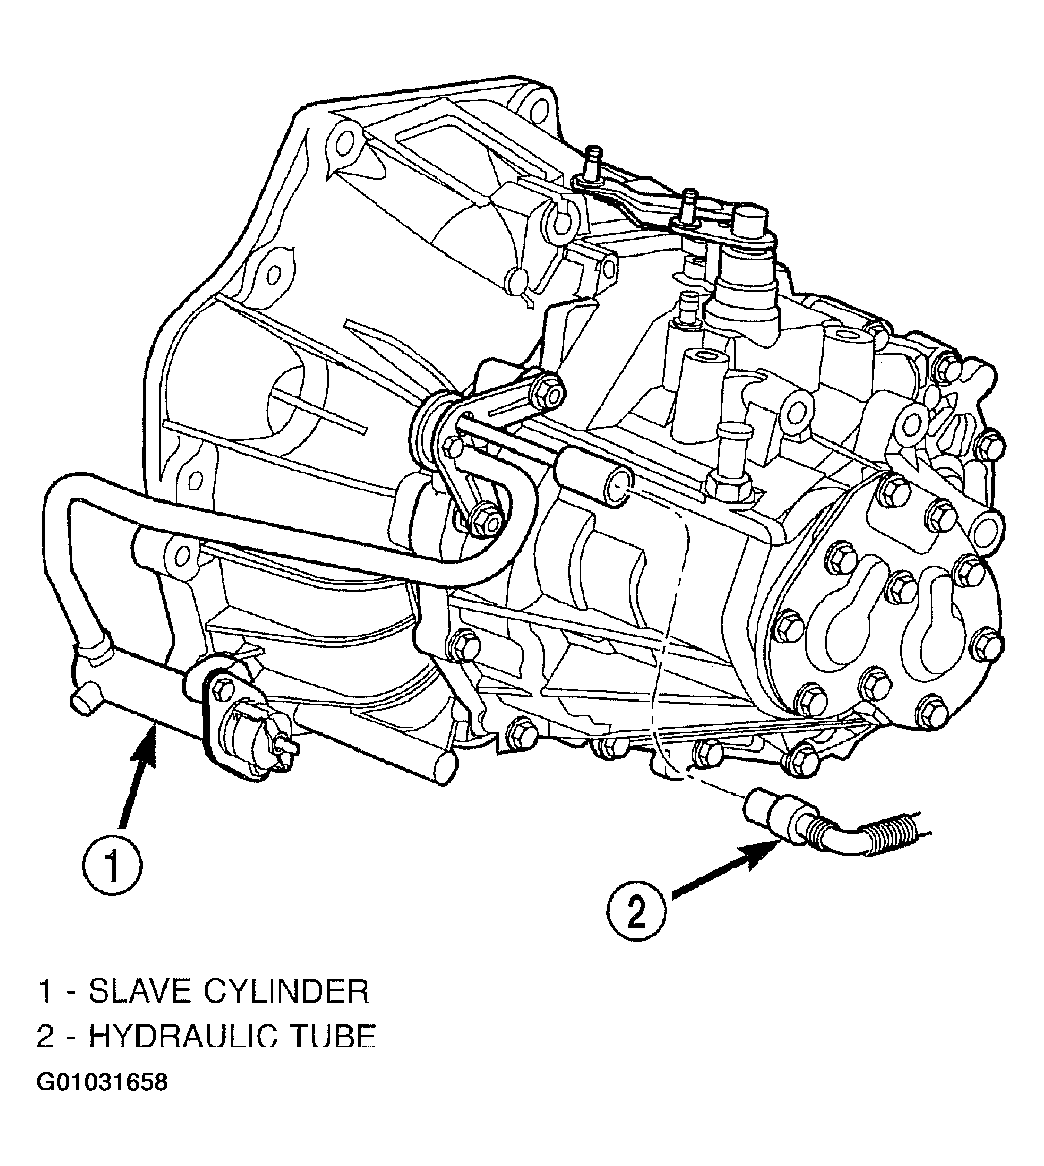
- Using Tool 6638A, disconnect clutch hydraulic quick-connect fitting. (Fig 2 and Fig 3
).
 Courtesy of DAIMLERCHRYSLER CORP.
 Courtesy of DAIMLERCHRYSLER CORP.
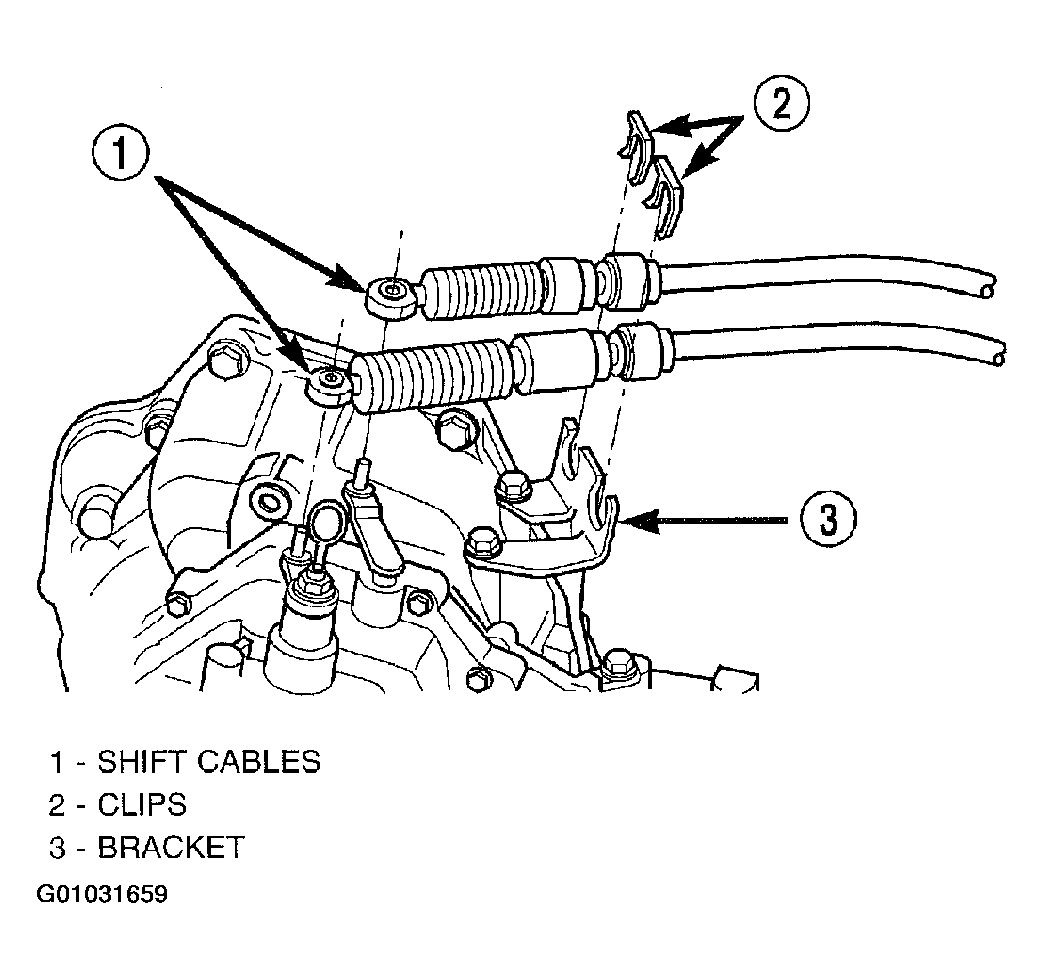
- Remove shift cable-to-bracket clips. (Fig 4).
- Disconnect shift selector and crossover cable from levers. (Fig 4). Remove cables and secure out of the way.
 Courtesy of DAIMLERCHRYSLER CORP.
- Disconnect the vehicle speed sensor connector. (Fig 5).
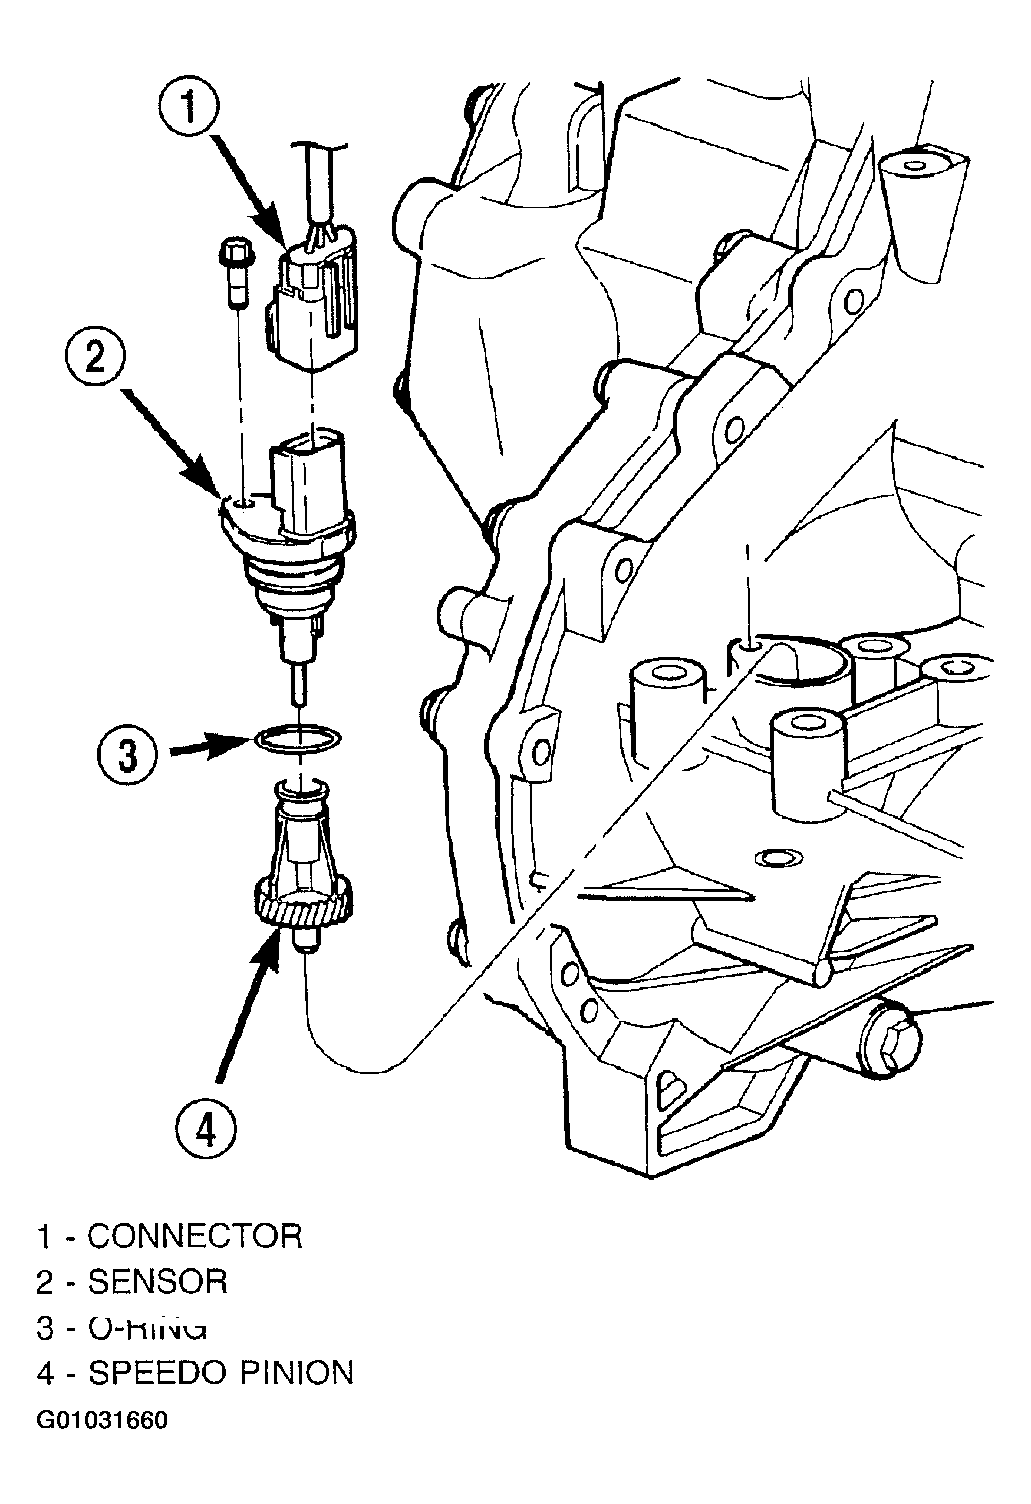 Courtesy of DAIMLERCHRYSLER CORP.
- Raise vehicle on hoist.
- Remove transaxle oil drain plug and drain oil into a suitable container.
- Remove both axle shafts. Refer to AXLE SHAFTS
for the correct procedures.
- Remove structural collar. (Fig 6).
- Remove the left engine-to-transaxle lateral bending brace. (Fig 6).
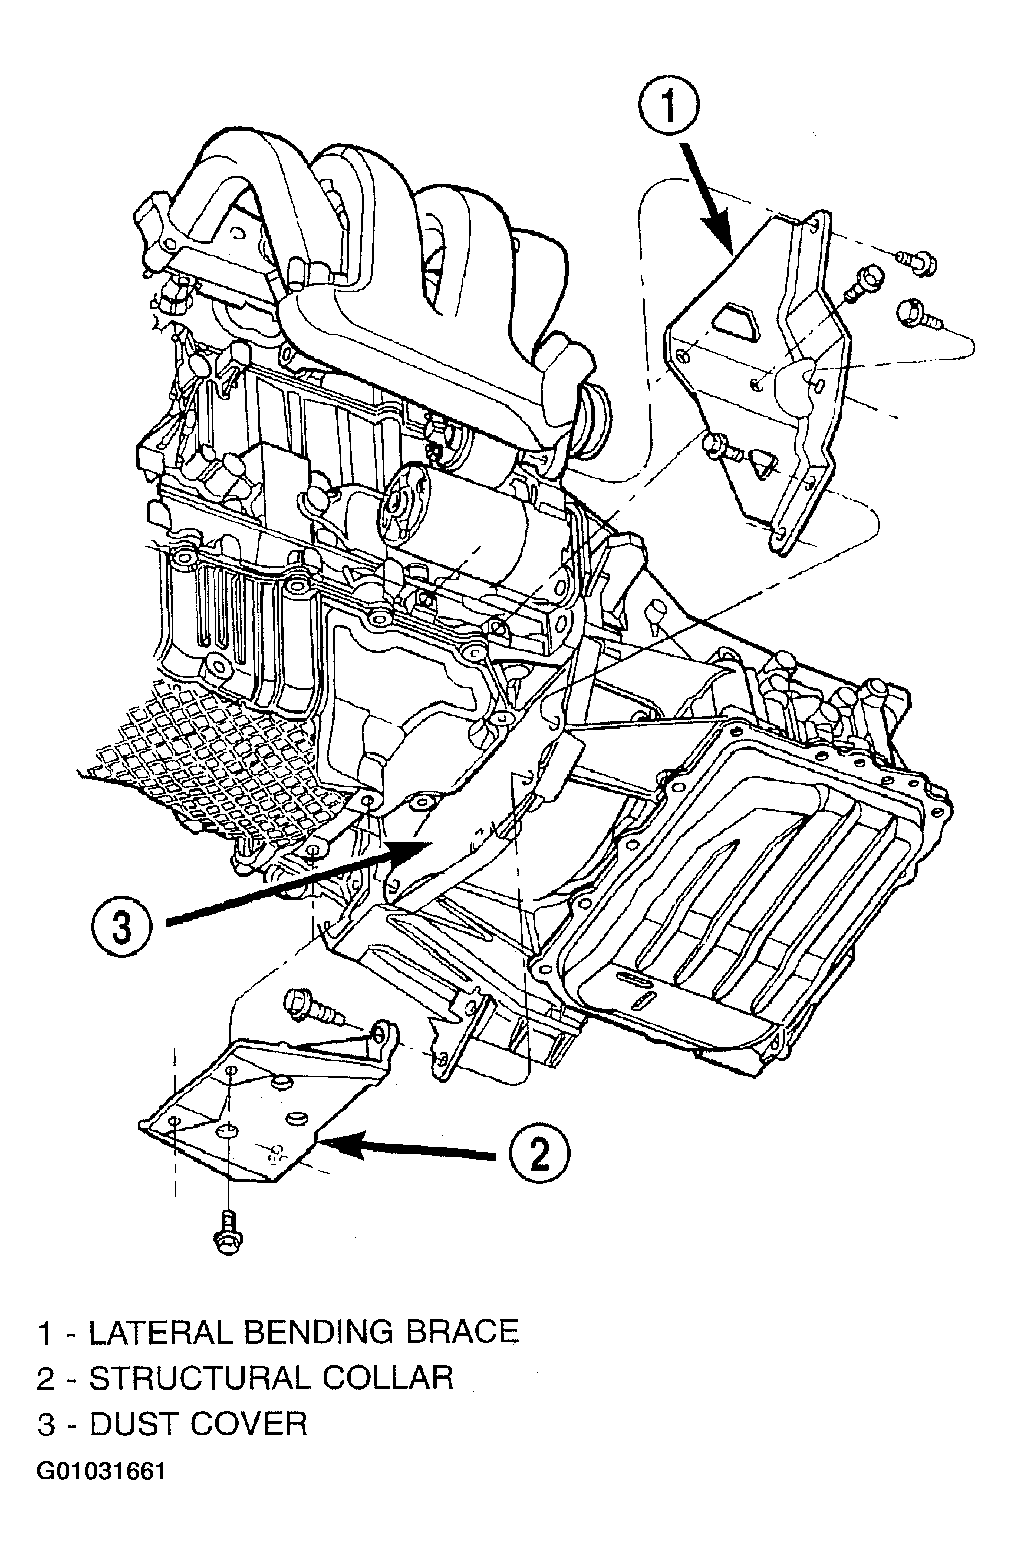 Courtesy of DAIMLERCHRYSLER CORP.
- Remove bellhousing dust cover. (Fig 6).
- Remove the right engine-to-transaxle lateral bending brace. (Fig 7).
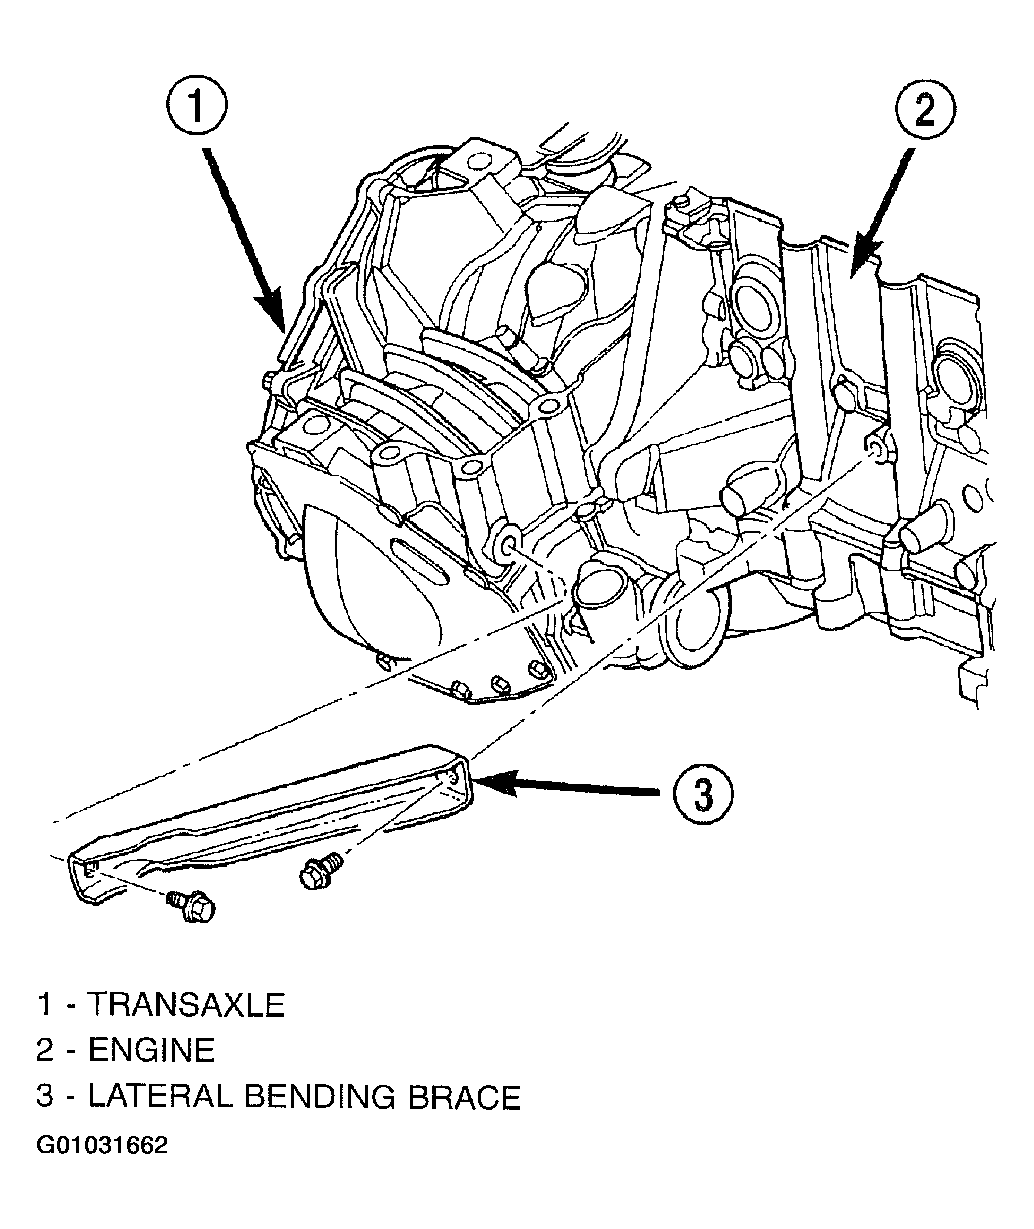 Courtesy of DAIMLERCHRYSLER CORP.
- Remove starter motor. (Fig 8).
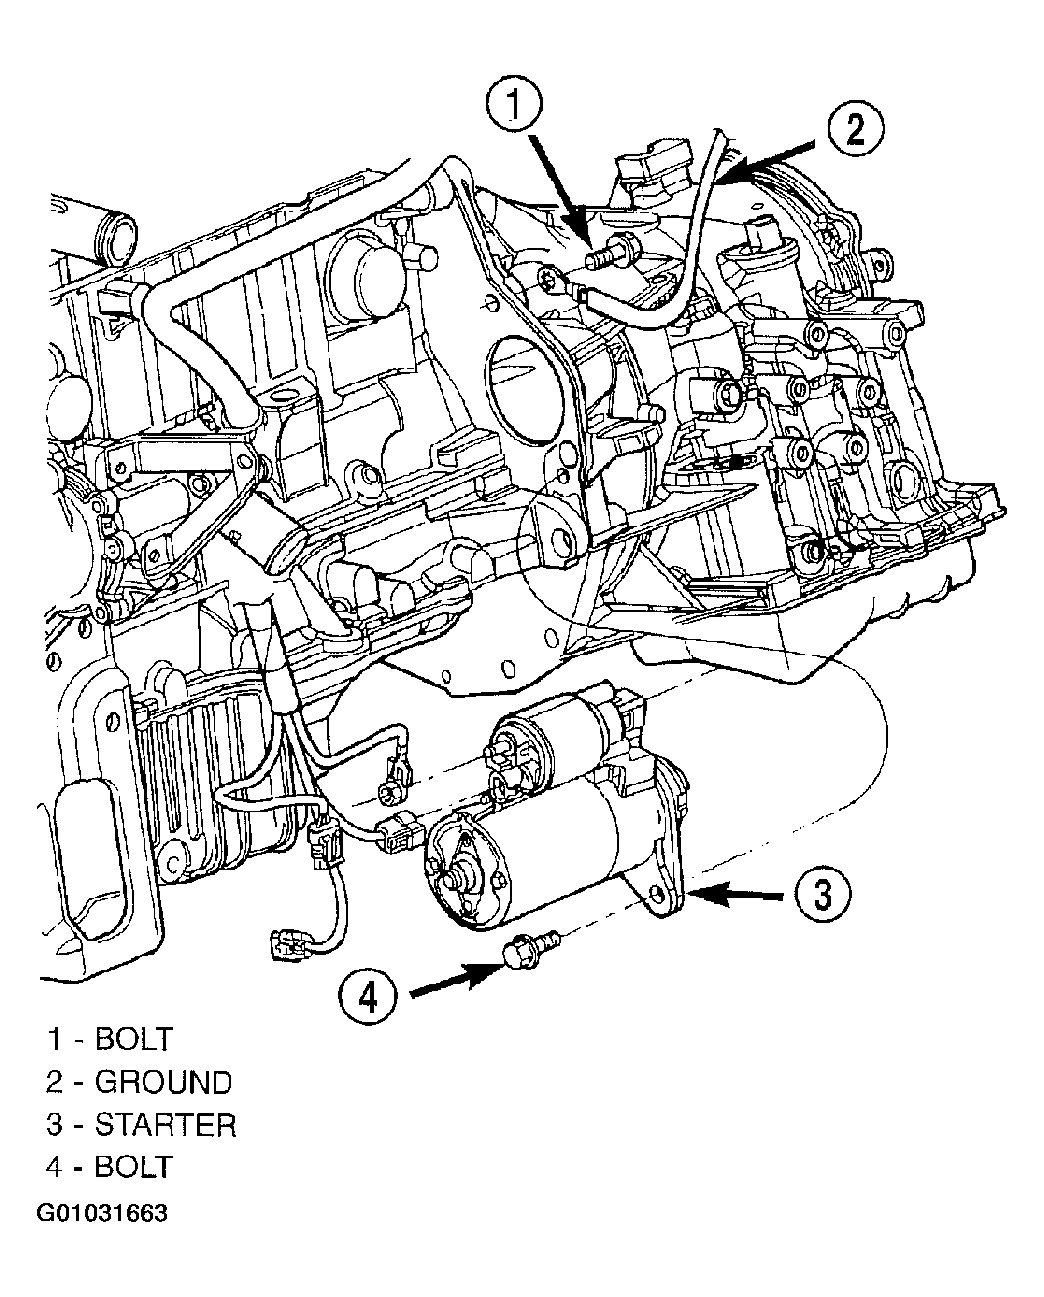 Courtesy of DAIMLERCHRYSLER CORP.
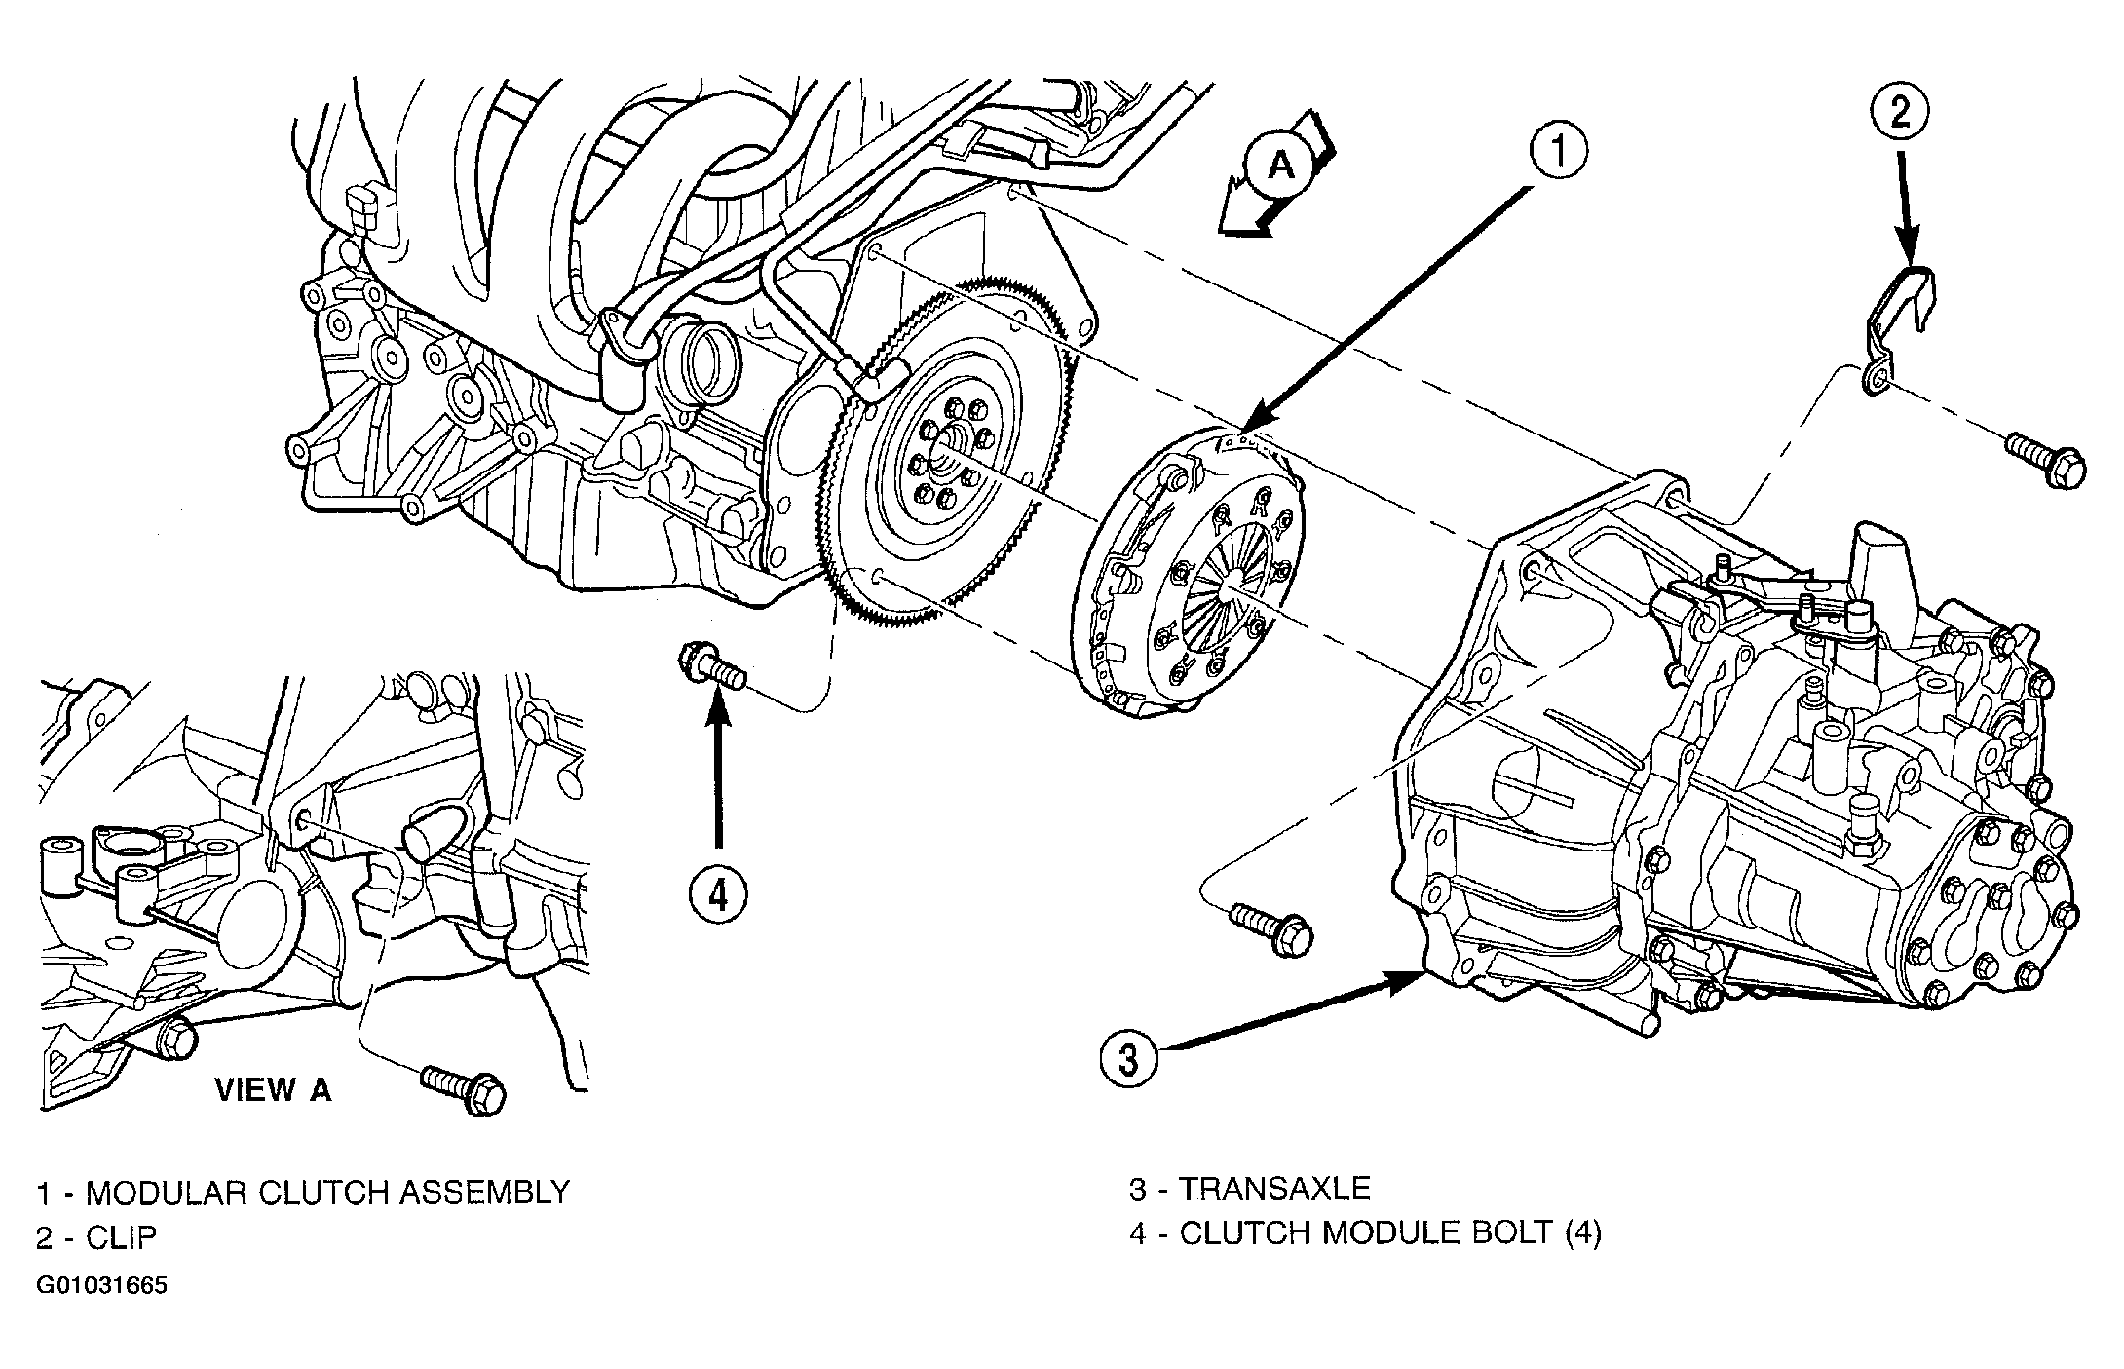
- Remove drive plate-to-clutch module bolts.
- Support engine at oil pan with screw jack and wood block.
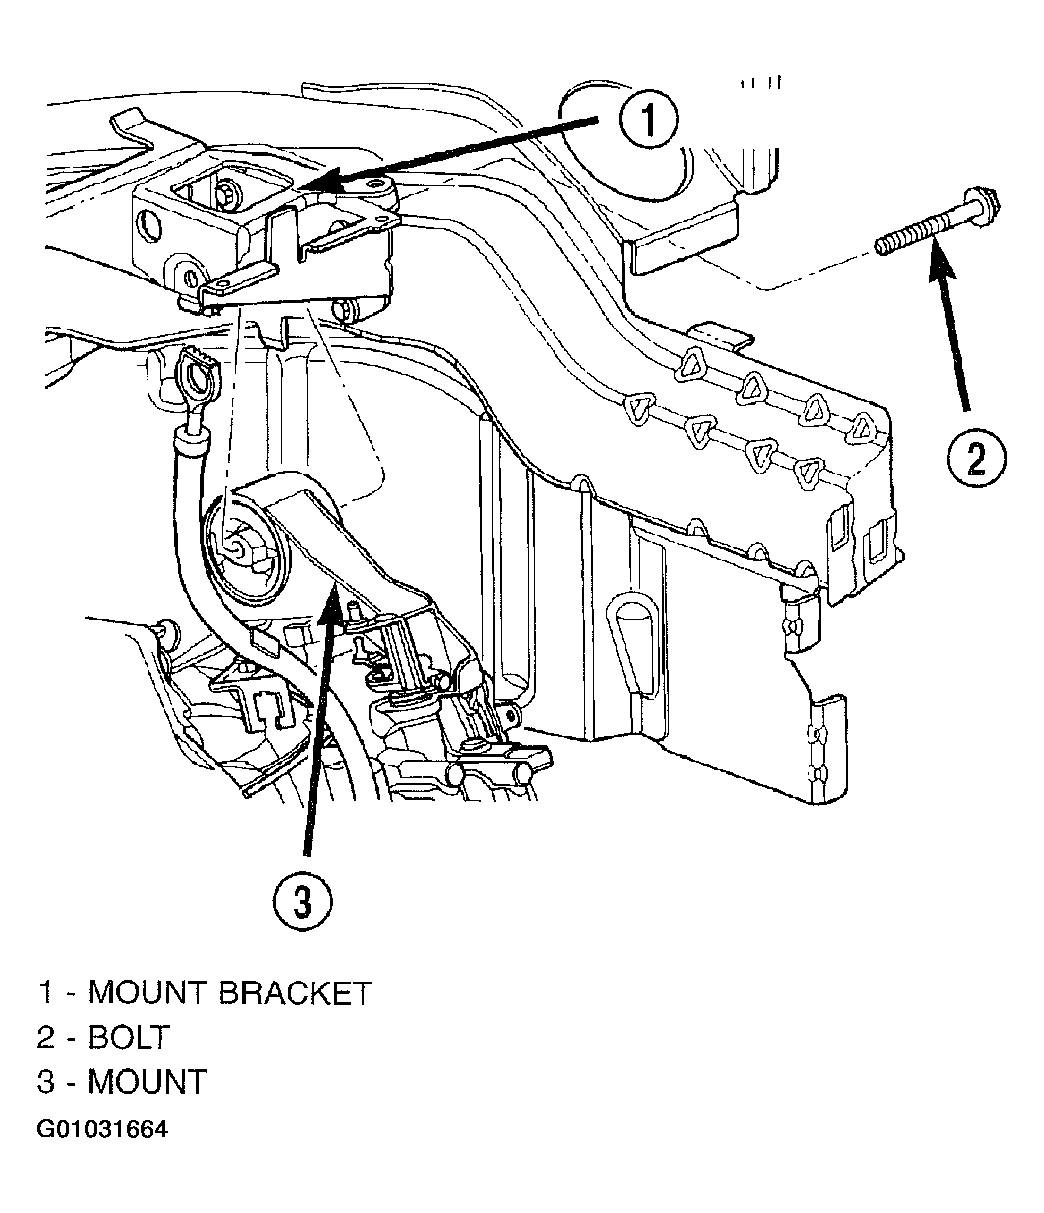
- Remove transaxle upper mount thru-bolt. Gain access to this bolt through the driver's side wheel house. (Fig 9).
 Courtesy of DAIMLERCHRYSLER CORP.
- Carefully lower engine and transaxle on screw jack until proper removal clearance is obtained.
- Obtain a helper to assist in holding transaxle while removing transaxle-to-engine mounting bolts. (Fig 10).
- Remove transaxle from vehicle. (Fig 10).
 Courtesy of DAIMLERCHRYSLER CORP.
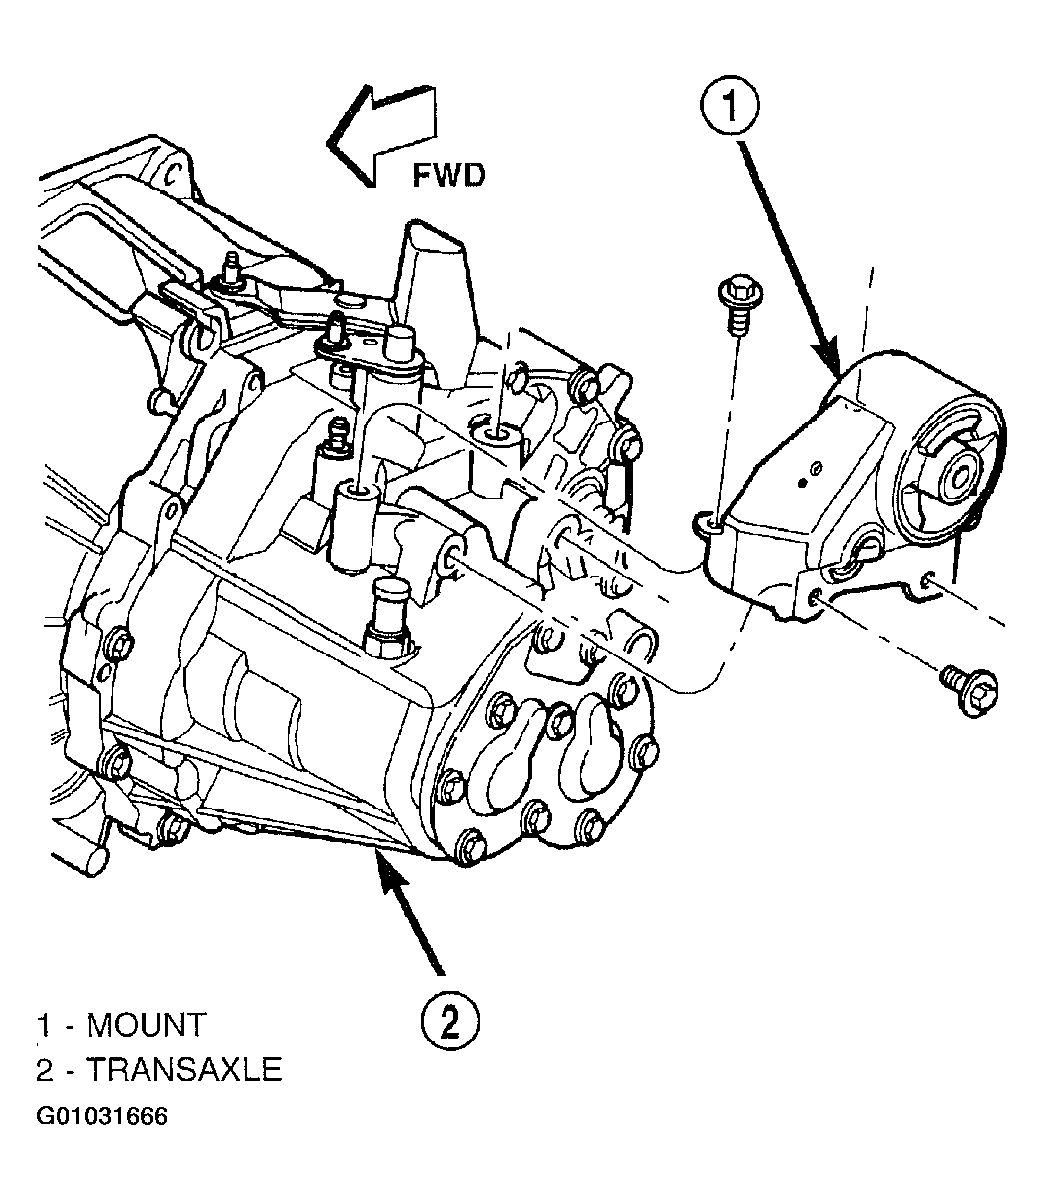
- If installing a new or replacement transaxle, remove the upper mount as shown in (Fig 11), transfer to the replacement unit and torque all bolts to 68 N.m (50 ft. lbs.).
 Courtesy of DAIMLERCHRYSLER CORP.