- Mount input clutch assembly to Input Clutch Pressure Fixture (Tool 8391).
- Tap down reverse clutch reaction plate to release pressure from snap ring (Fig 1).
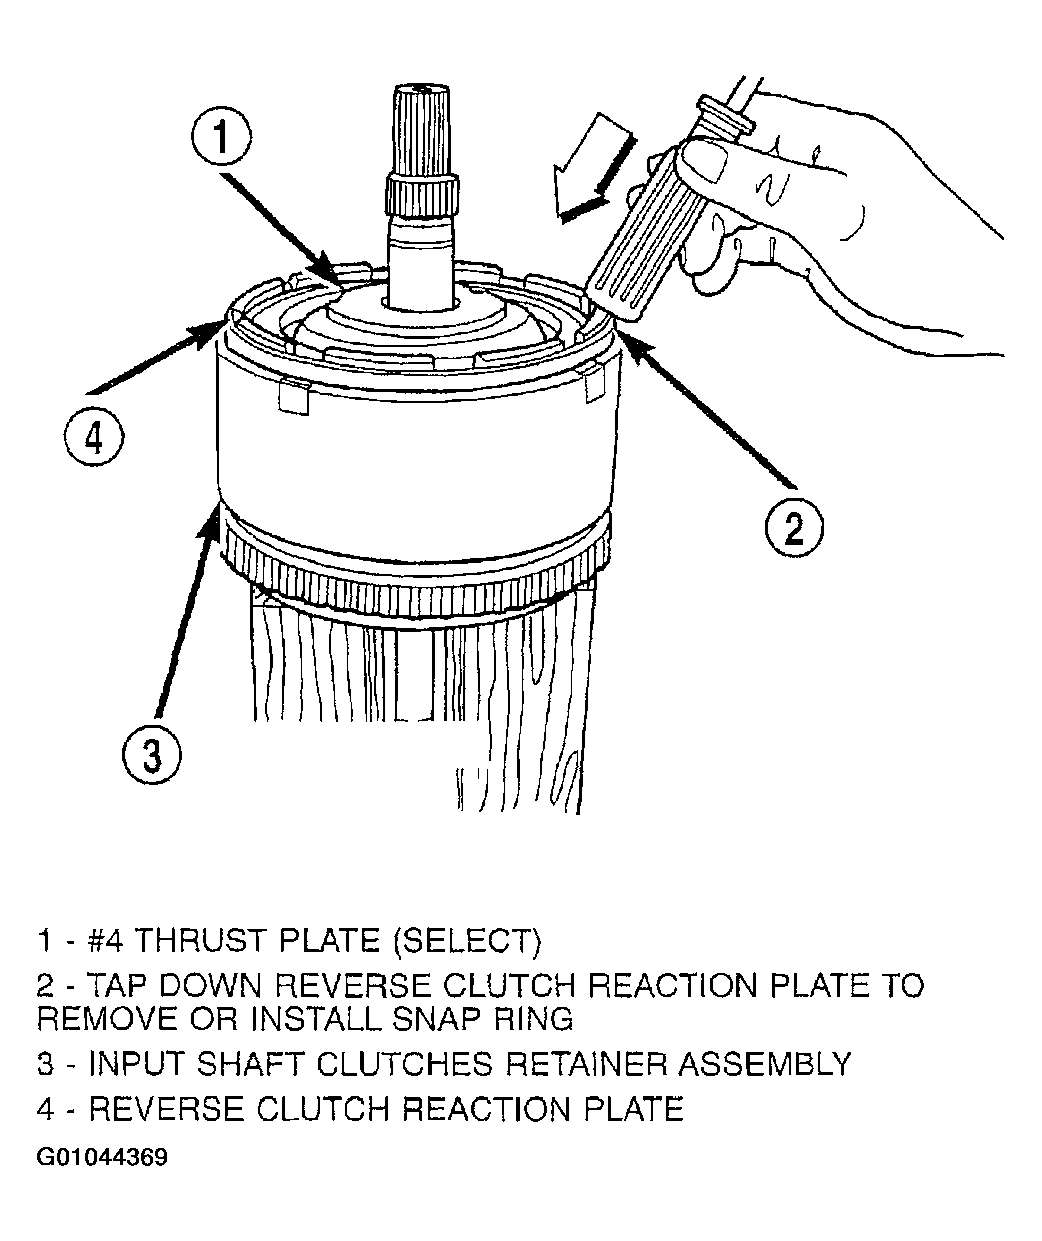 Courtesy of DAIMLERCHRYSLER CORP.
- Remove reverse clutch snap ring (Fig 2).
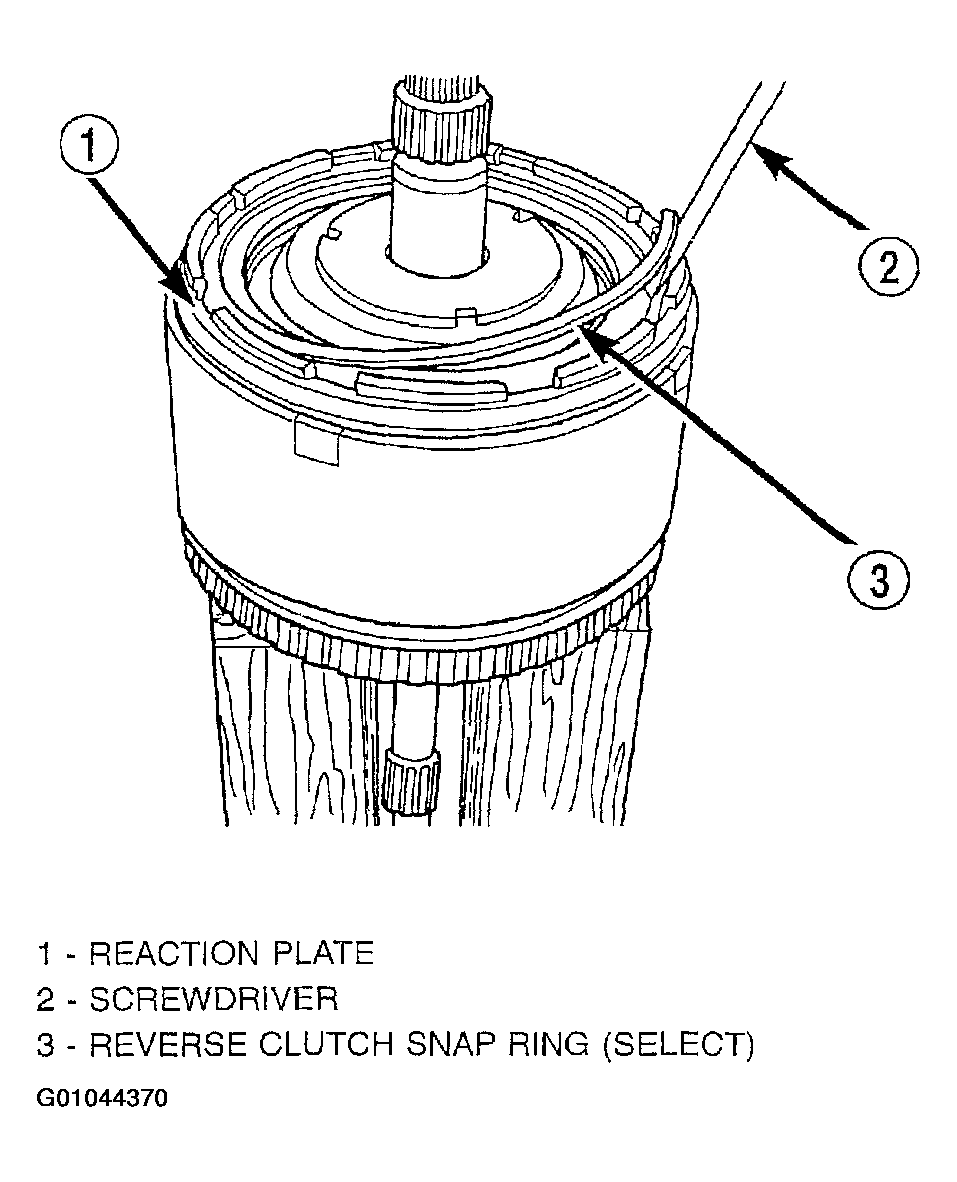 Courtesy of DAIMLERCHRYSLER CORP.
- Pry up and remove reverse clutch reaction plate (Fig 3) (Fig 4).
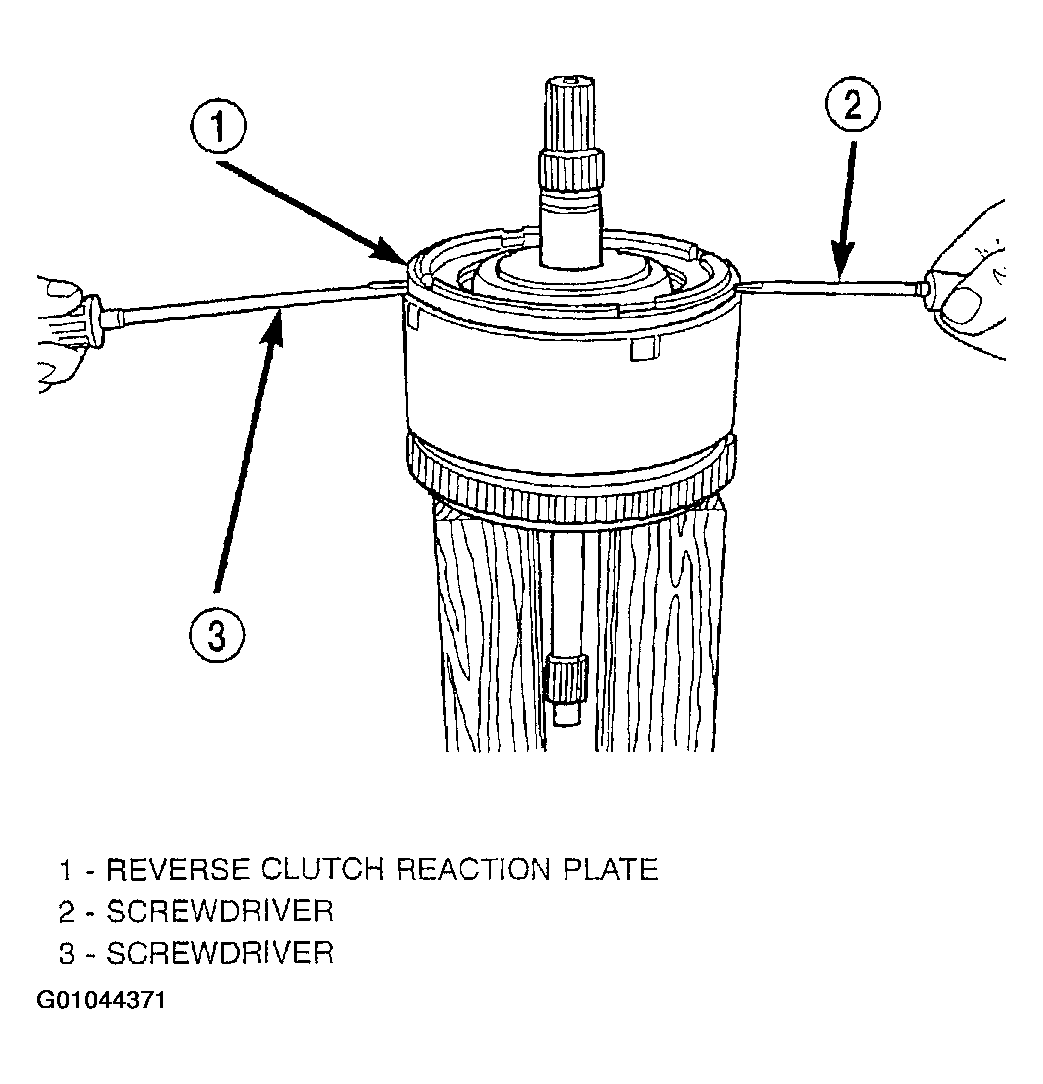 Courtesy of DAIMLERCHRYSLER CORP.
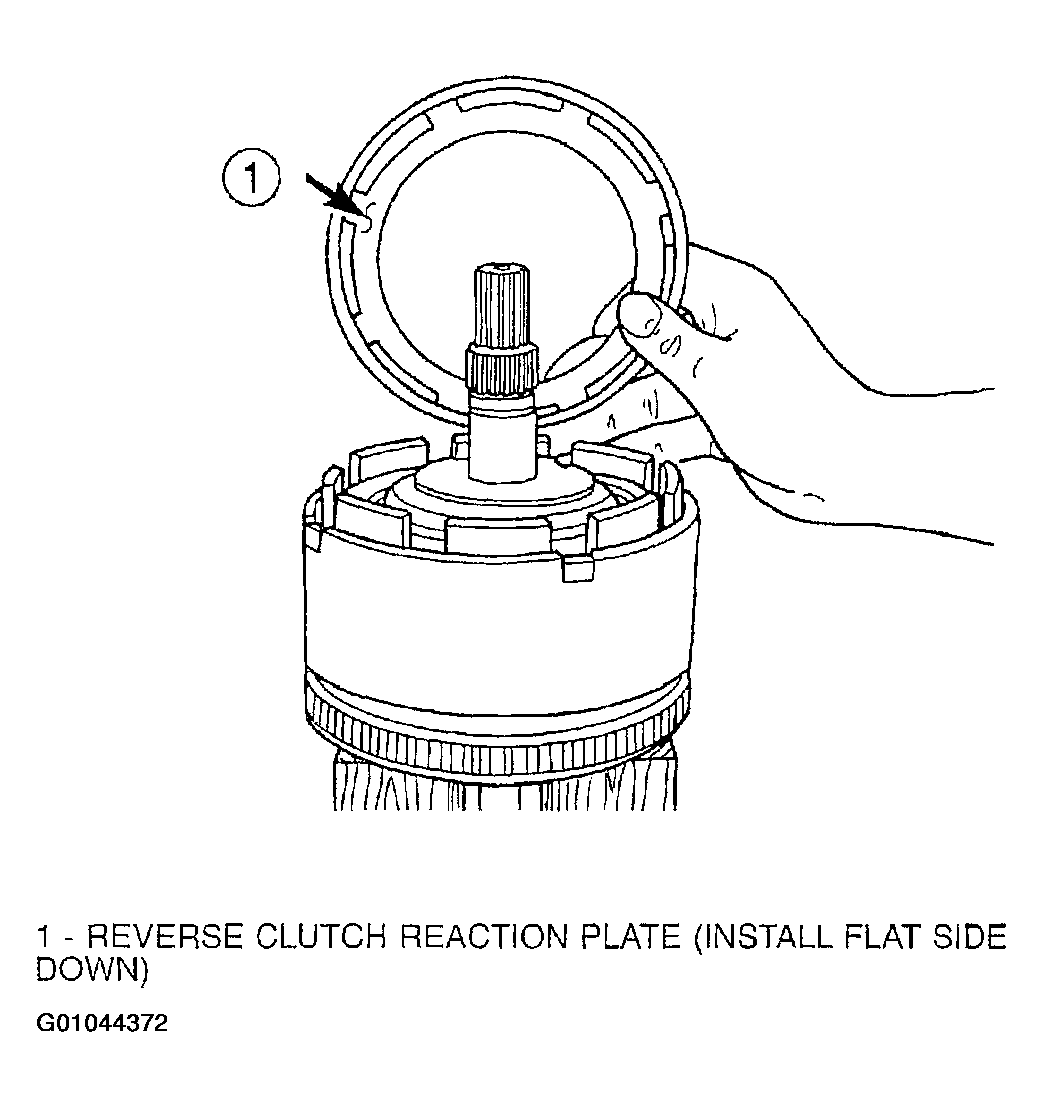 Courtesy of DAIMLERCHRYSLER CORP.
- Remove the reverse clutch pack (two fibers/one steel) (Fig 5).
NOTE:
Tag reverse clutch pack for reassembly identification.
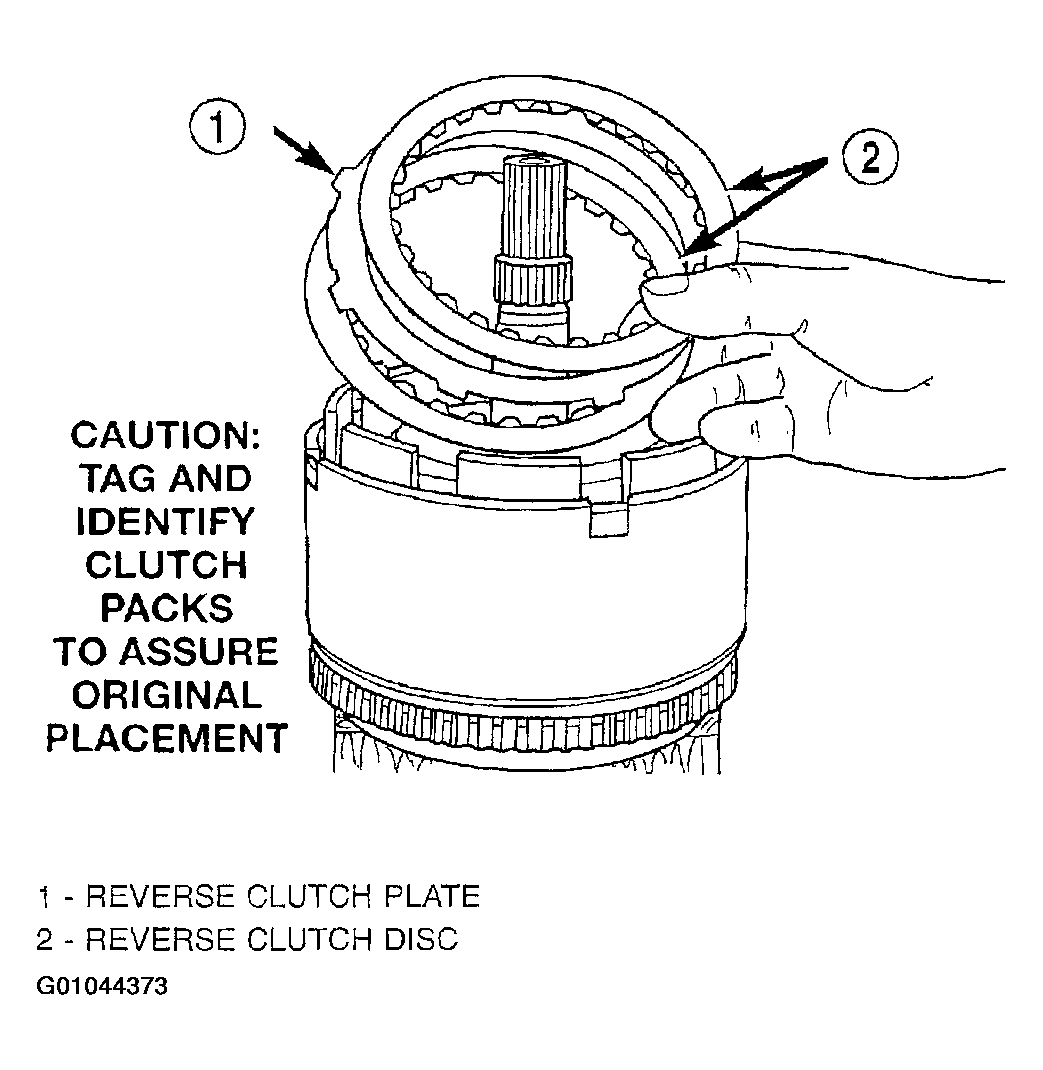 Courtesy of DAIMLERCHRYSLER CORP.
- Remove the OD/Reverse pressure plate snap ring (Fig 6).
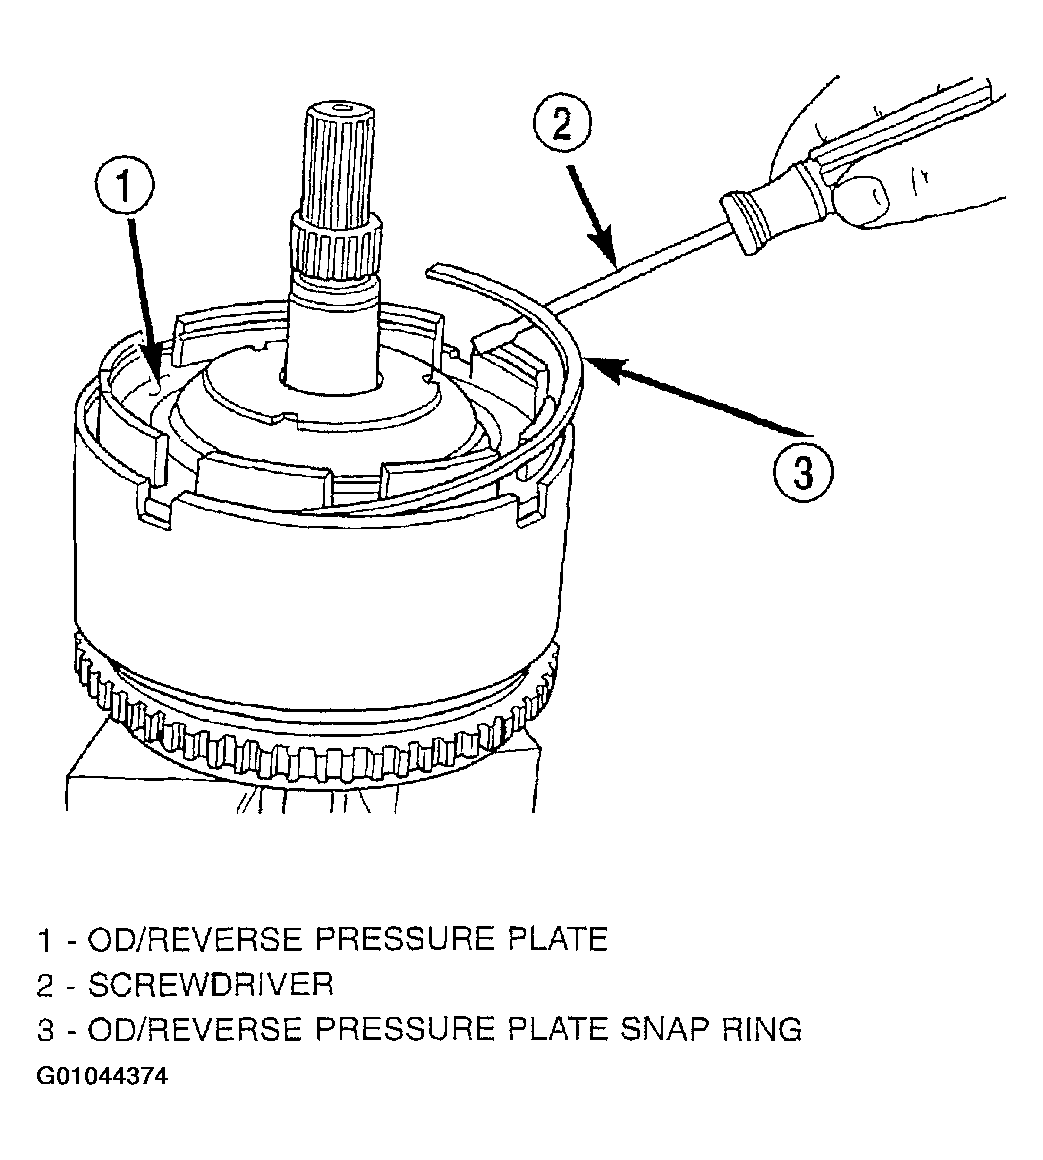 Courtesy of DAIMLERCHRYSLER CORP.
- Remove OD/Reverse pressure plate (Fig 7).
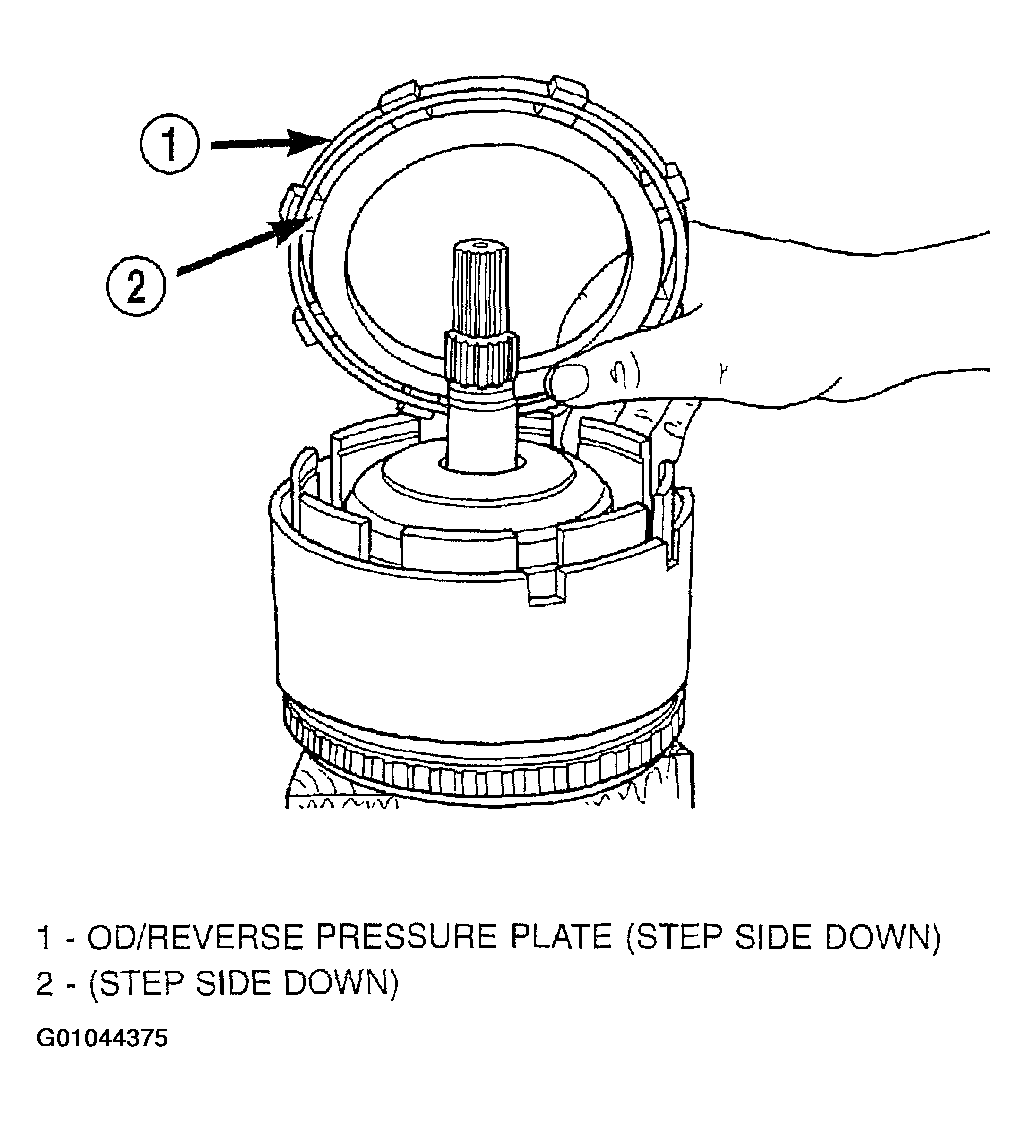 Courtesy of DAIMLERCHRYSLER CORP.
- Remove OD/Reverse pressure plate wave snap ring (Fig 8).
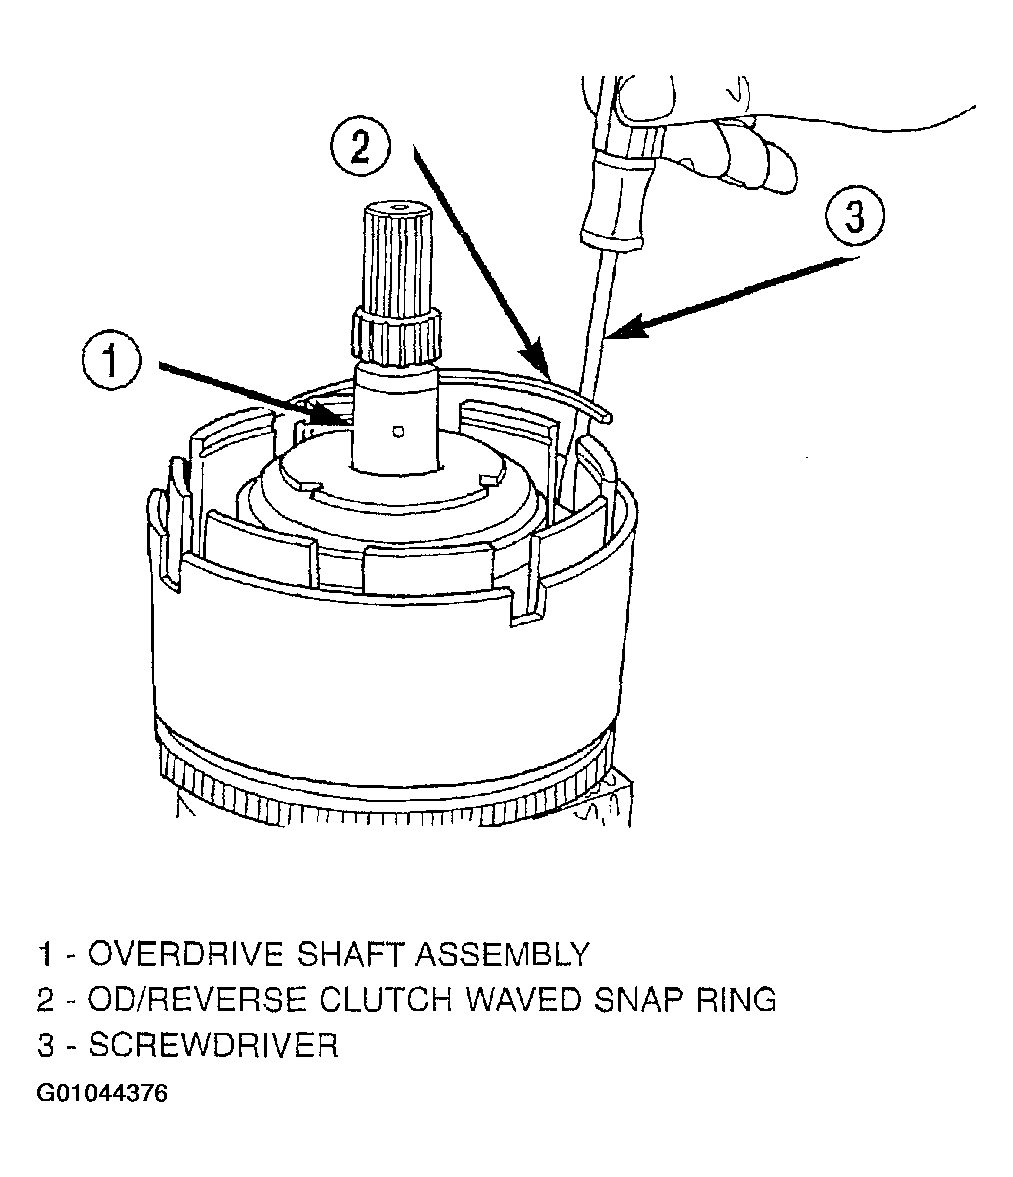 Courtesy of DAIMLERCHRYSLER CORP.
- Remove OD shaft/hub and OD clutch pack (Fig 9) (Fig 10).
NOTE:
Tag overdrive clutch pack for reassembly identification.
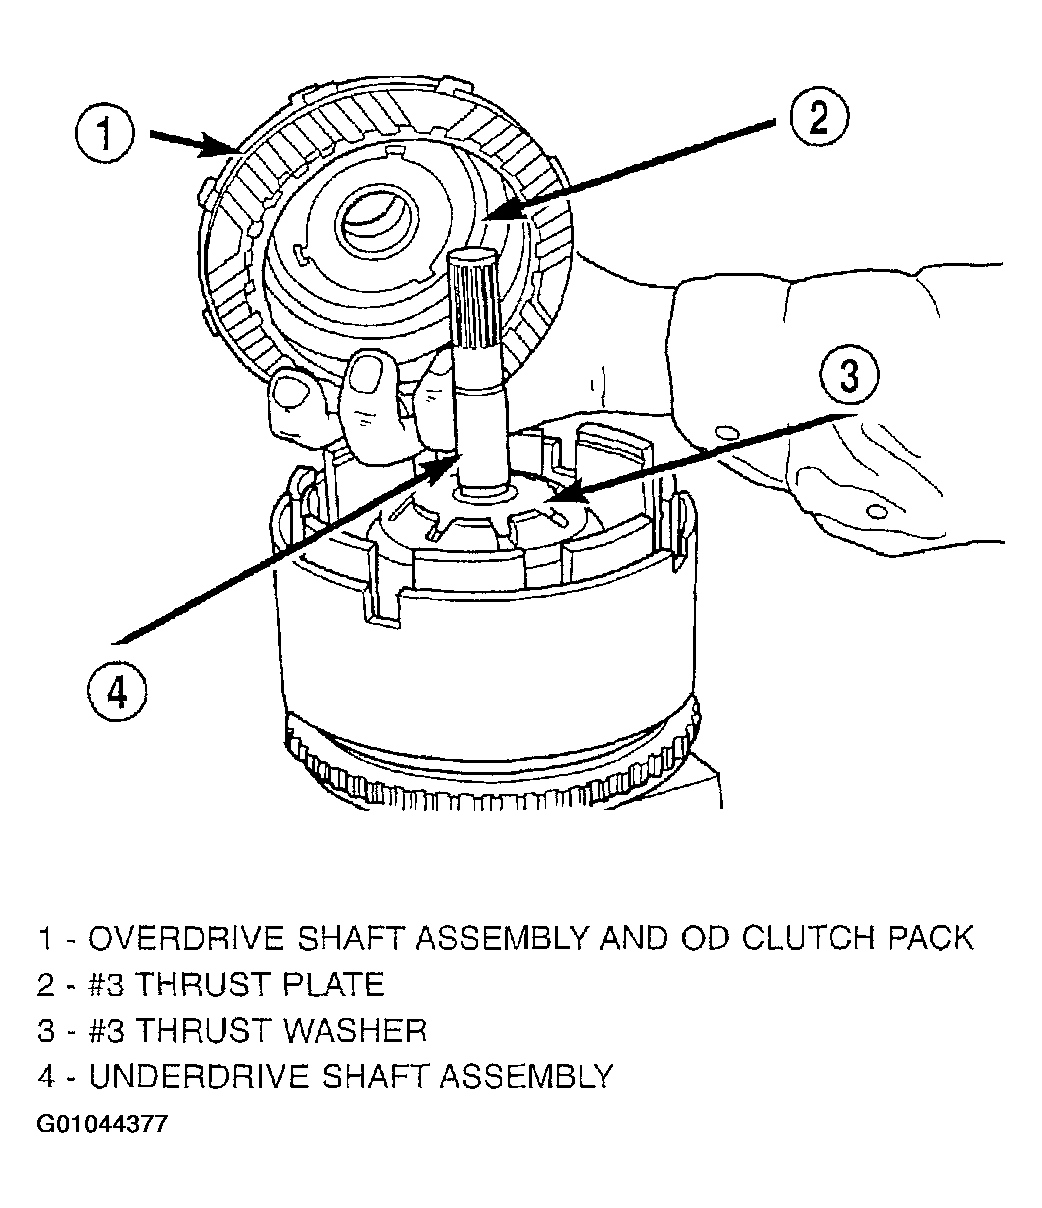 Courtesy of DAIMLERCHRYSLER CORP.
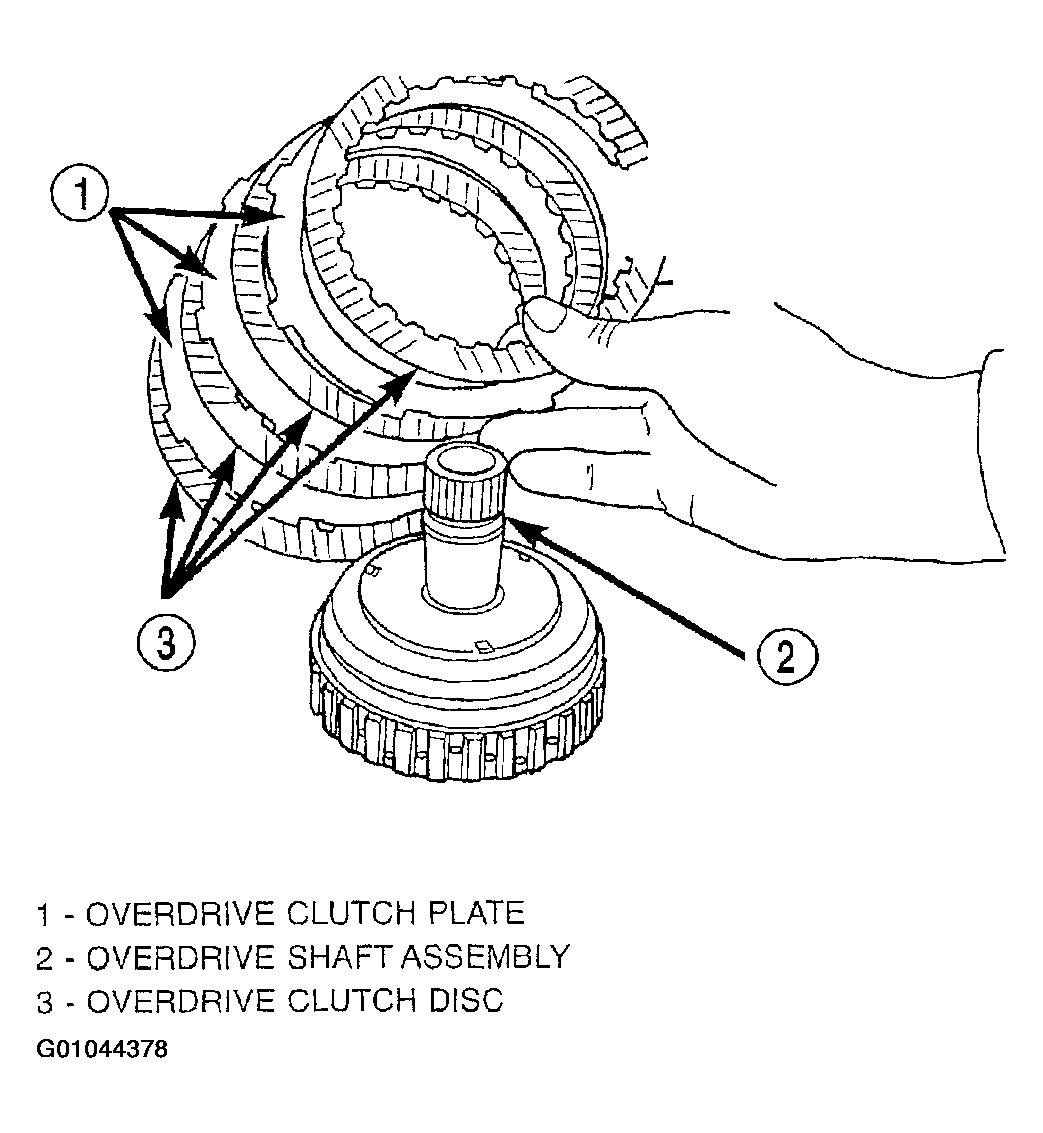 Courtesy of DAIMLERCHRYSLER CORP.
- Remove and inspect #3 & #4 thrust washers (Fig 11).
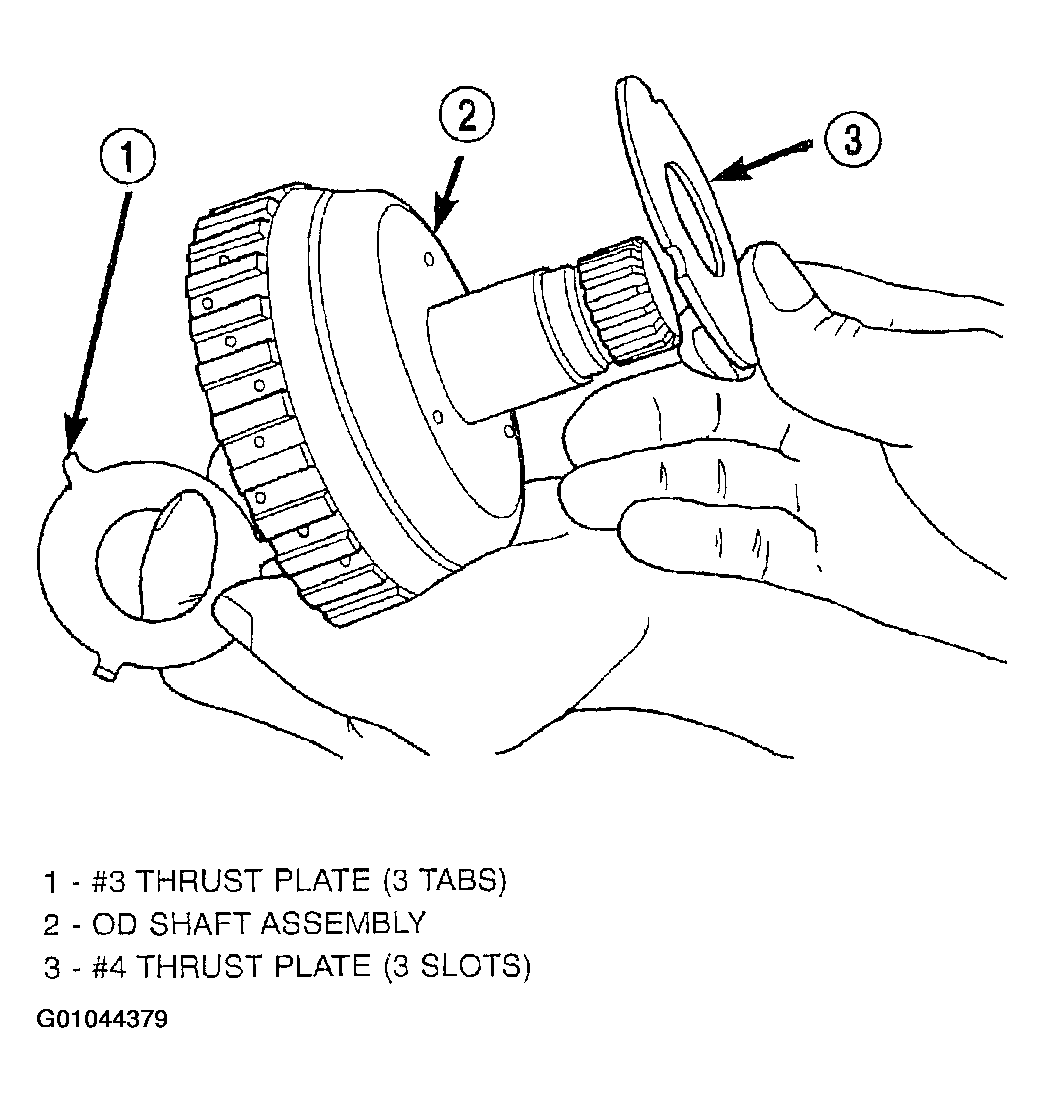 Courtesy of DAIMLERCHRYSLER CORP.
- Remove the underdrive shaft assembly (Fig 12).
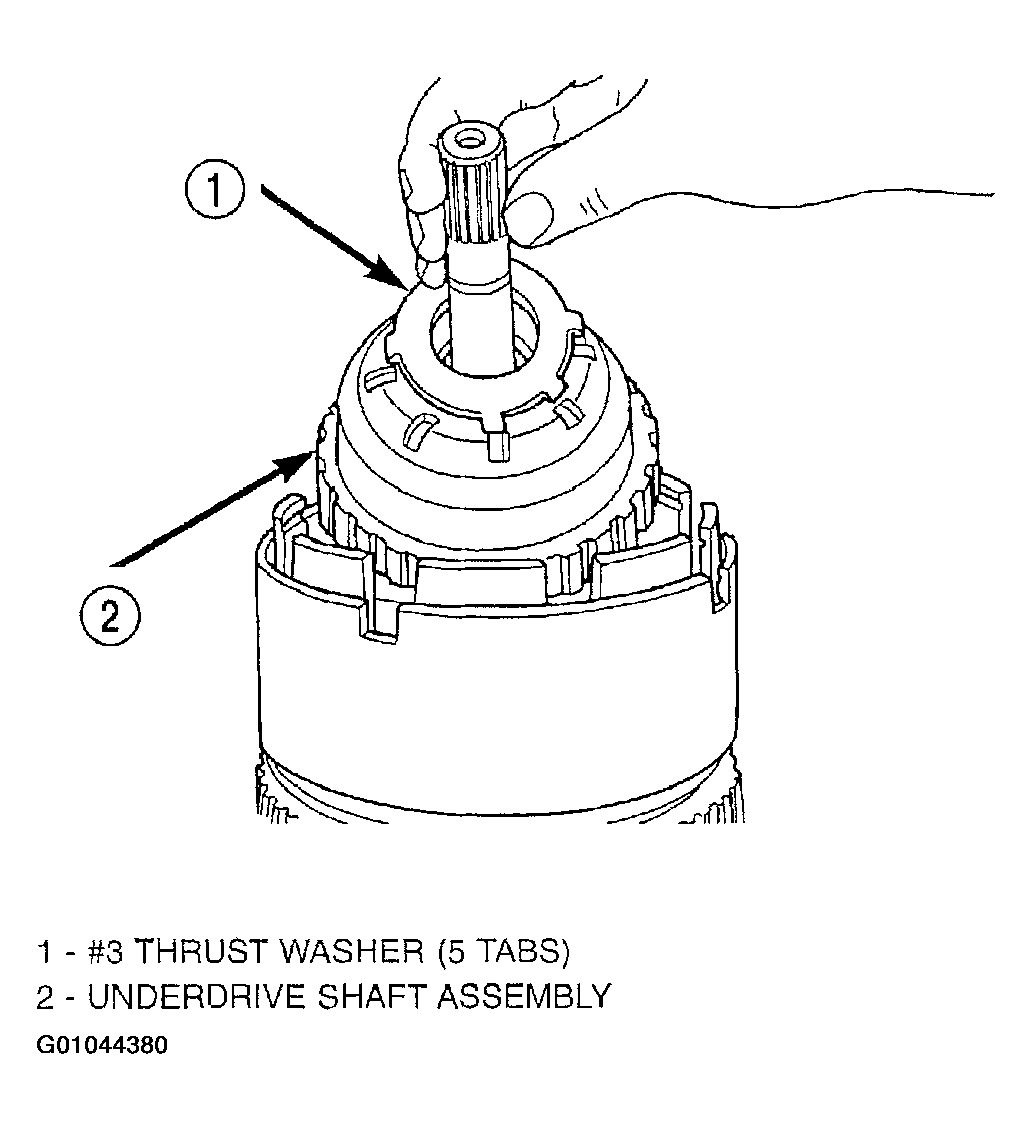 Courtesy of DAIMLERCHRYSLER CORP.
- Remove the #2 needle bearing (Fig 13).
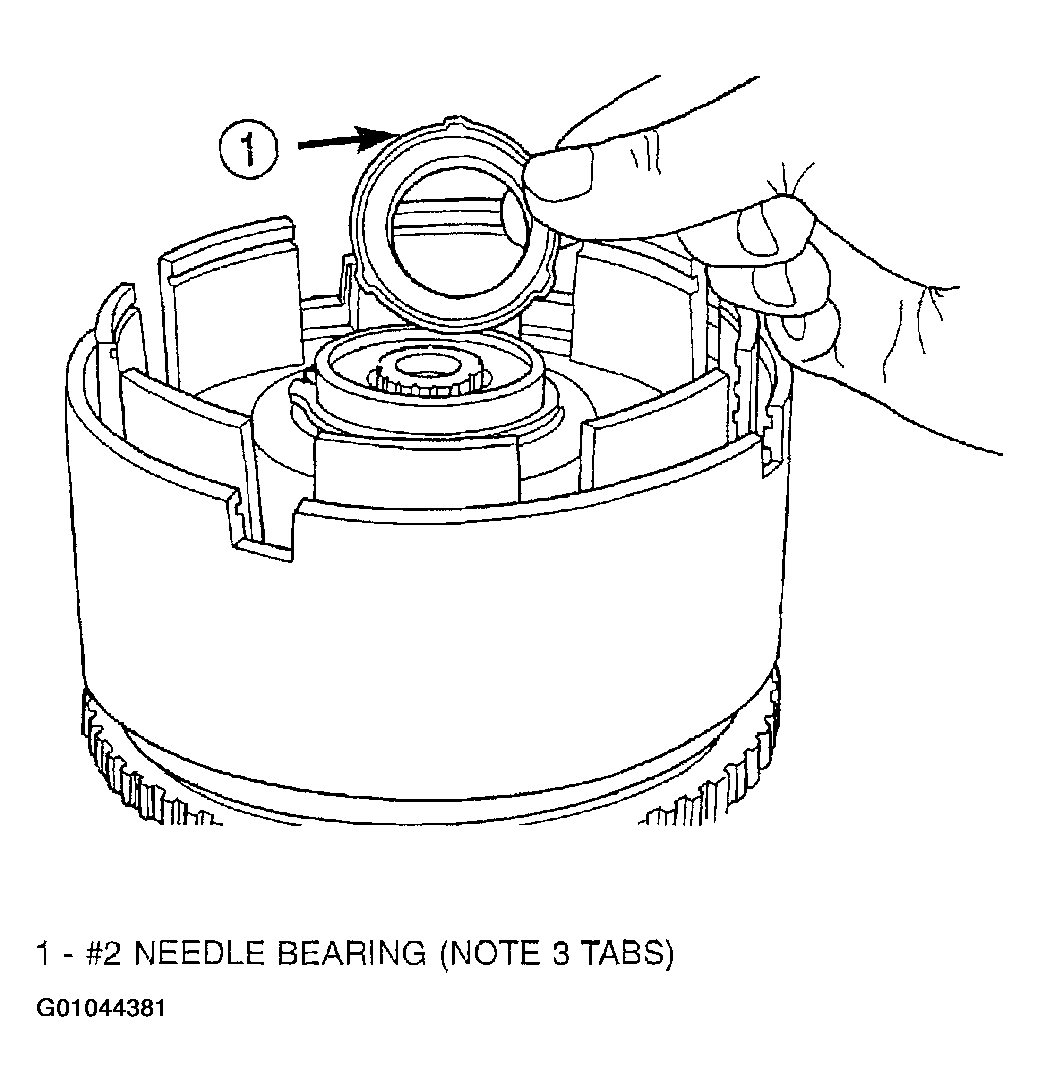 Courtesy of DAIMLERCHRYSLER CORP.
- Remove the OD/UD reaction plate tapered snap ring (Fig 14).
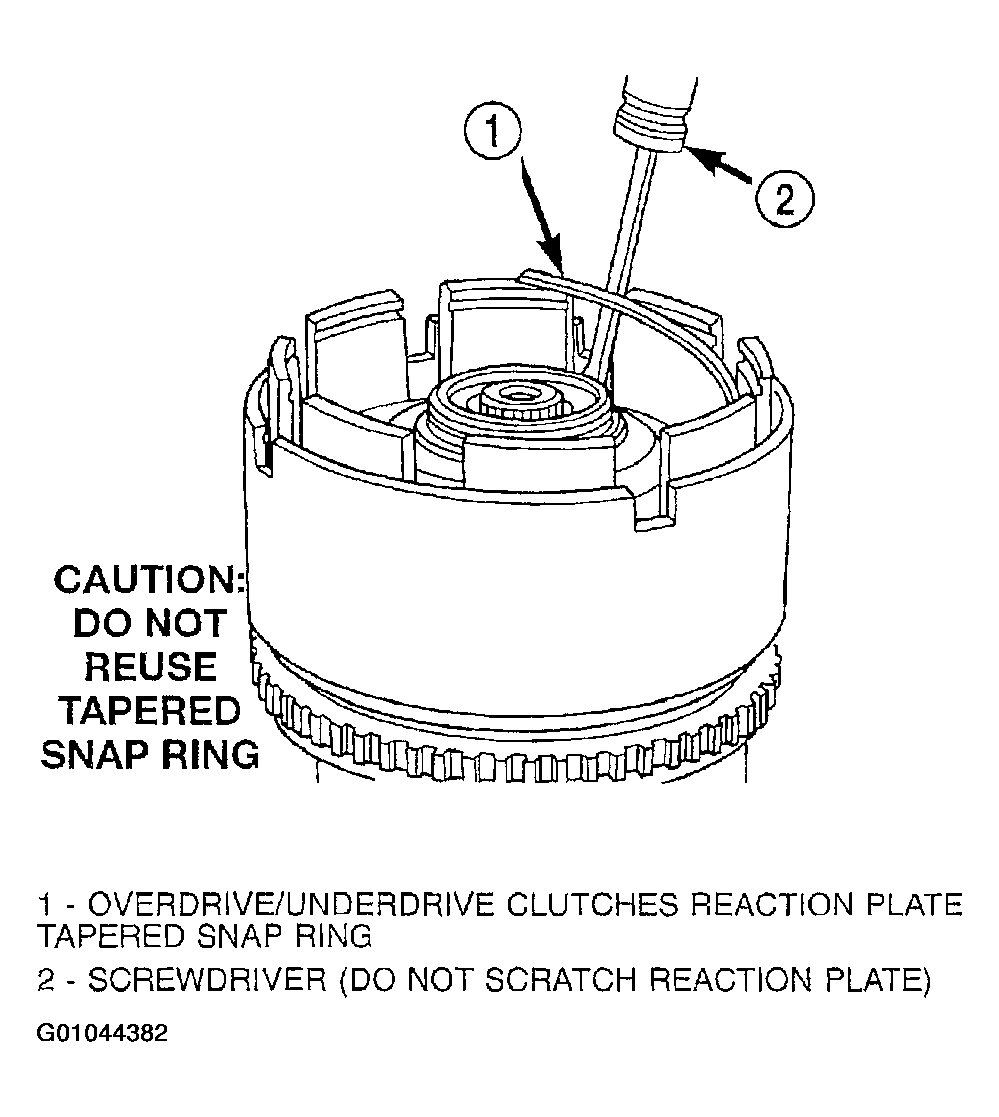 Courtesy of DAIMLERCHRYSLER CORP.
NOTE:
The OD/UD clutch reaction plate has a step on both sides. Install the OD/UD clutches reaction plate tapered step side up.
- Remove the OD/UD reaction plate (Fig 15).
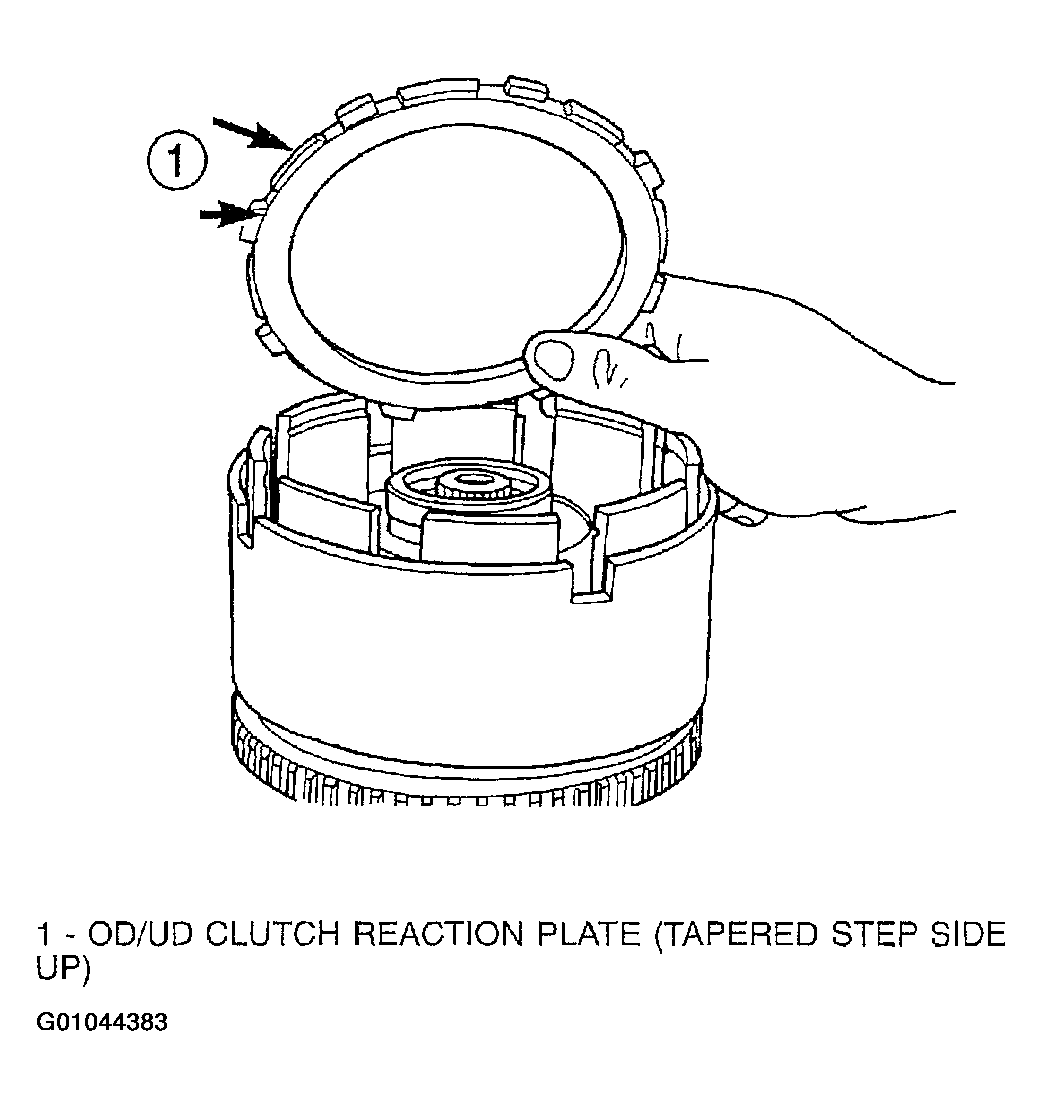 Courtesy of DAIMLERCHRYSLER CORP.
- Remove the first UD clutch disc (Fig 16).
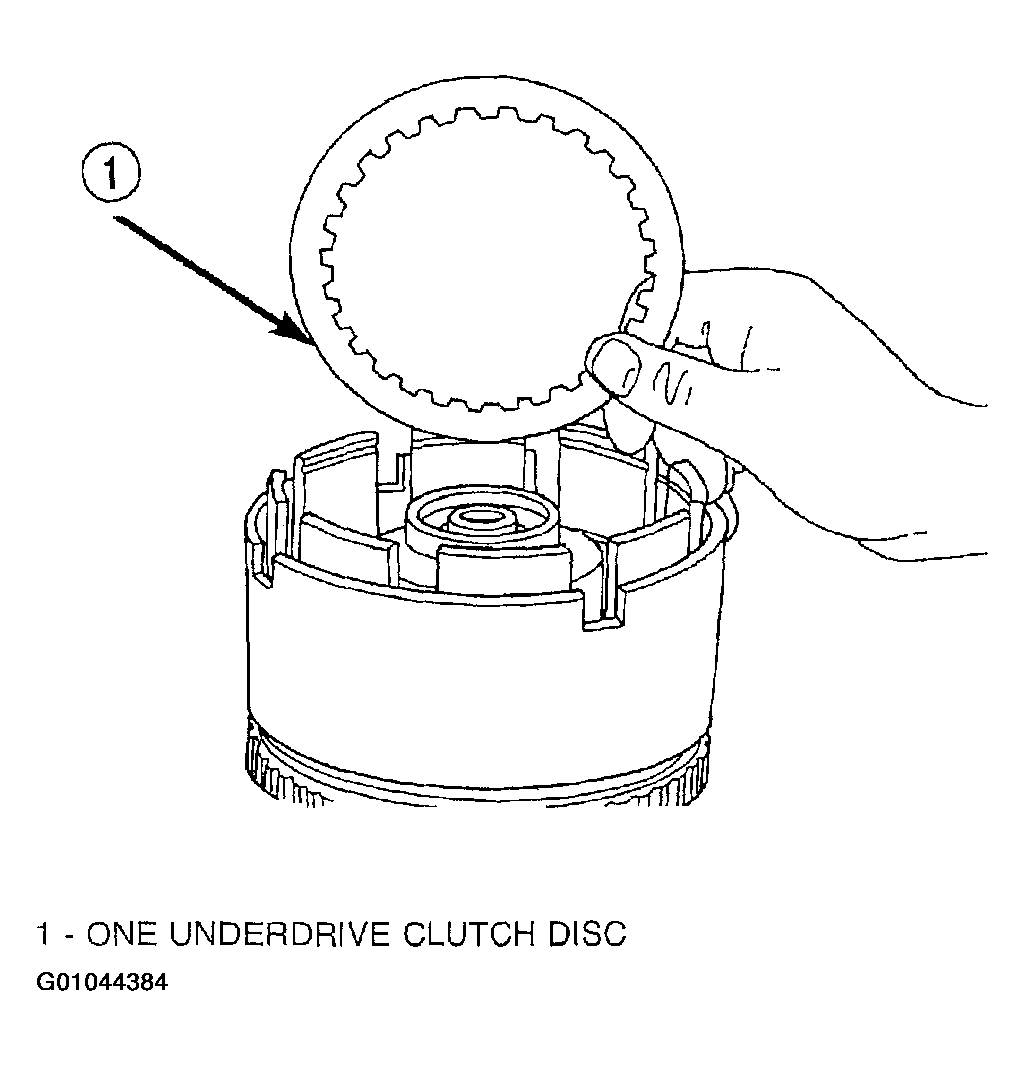 Courtesy of DAIMLERCHRYSLER CORP.
- Remove the UD clutch flat snap ring (Fig 27).
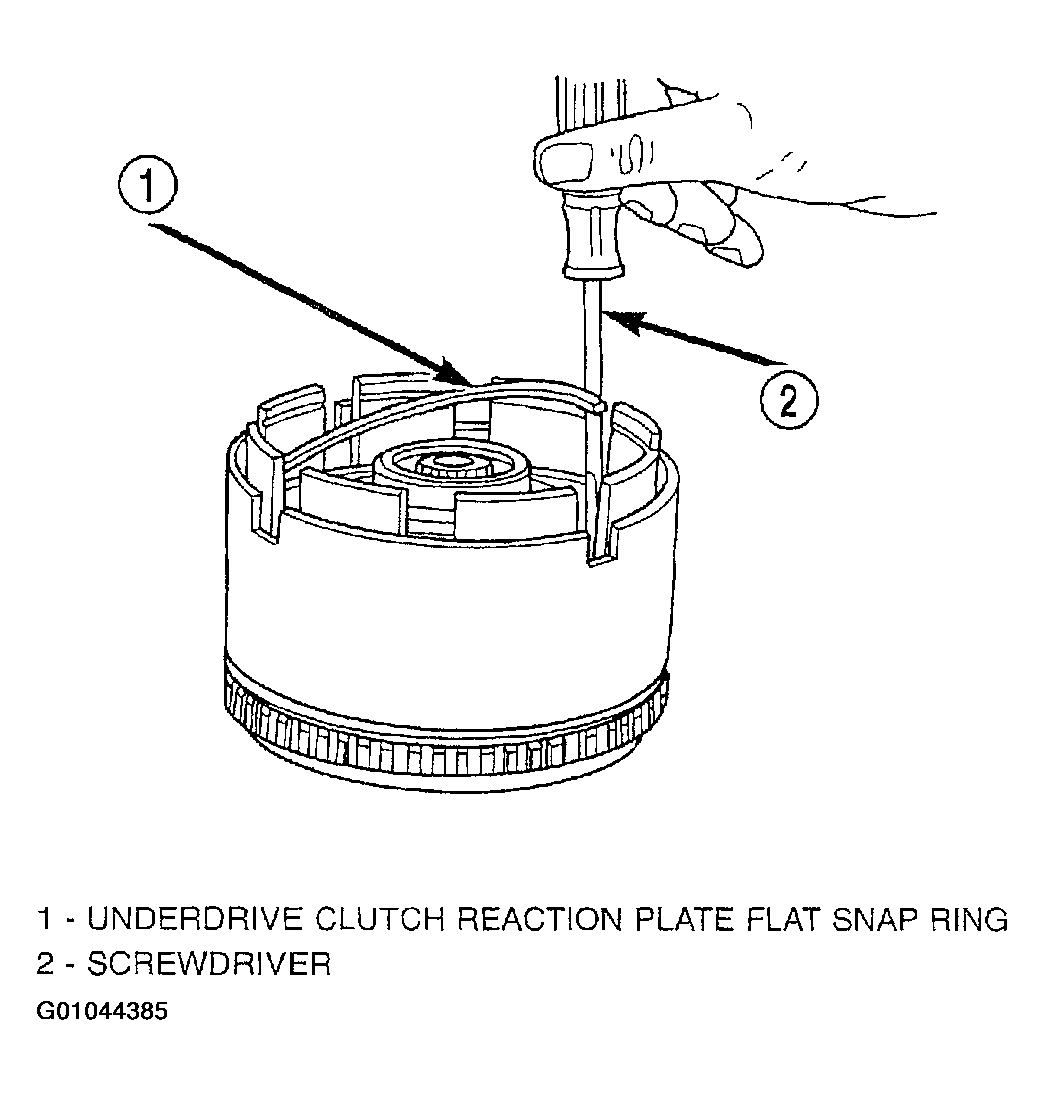 Courtesy of DAIMLERCHRYSLER CORP.
NOTE:
Tag underdrive clutch pack for reassembly identification.
- Remove the UD clutch pack (Fig 18).
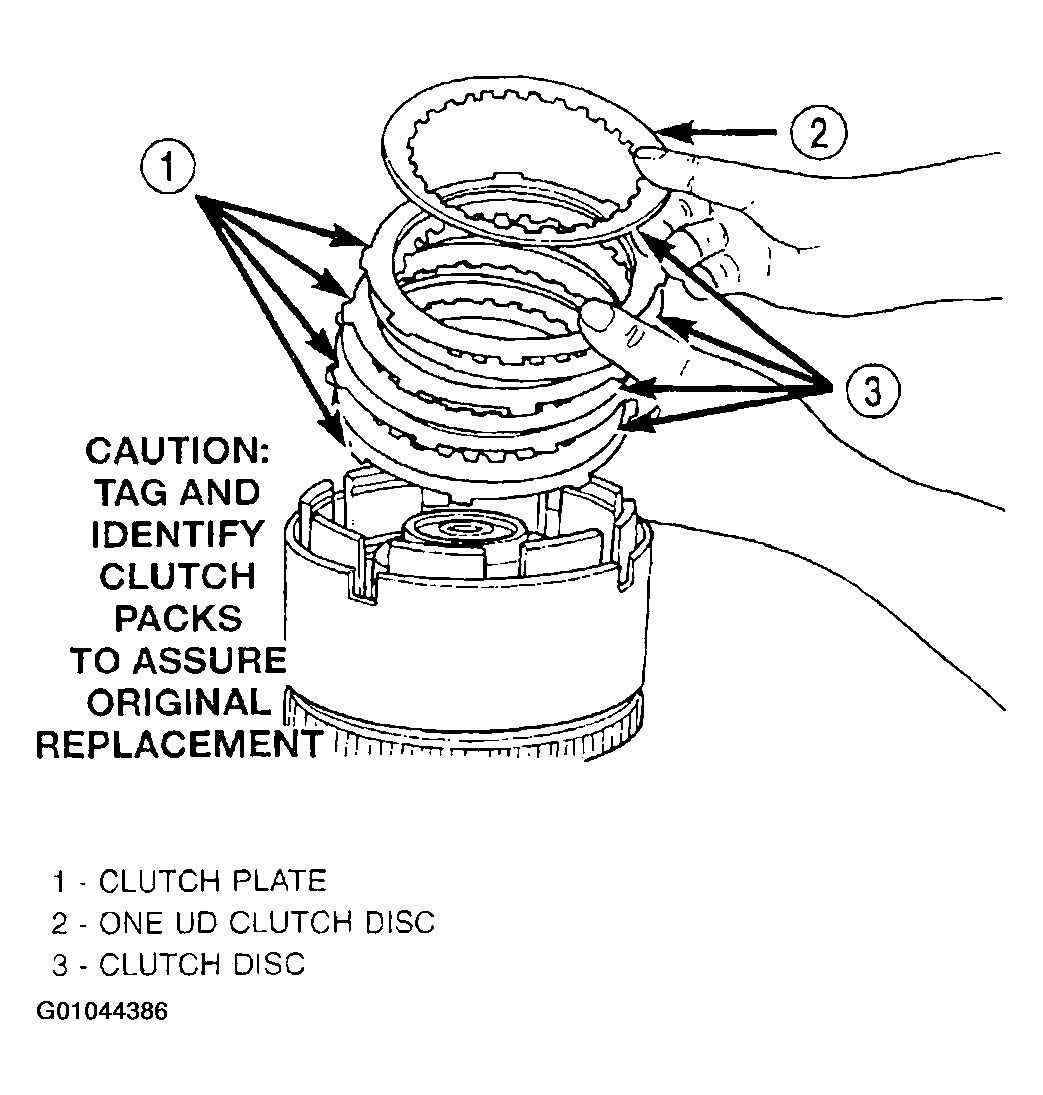 Courtesy of DAIMLERCHRYSLER CORP.
CAUTION:
Compress return spring just enough to remove or install snap ring.
- Using Tool 5059A and an arbor press, compress UD clutch piston enough to remove snap ring (Fig 19) (Fig 20).
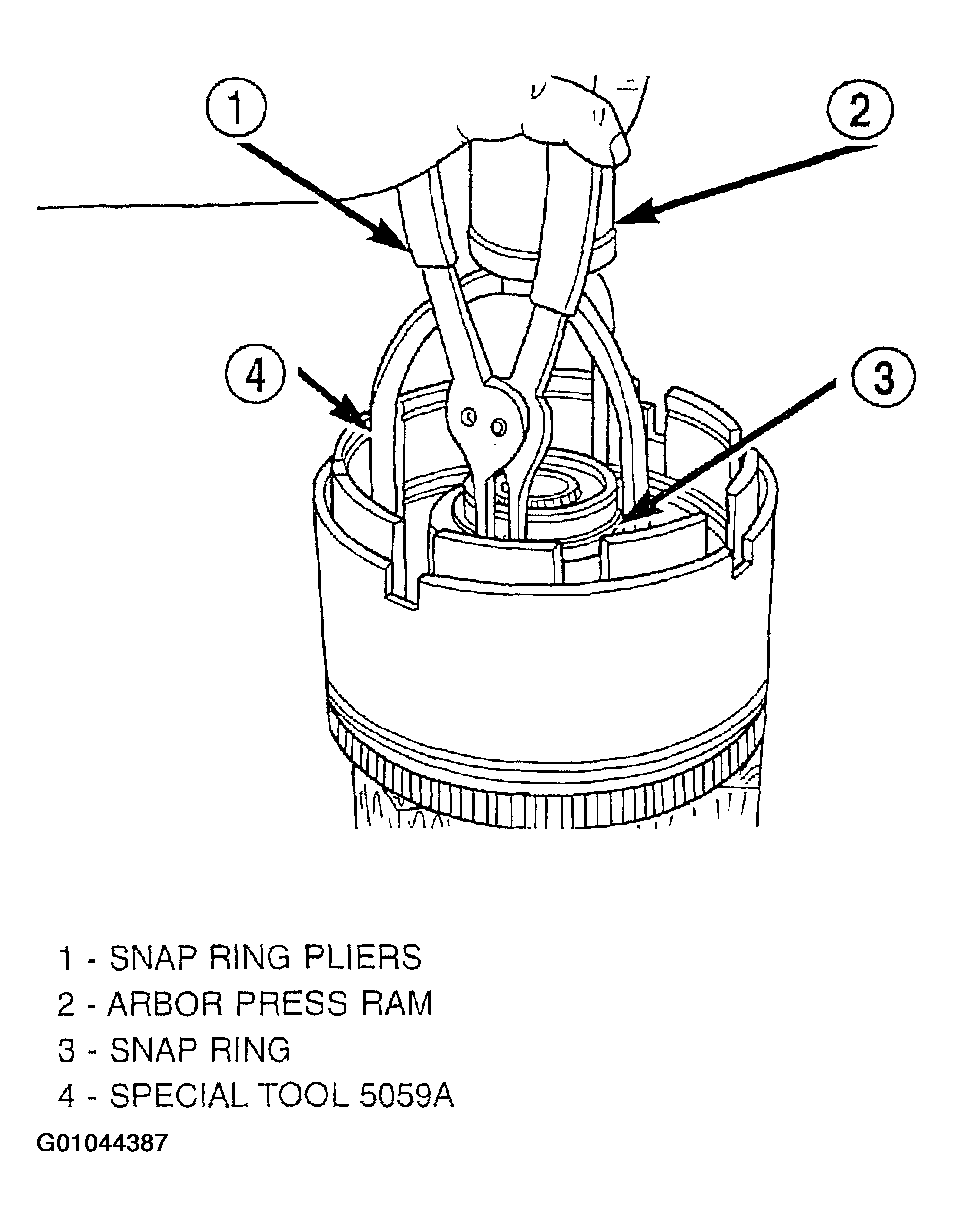 Courtesy of DAIMLERCHRYSLER CORP.
- Remove spring retainer (Fig 20).
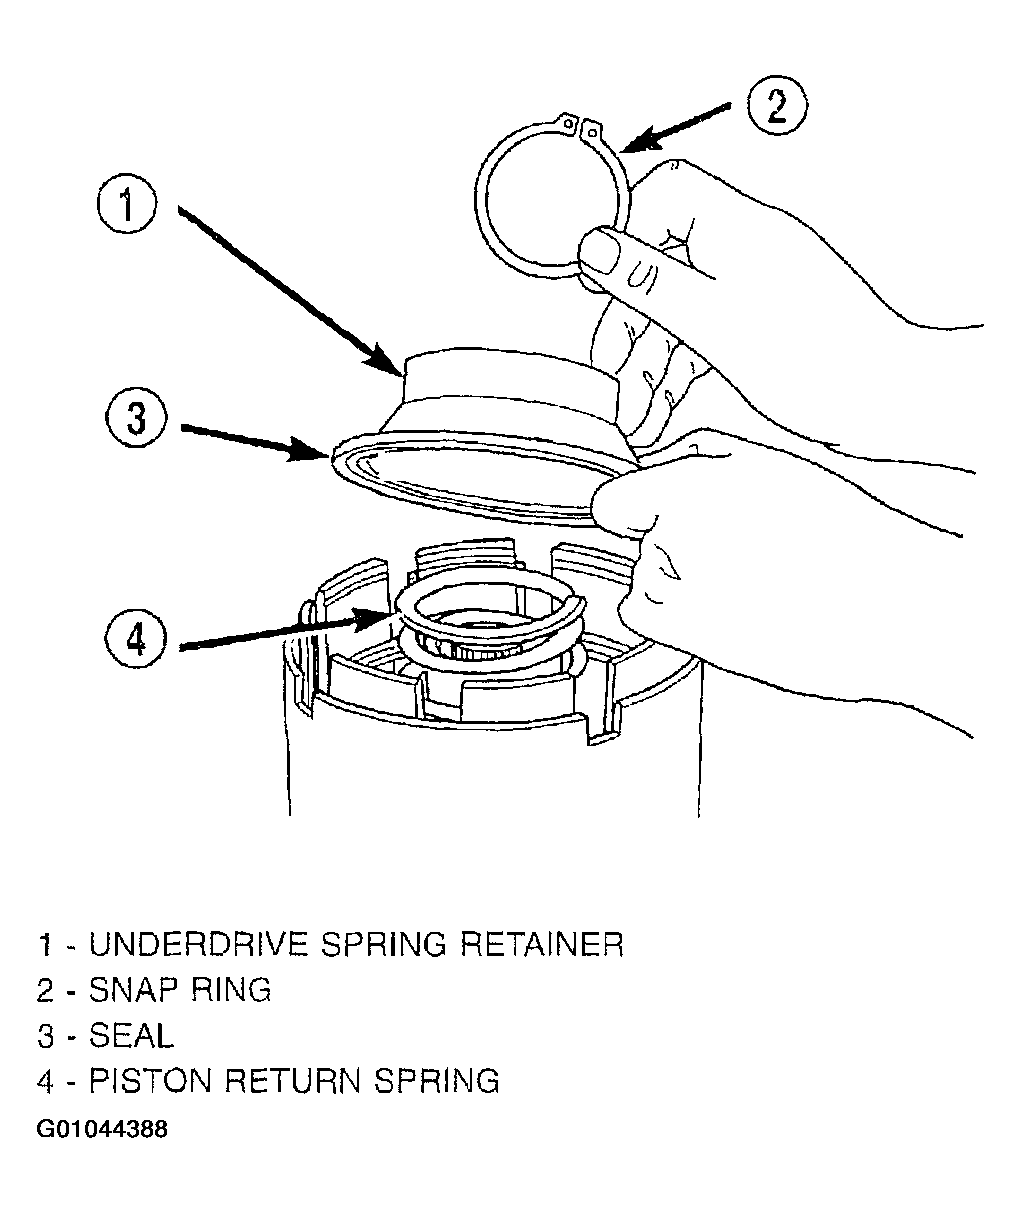 Courtesy of DAIMLERCHRYSLER CORP.
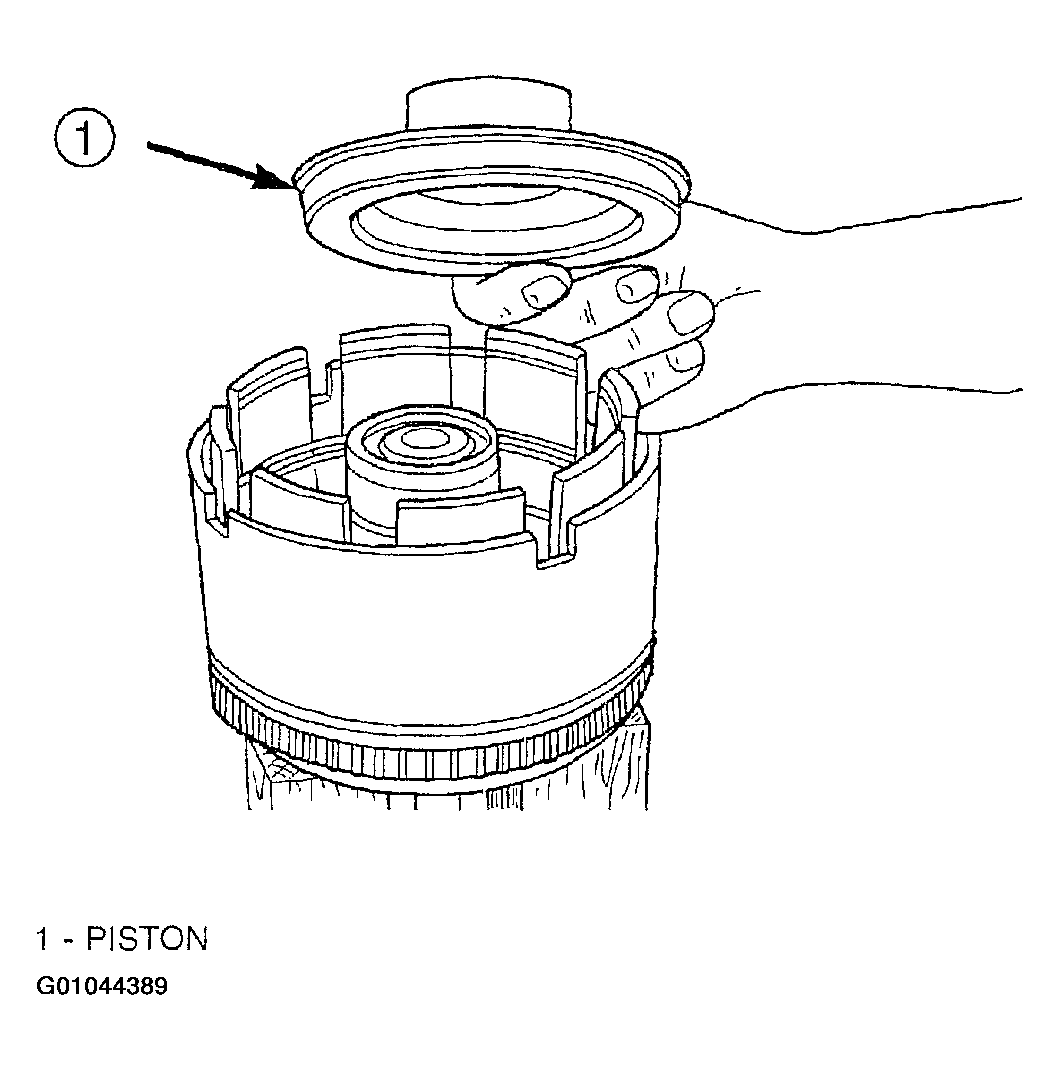
- Remove UD clutch piston (Fig 21).
 Courtesy of DAIMLERCHRYSLER CORP.
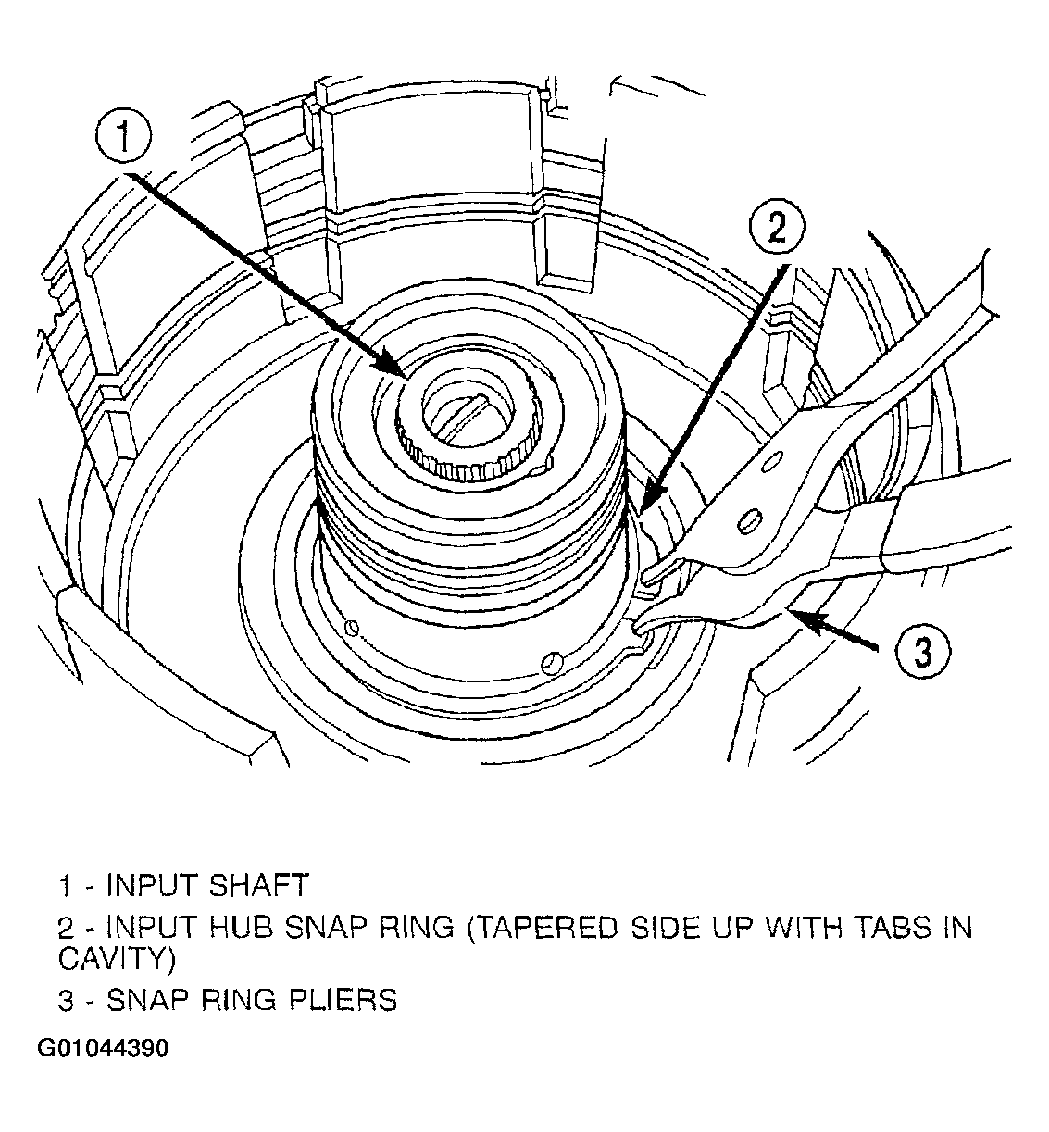
- Remove input hub tapered snap ring (Fig 22).
 Courtesy of DAIMLERCHRYSLER CORP.
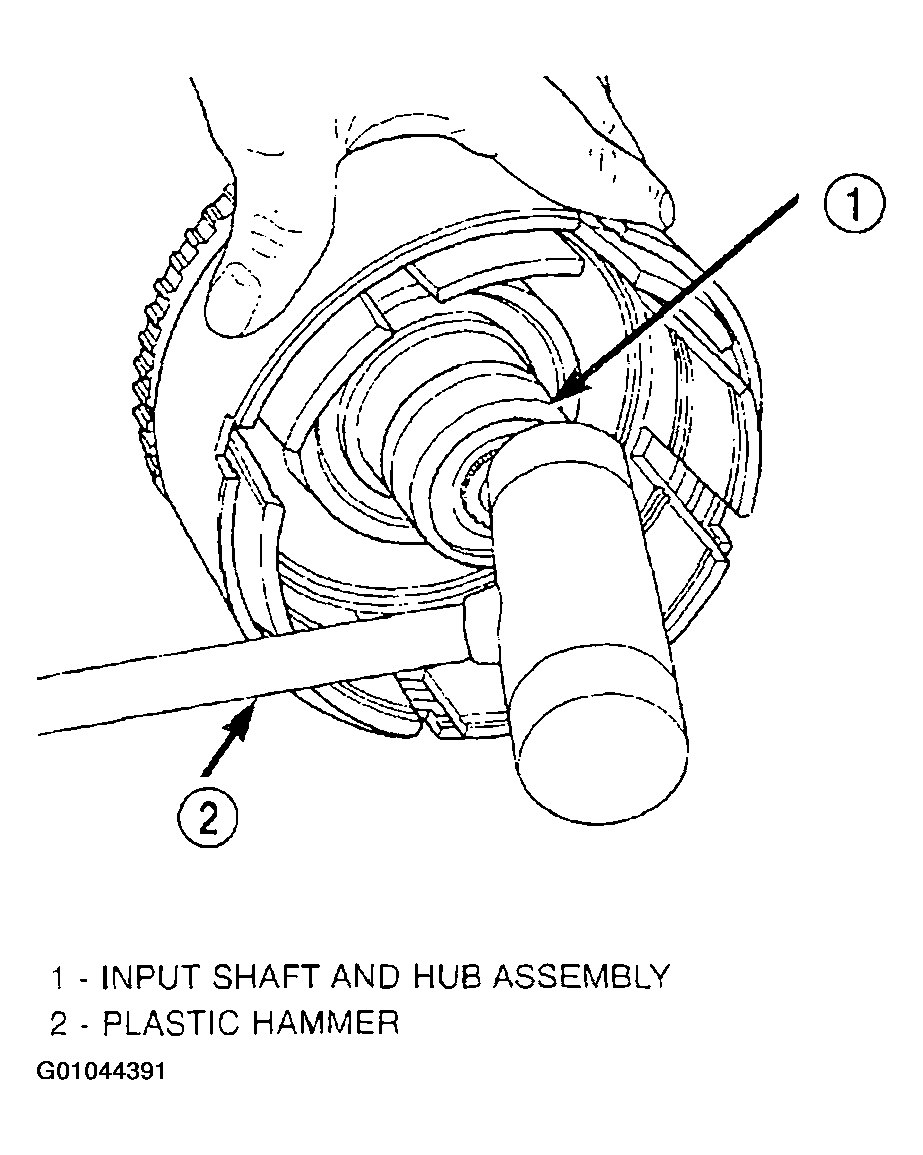
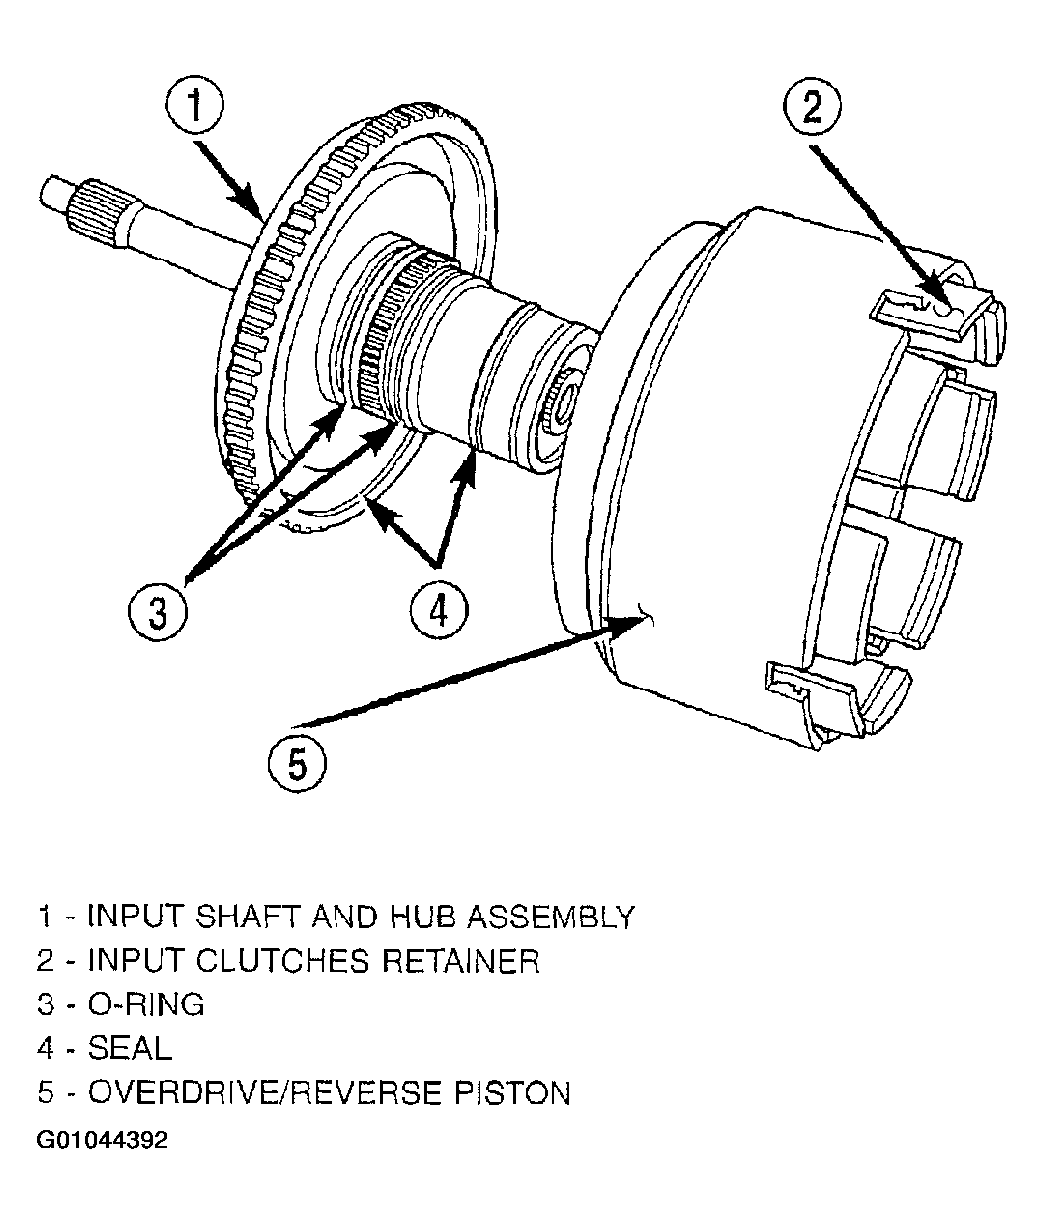
- Tap on input hub with soft faced hammer and separate input hub from OD/Reverse piston and clutch retainer (Fig 23) (Fig 24).
 Courtesy of DAIMLERCHRYSLER CORP.
 Courtesy of DAIMLERCHRYSLER CORP.
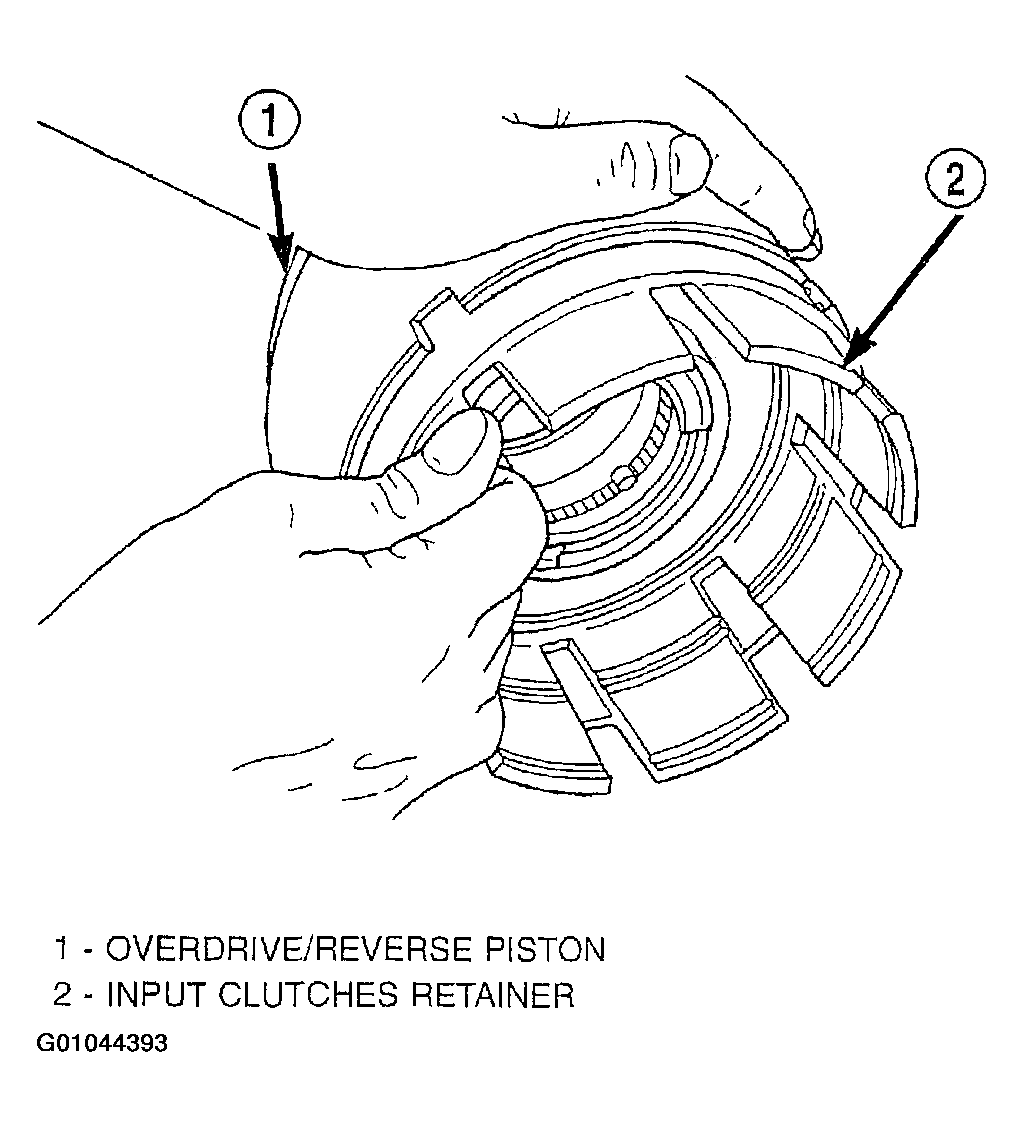
- Separate clutch retainer from OD/Reverse piston (Fig 25).
 Courtesy of DAIMLERCHRYSLER CORP.
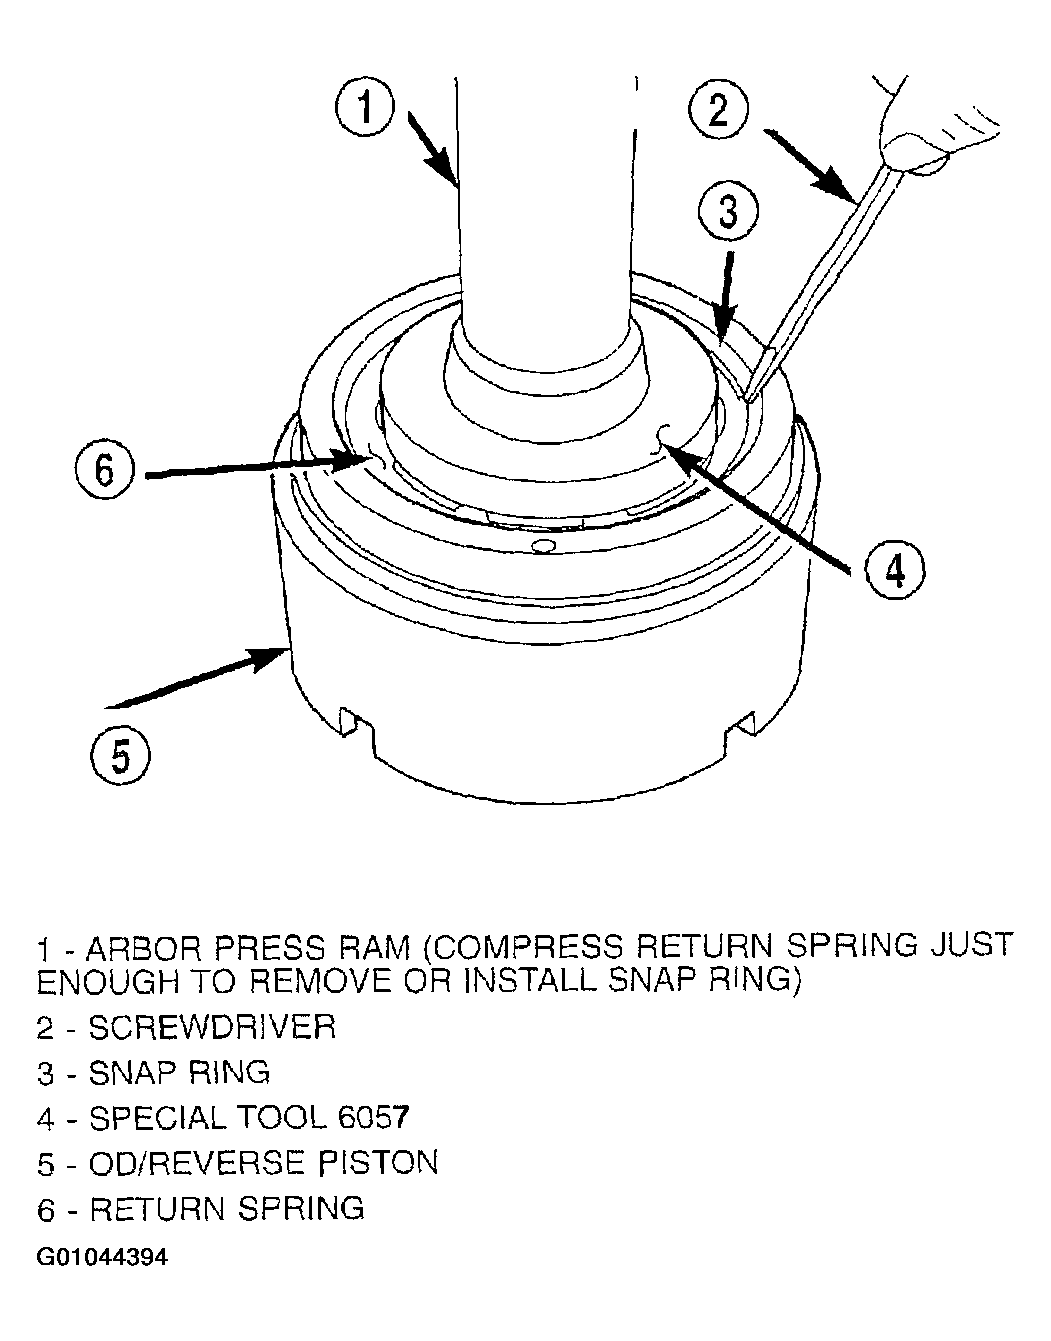
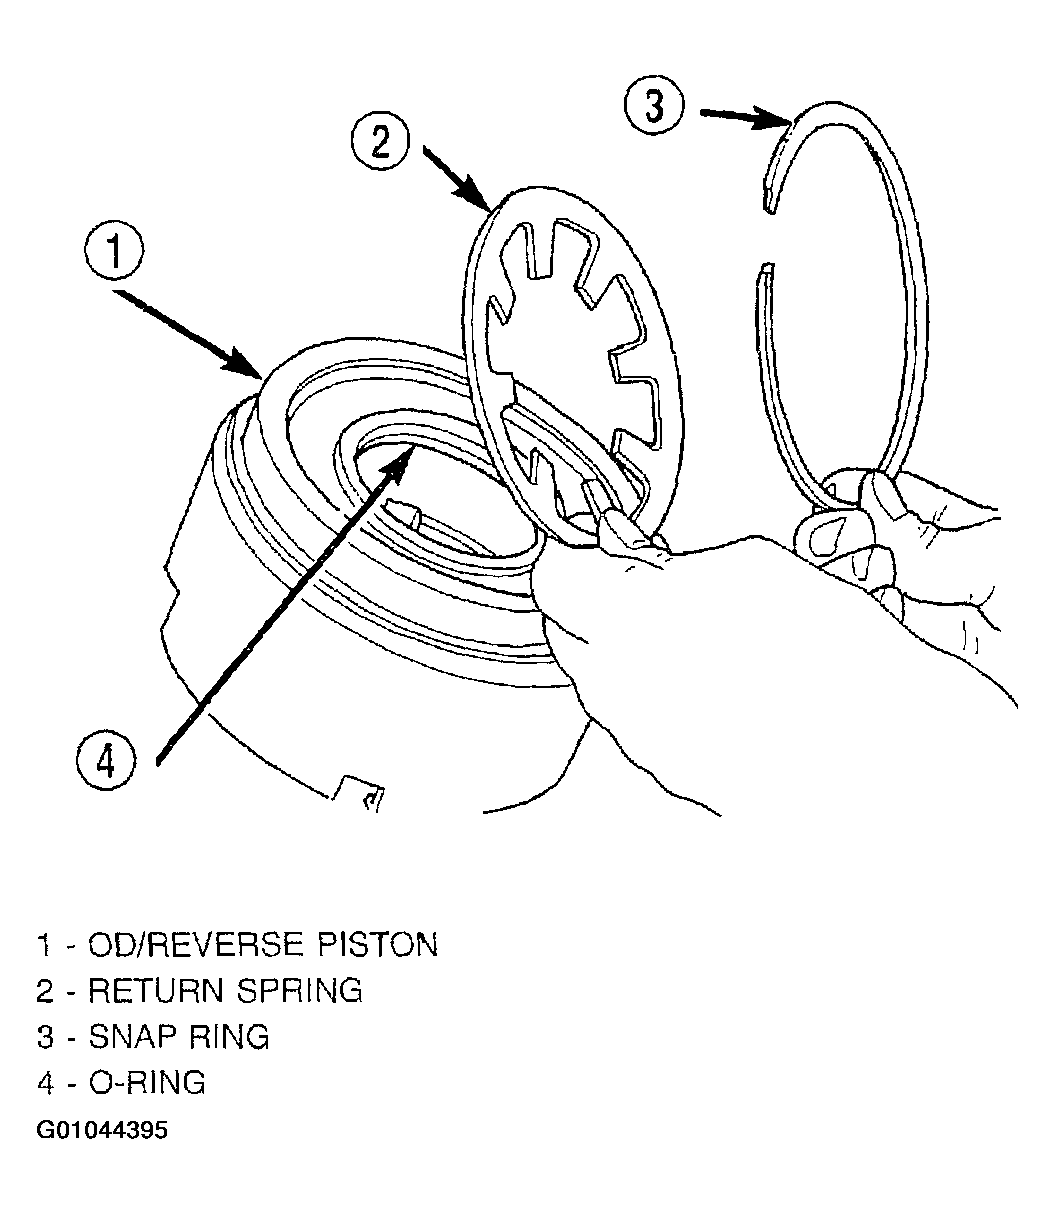
- Using Tool 6057 and an arbor press, compress return OD/Reverse piston return spring just enough to remove snap ring (Fig 26) (Fig 27).
 Courtesy of DAIMLERCHRYSLER CORP.
 Courtesy of DAIMLERCHRYSLER CORP.
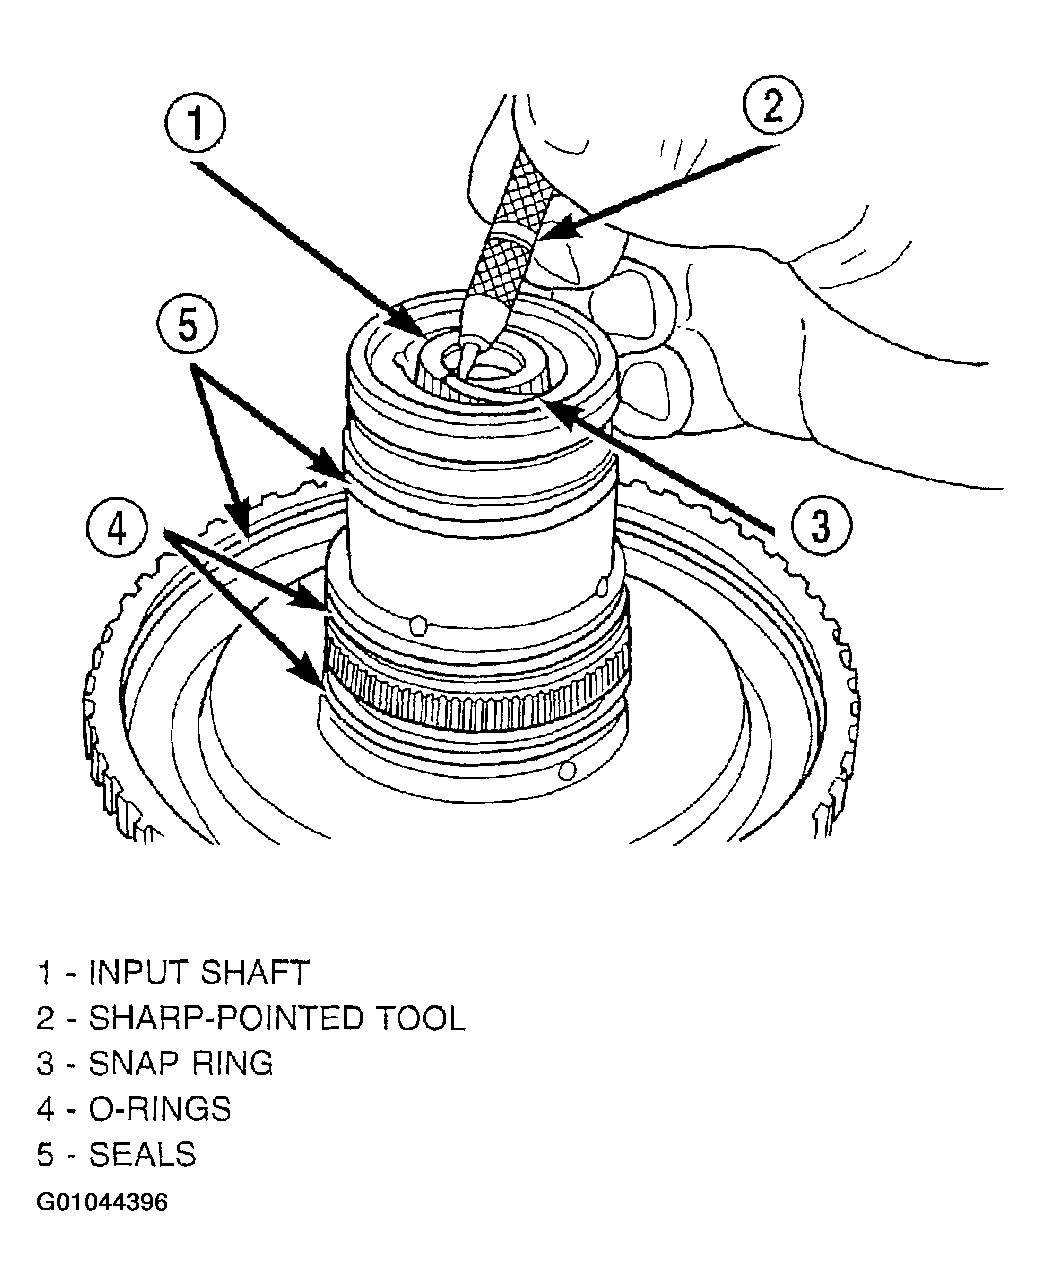
- Remove input shaft to input clutch hub snap ring (Fig 28).
 Courtesy of DAIMLERCHRYSLER CORP.
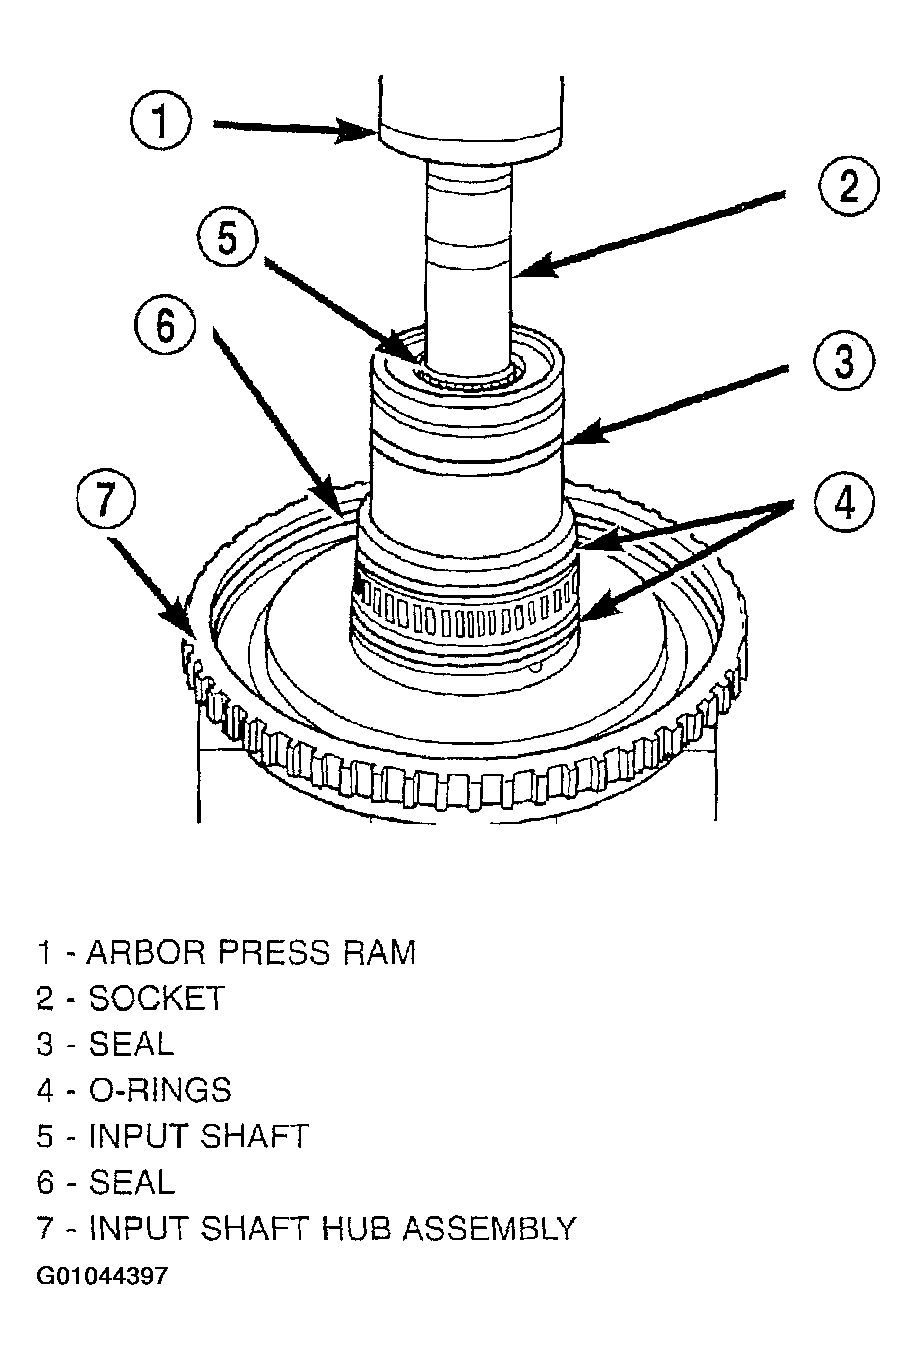
- Using a suitably sized socket and an arbor press, remove input shaft from input shaft hub (Fig 29).
 Courtesy of DAIMLERCHRYSLER CORP.