- Check torque converter hub and hub drive flats for sharp edges burrs, scratches, or nicks. Polish the hub and flats with 800/1000 grit paper and crocus cloth if necessary. The hub must be smooth to avoid damaging pump seal at installation.
- If a replacement transmission is being installed, transfer any components necessary, such as the manual shift lever and shift cable bracket, from the original transmission onto the replacement transmission.
- Lubricate oil pump seal lip with transmission fluid.
 Courtesy of CHRYSLER LLC
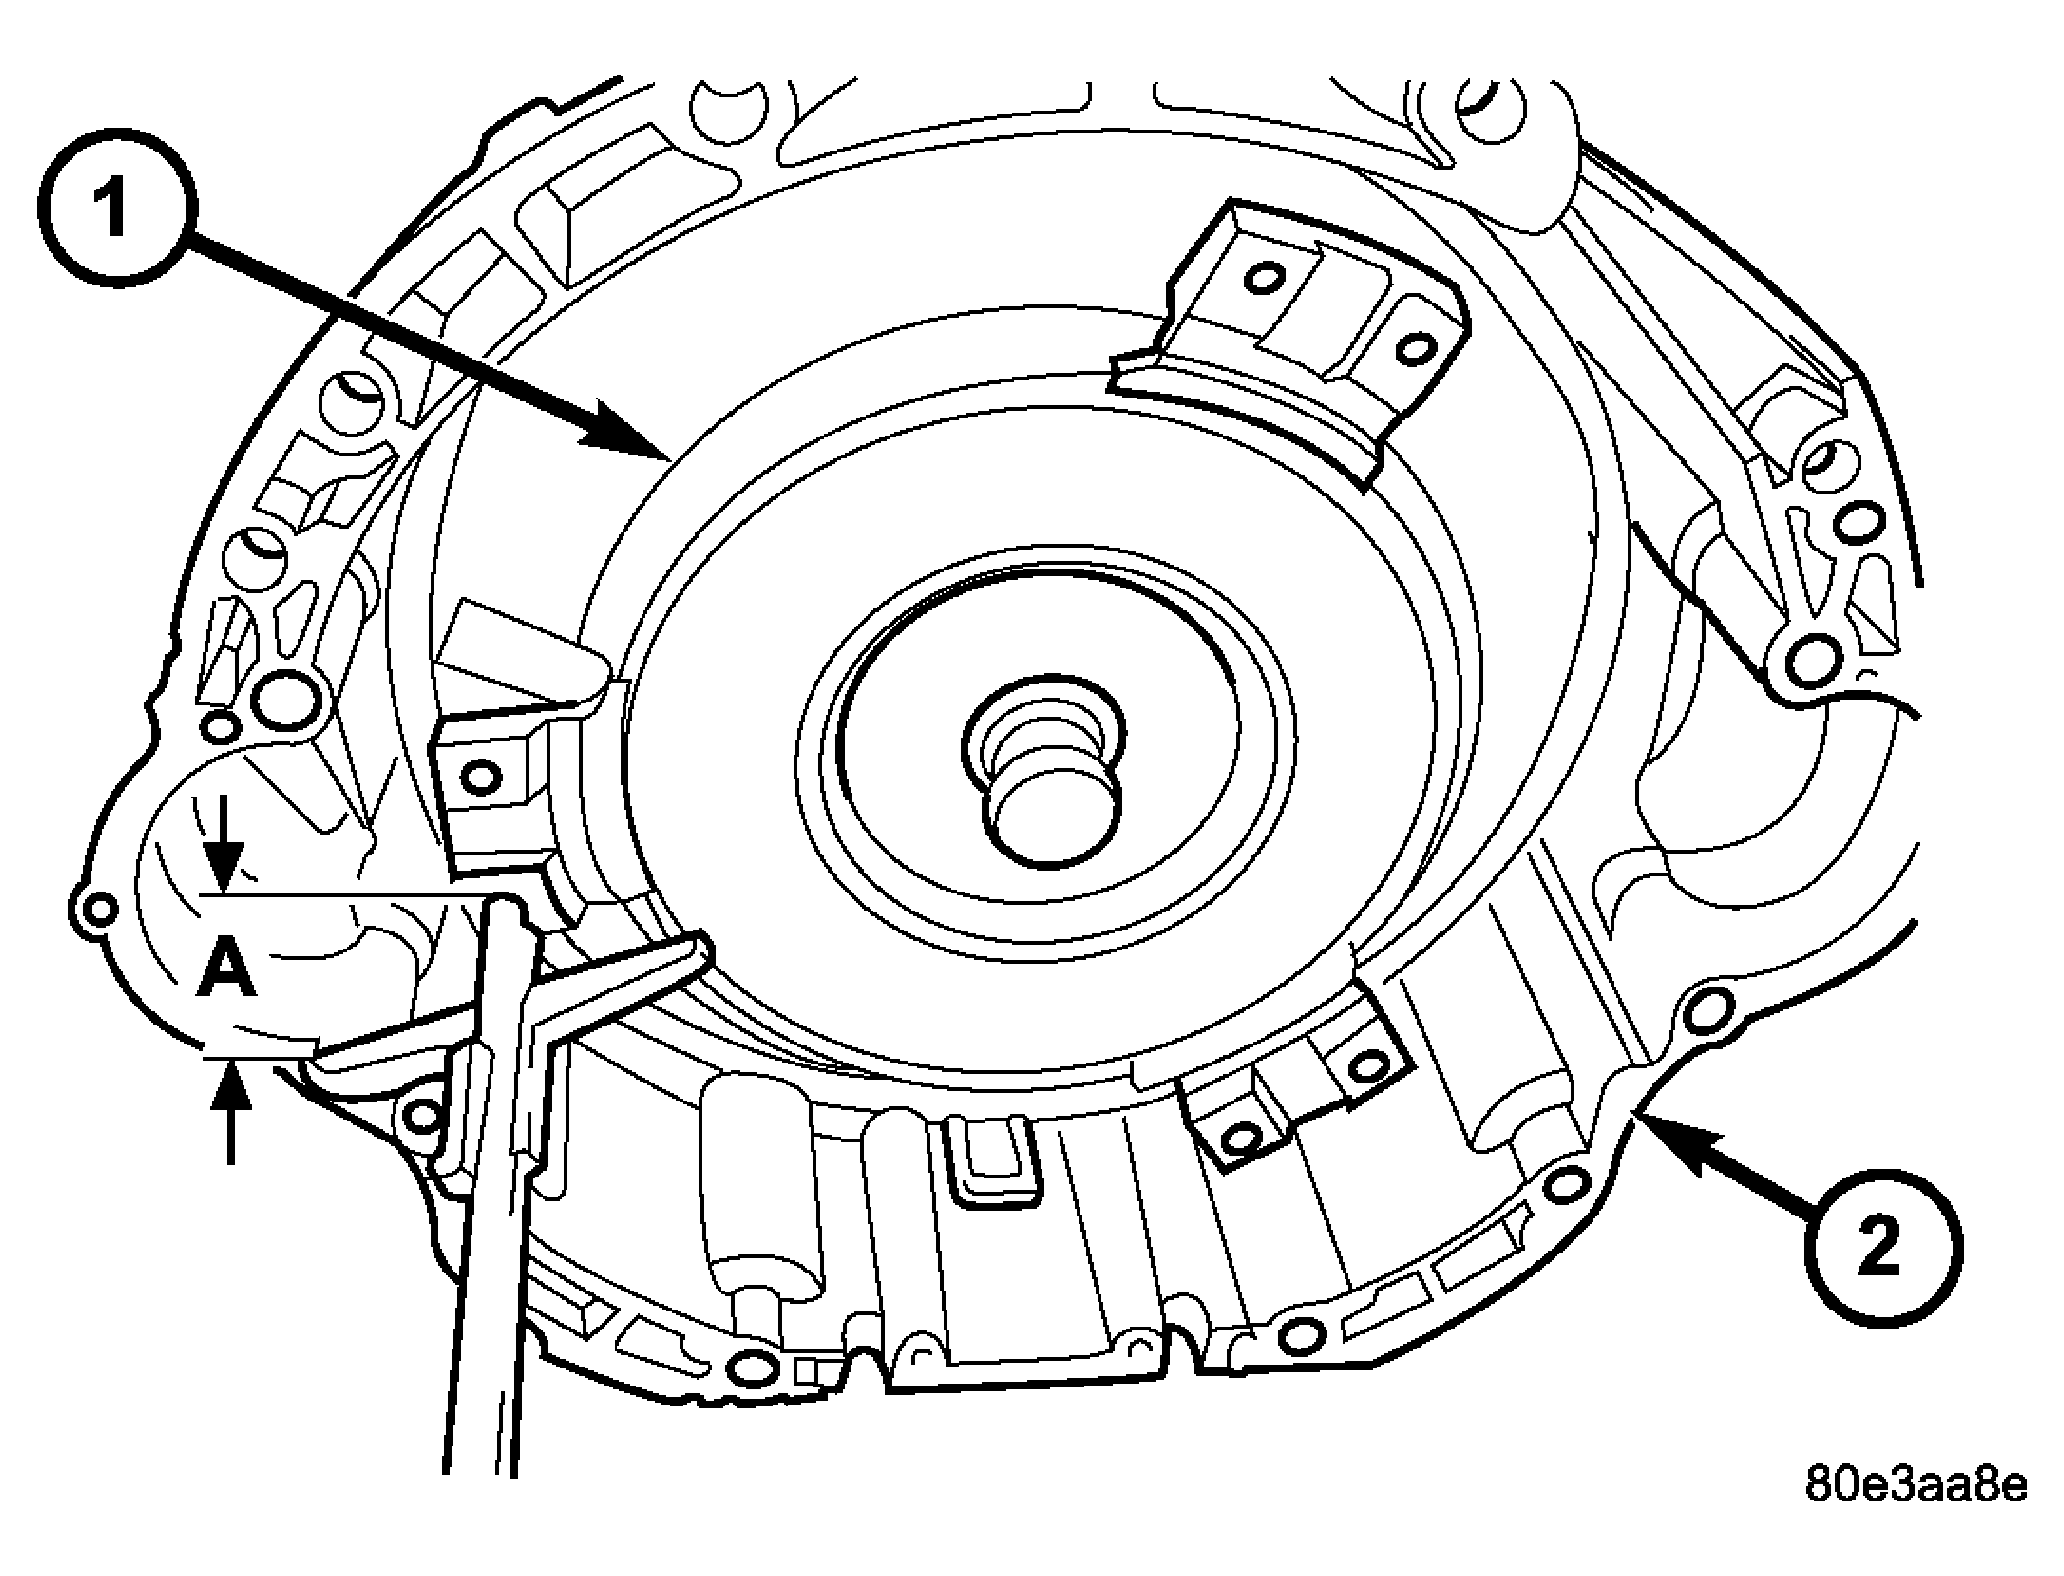
- Place torque converter (1) in position in transmission (2).
CAUTION:
Do not damage oil pump seal or converter hub while inserting torque converter into the front of the transmission.
- Align torque converter to oil pump seal opening.
- Insert torque converter hub into oil pump.
- While pushing torque converter inward, rotate converter until converter is fully seated in the oil pump gears.
- Check converter seating with a scale and straightedge (A). Surface of converter lugs should be at least 19 mm (3/4 in.) to rear of straightedge when converter is fully seated.
- If necessary, temporarily secure converter with C-clamp attached to the converter housing.
 Courtesy of CHRYSLER LLC
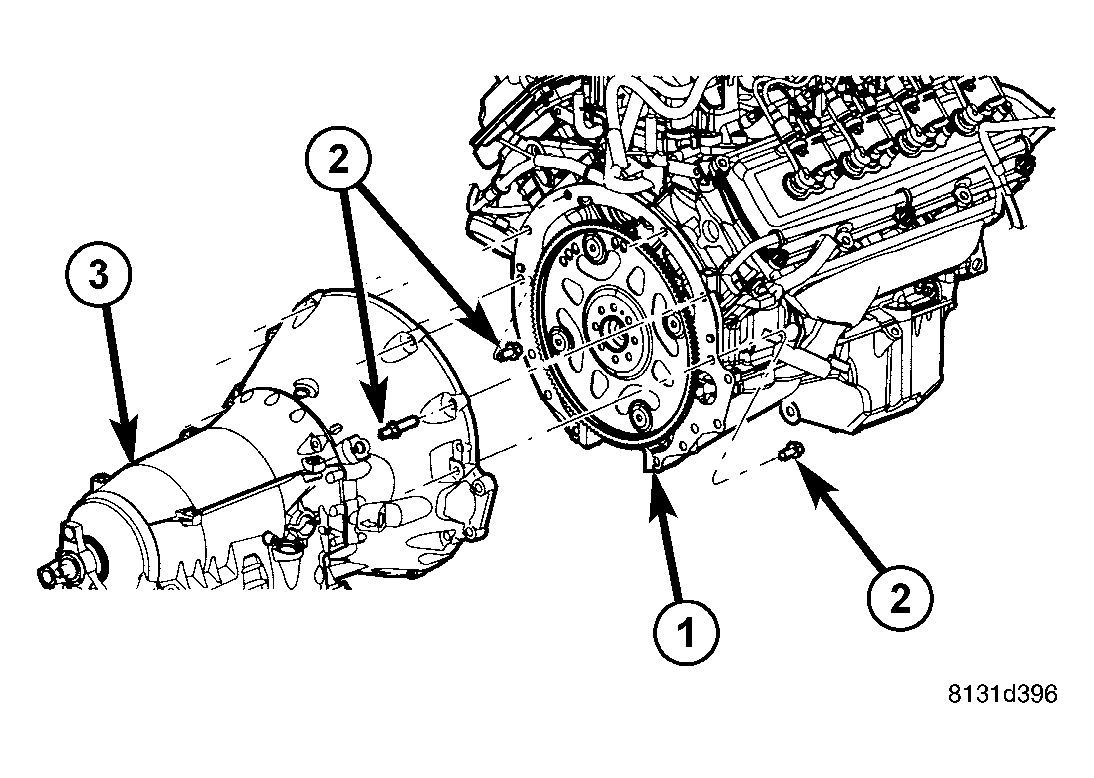
- Check condition of converter driveplate. Replace the plate if cracked, distorted or damaged. Also be sure transmission dowel pins are seated in engine block and protrude far enough to hold transmission in alignment.
- Apply a light coating of Mopar® High Temp Grease to the torque converter hub pocket in the rear pocket of the engine's crankshaft.
- Raise transmission (3) and align the torque converter with the drive plate and the transmission converter housing with the engine block (1).
- Move transmission forward. Then raise, lower, or tilt transmission to align the converter housing with the engine block dowels.
- While installing the fill tube into the transmission case, carefully work transmission forward and over engine block dowels until converter hub is seated in crankshaft. Verify that no wires, or the transmission vent hose, have become trapped between the engine block and the transmission.
- Install two torque converter housing bolts (2) to attach the transmission to the engine.
- Install remaining to engine bolts (2). Tighten to 39 N.m (29 ft.lbs.).
- Install the fill tube bolt at the transmission case. Tighten the bolt to 12 N.m (105 lbs in.).
 Courtesy of CHRYSLER LLC
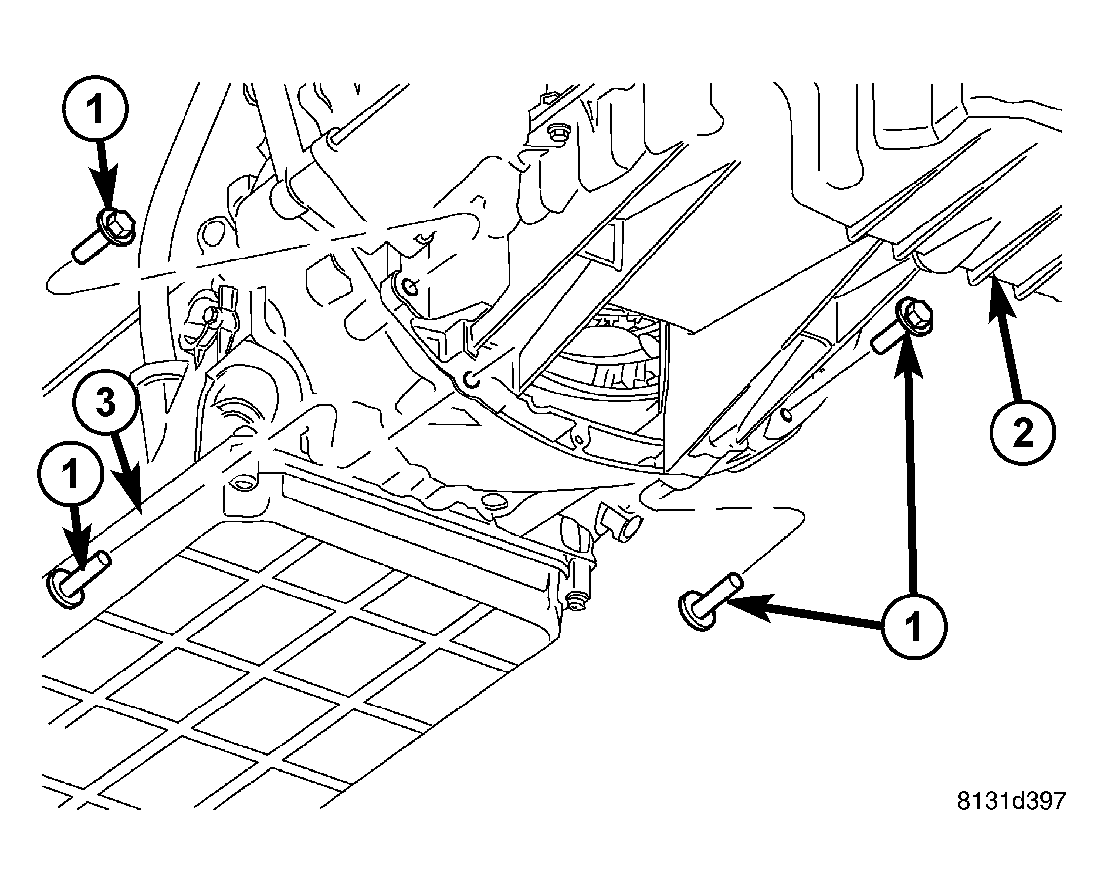
- Install the transmission (3) to engine oil pan (2) bolts (1). Tighten to 39 N.m (29 ft.lbs.).
 Courtesy of CHRYSLER LLC
CAUTION:
It is essential that correct length bolts be used to attach the converter to the driveplate. Bolts that are too long will damage the clutch surface inside the converter.
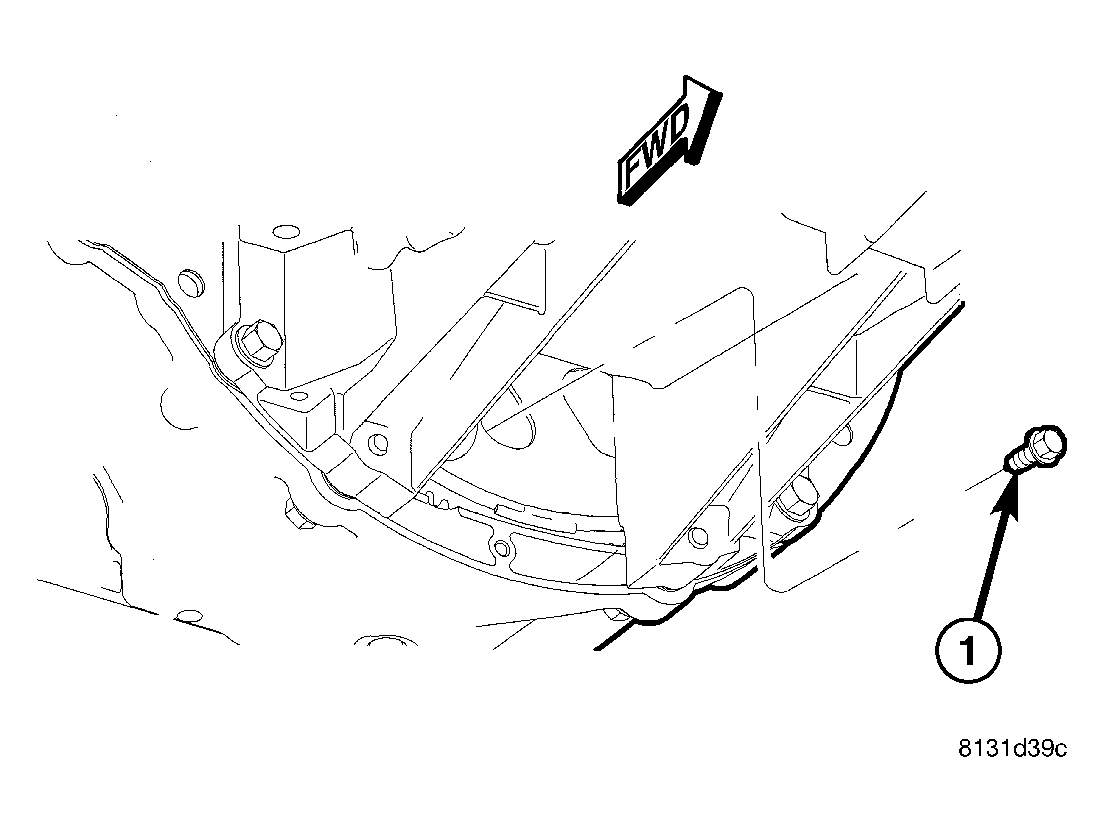
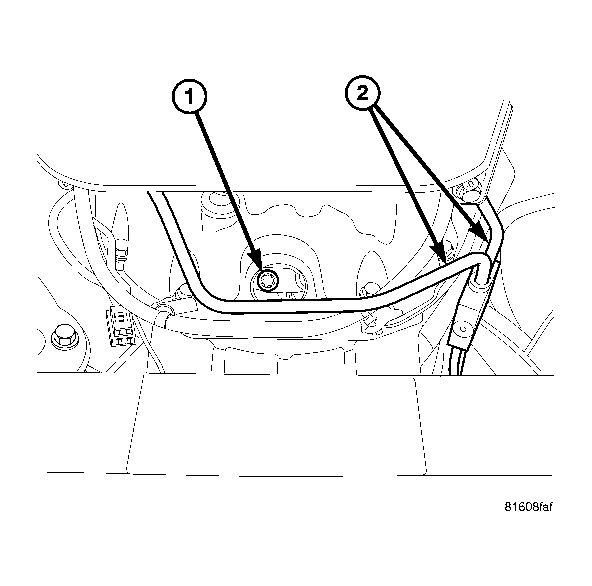
- For gas engines, install all torque converter-to-driveplate bolts (1) by hand.
- Verify that the torque converter is pulled flush to the driveplate. Tighten bolts to 42 N.m (31 ft. lbs.).
 Courtesy of CHRYSLER LLC
CAUTION:
It is essential that correct length bolts be used to attach the converter to the driveplate. Bolts that are too long will damage the clutch surface inside the converter.
- For diesel engines, install all torque converter-to-driveplate bolts (1) by hand.
- Verify that the torque converter is pulled flush to the driveplate. Tighten bolts to 42 N.m (31 ft. lbs.).
 Courtesy of CHRYSLER LLC
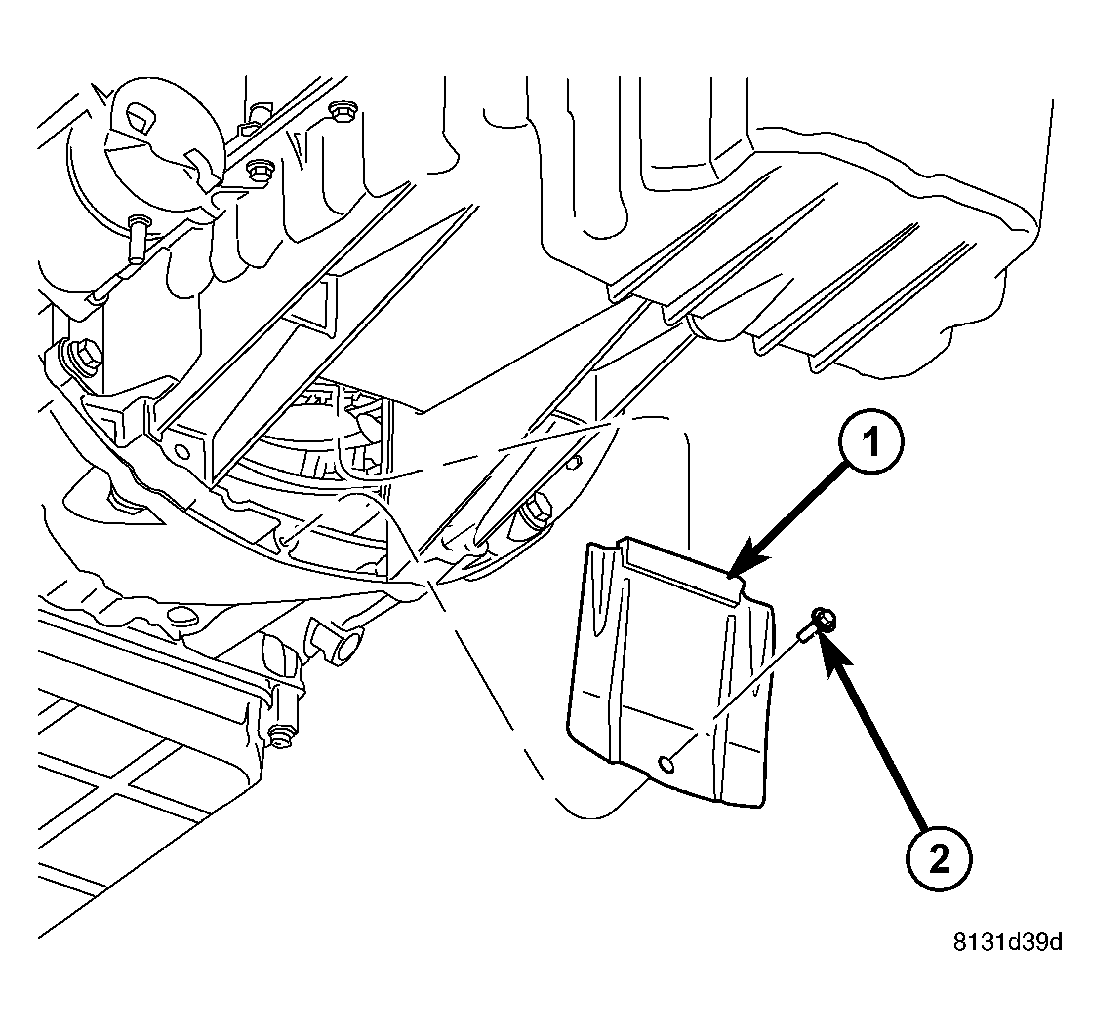
- Install the torque converter bolt access cover (1) onto the transmission. Install the access cover bolt (2) and tighten to 11 N.m (8 ft.lbs.).
 Courtesy of CHRYSLER LLC
NOTE:
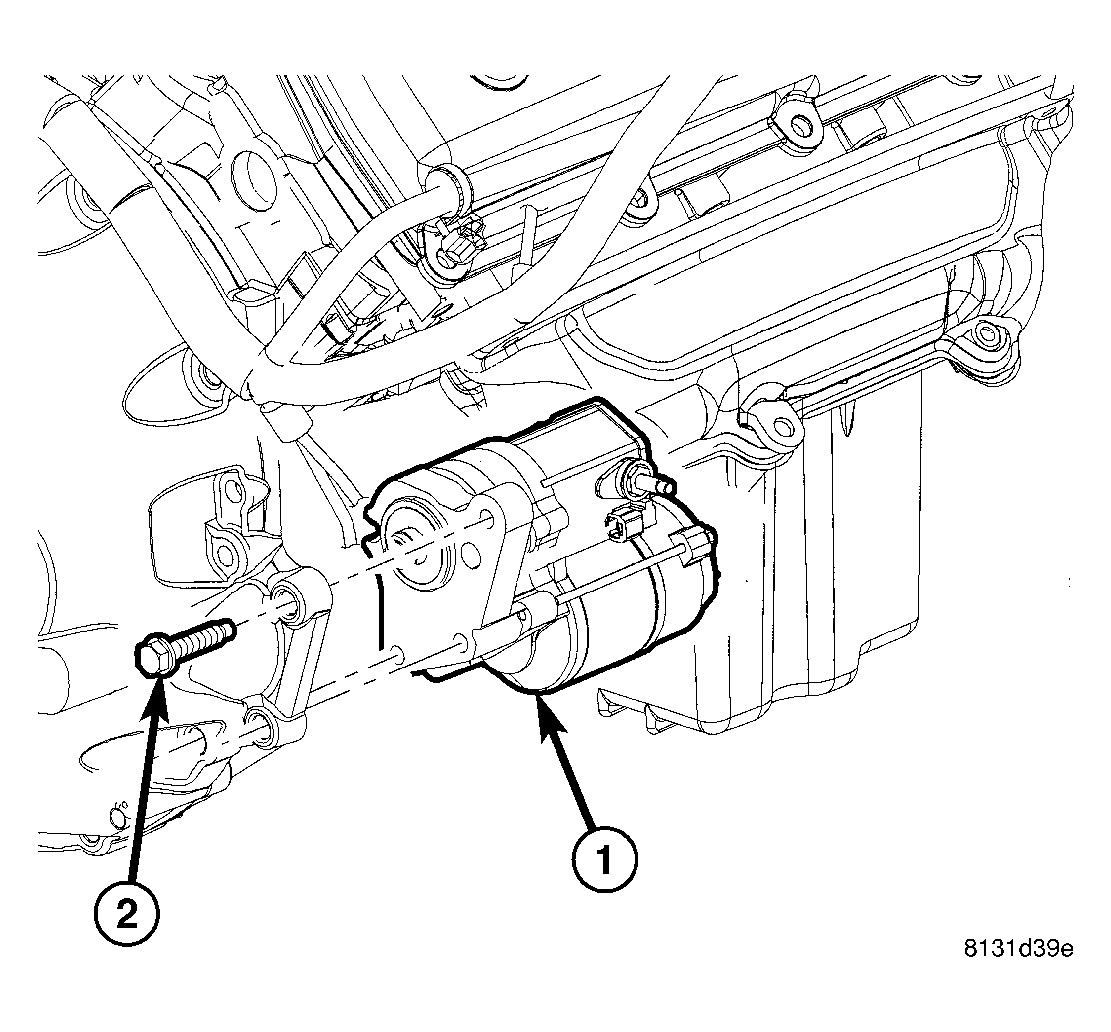
The starters are located on the right side of the transmission for RWD vehicles and they are on the left side for AWD vehicles.
- Install starter motor (1). Refer to INSTALLATION
.
 Courtesy of CHRYSLER LLC
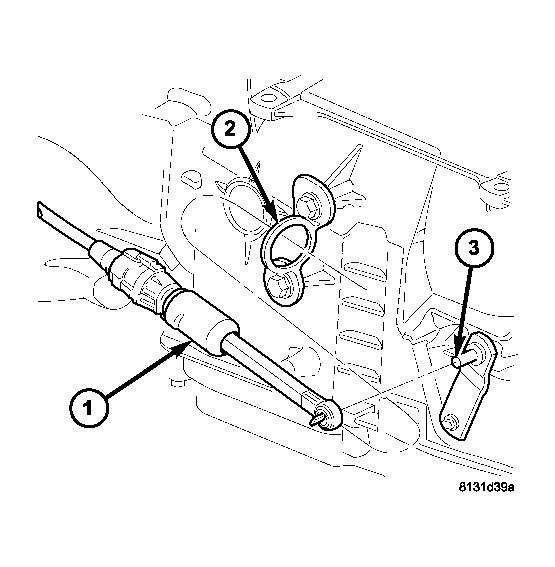
- Connect the gearshift cable (1) to the transmission manual shift lever (3).
 Courtesy of CHRYSLER LLC
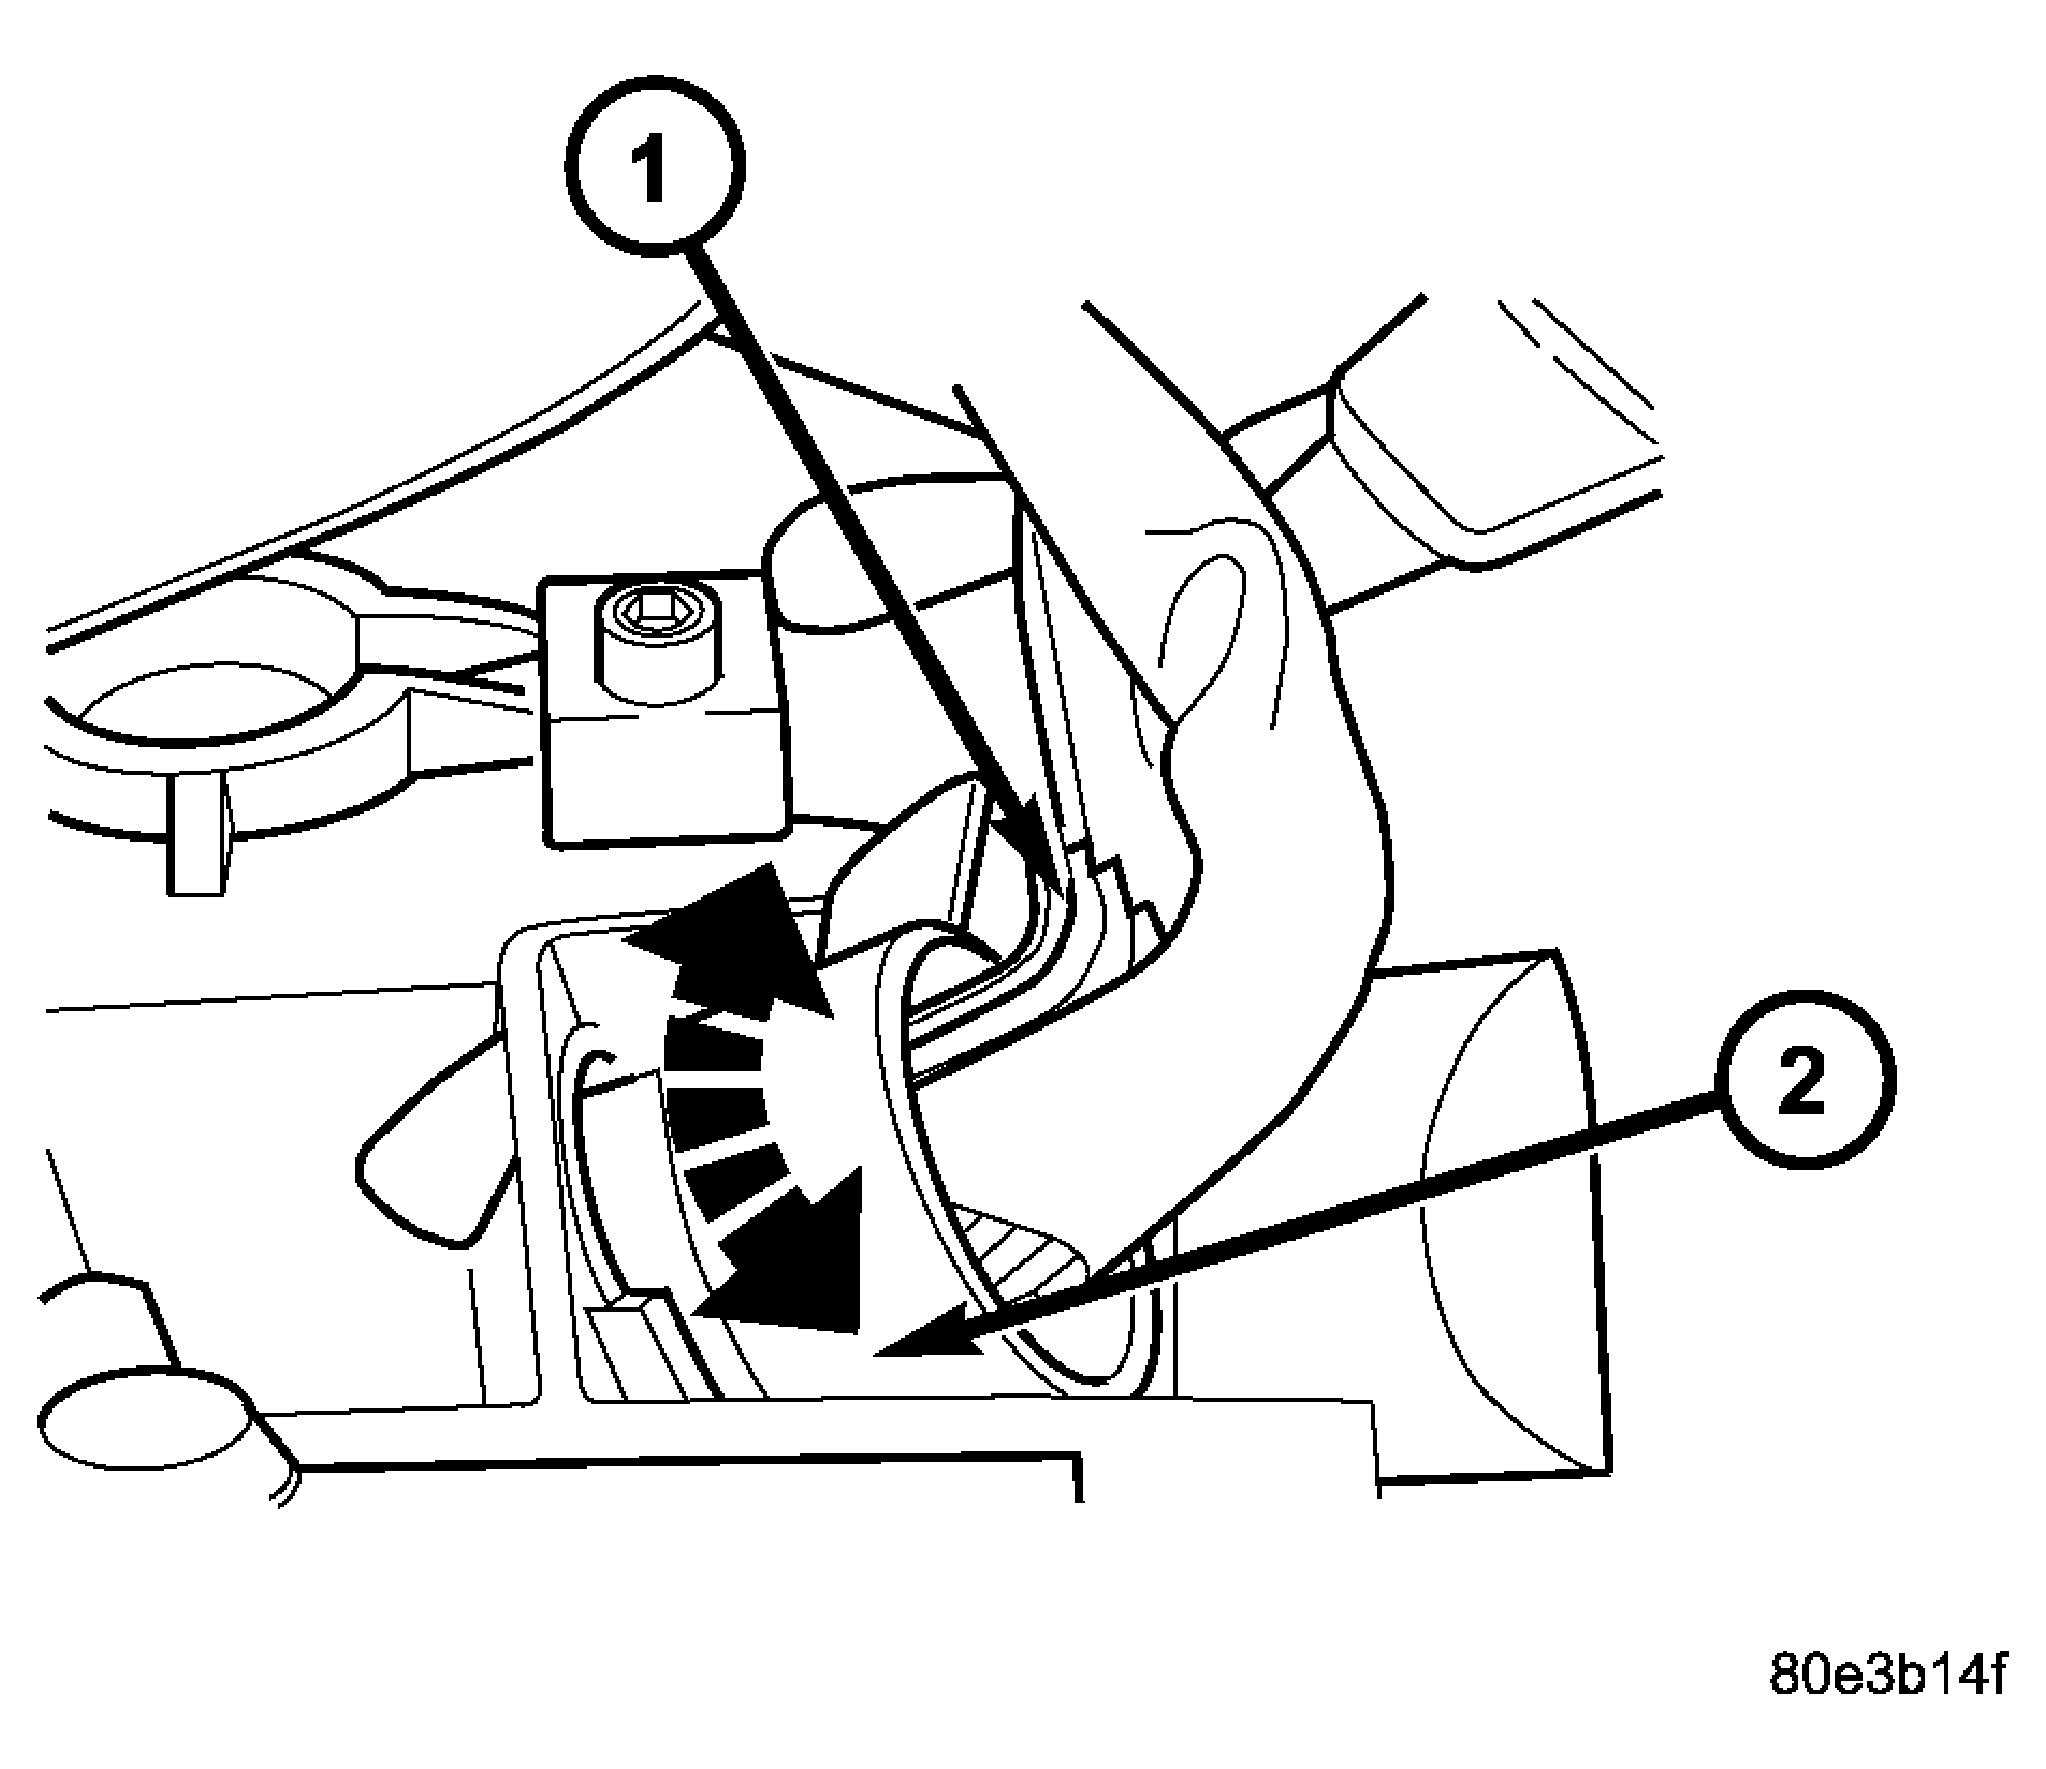
- Check O-rings on plug connector (1), and replace if necessary.
- Install the plug connector (1) into the adapter plug (2). Turn bayonet lock of the adapter plug (2) clockwise to connect plug connector (1).
 Courtesy of CHRYSLER LLC
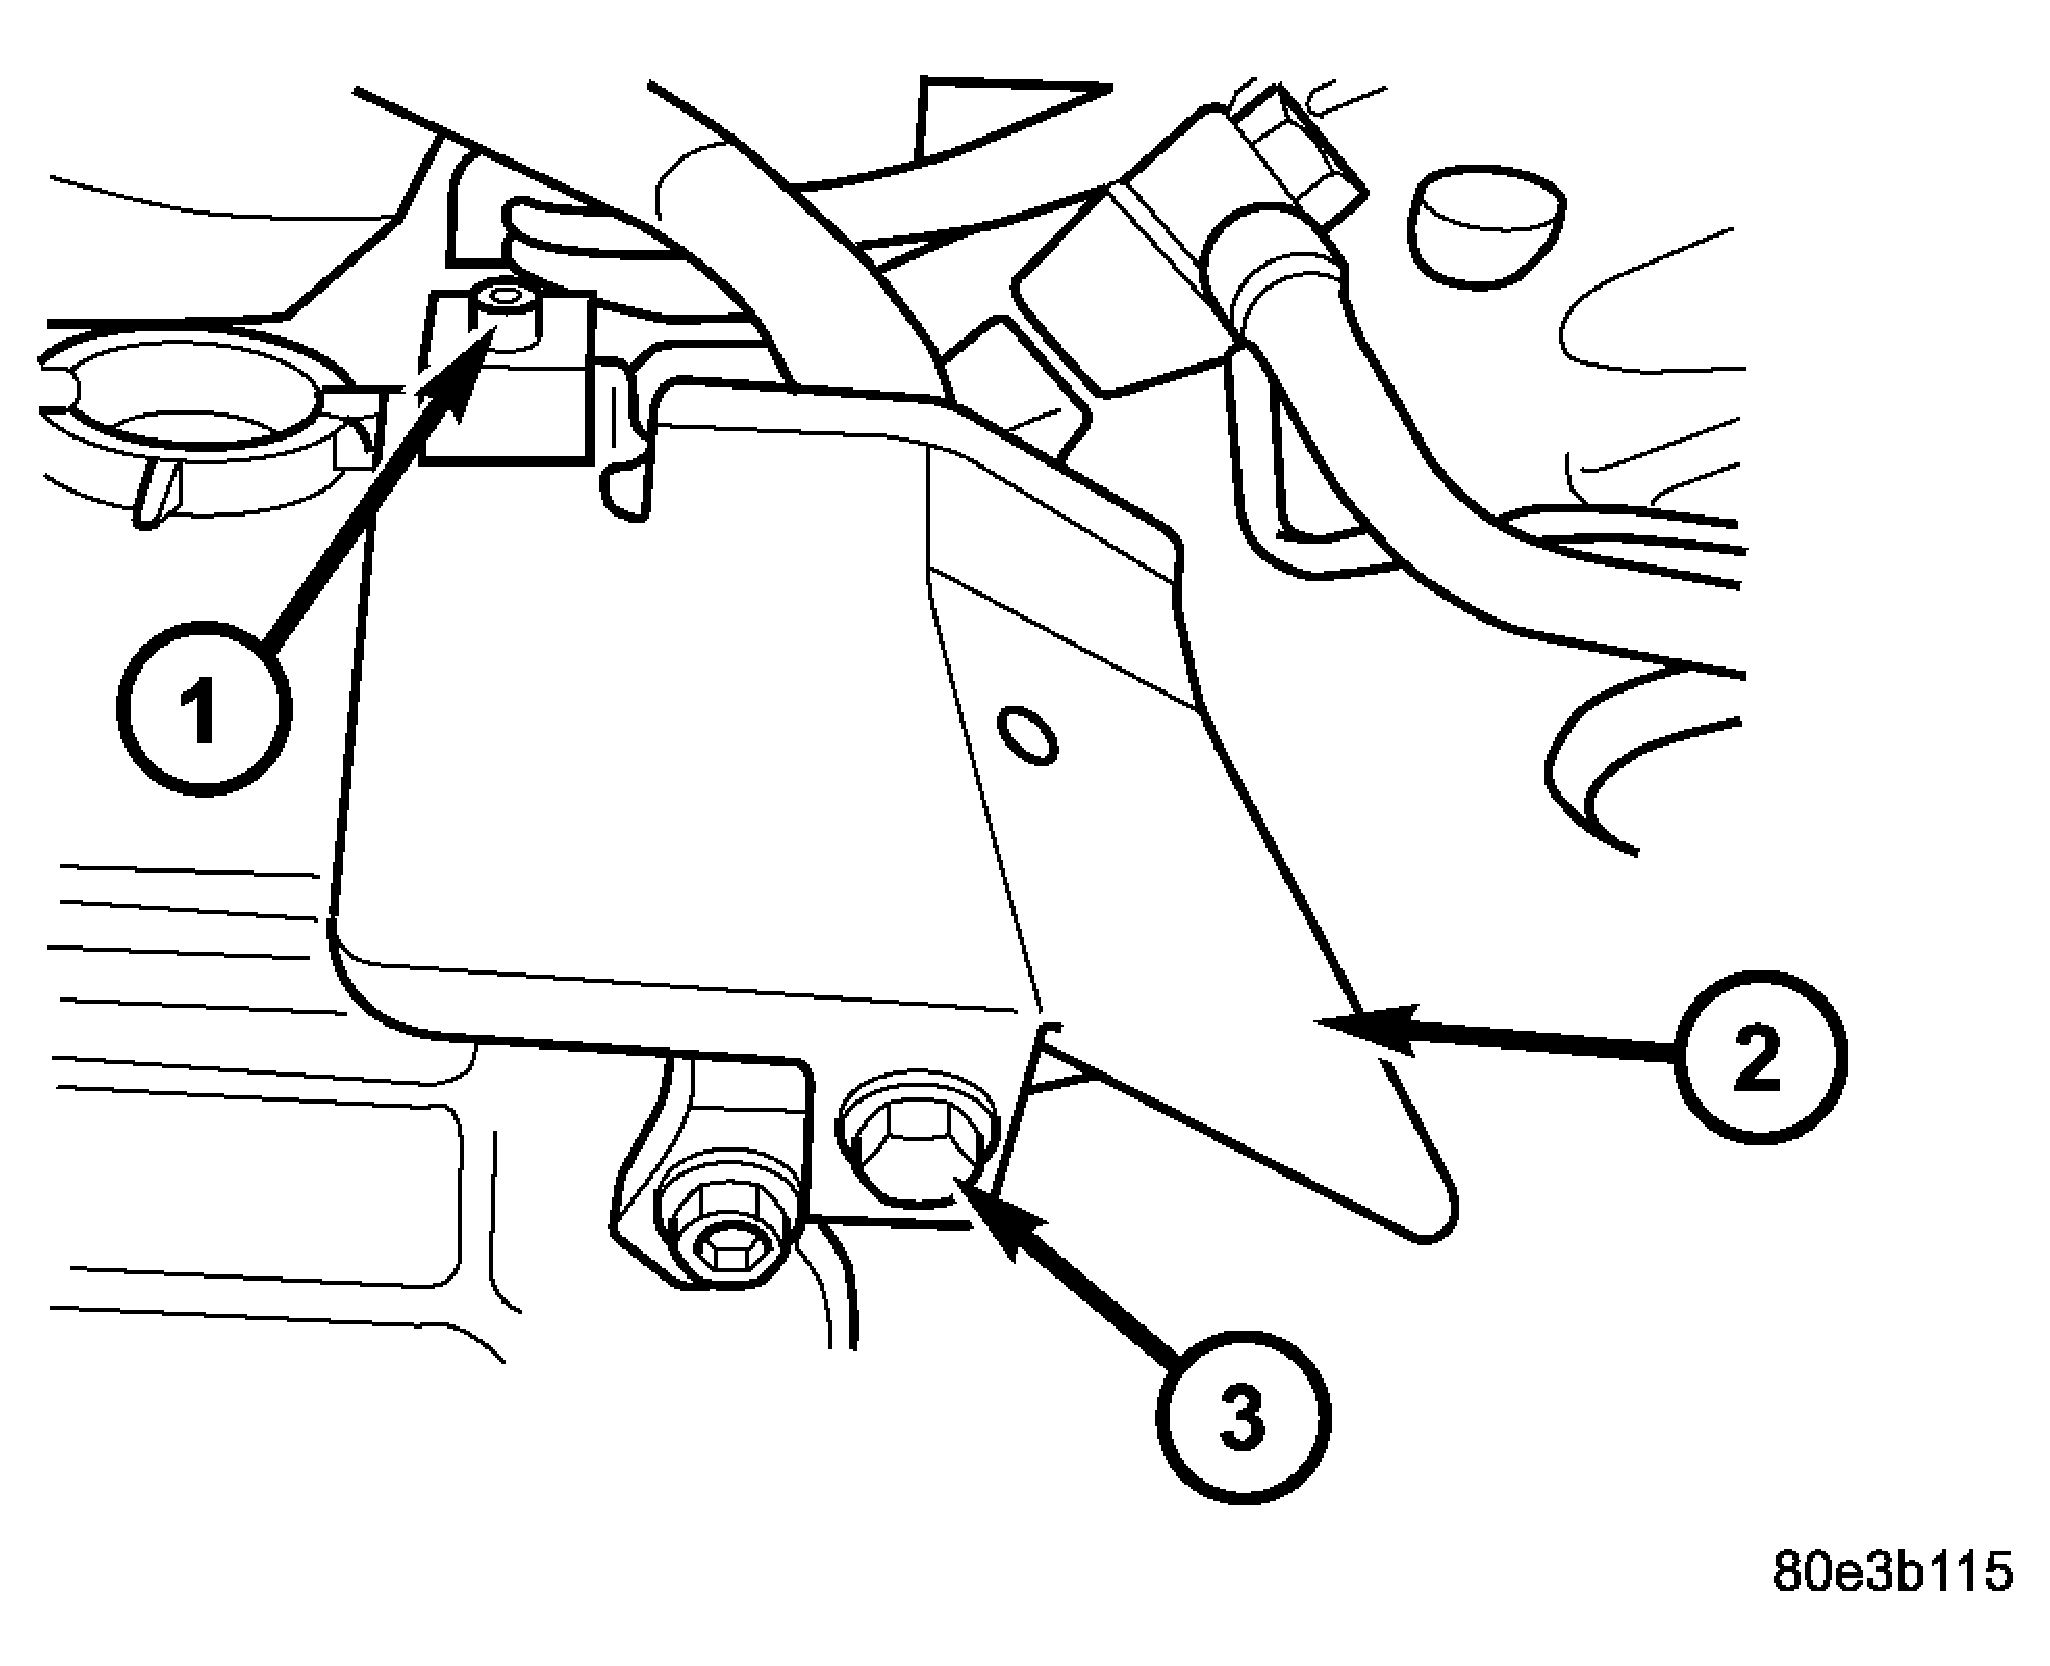
- Position the heat shield (2), if equipped, onto the transmission housing and install the screw (1) and bolt (3) to hold the shield in place.
 Courtesy of CHRYSLER LLC
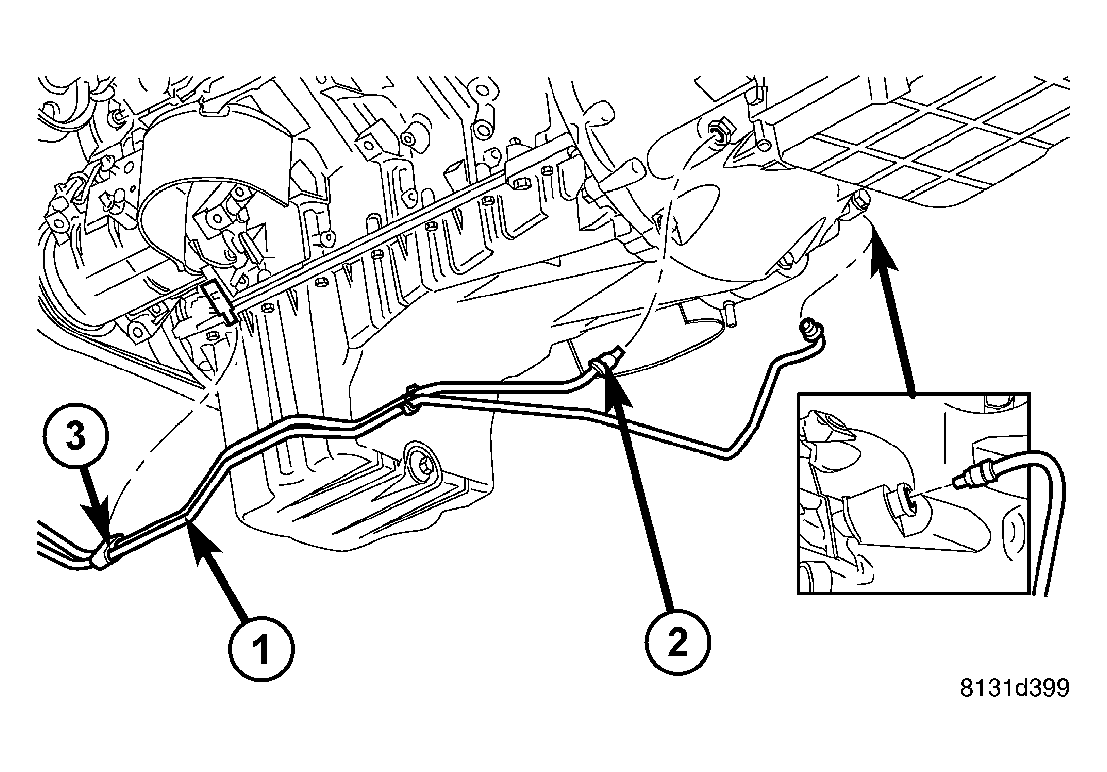
- Connect the cooler line fittings (2) and cooler lines (1) to the transmission.
 Courtesy of CHRYSLER LLC
- For AWD vehicles, install the transfer case. Refer to INSTALLATION
.
- Install the front axle. Refer to INSTALLATION
.
- For RWD vehicles:
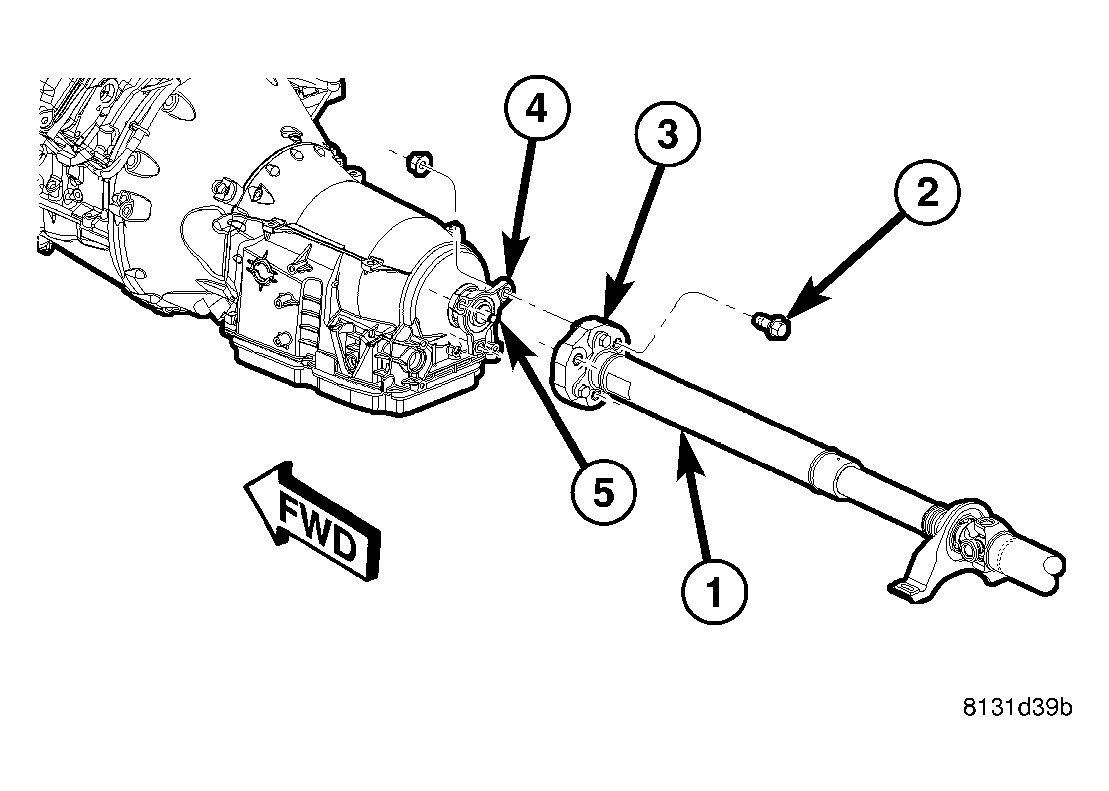
- Align and connect the propeller shaft (1). Refer to INSTALLATION
.
 Courtesy of CHRYSLER LLC
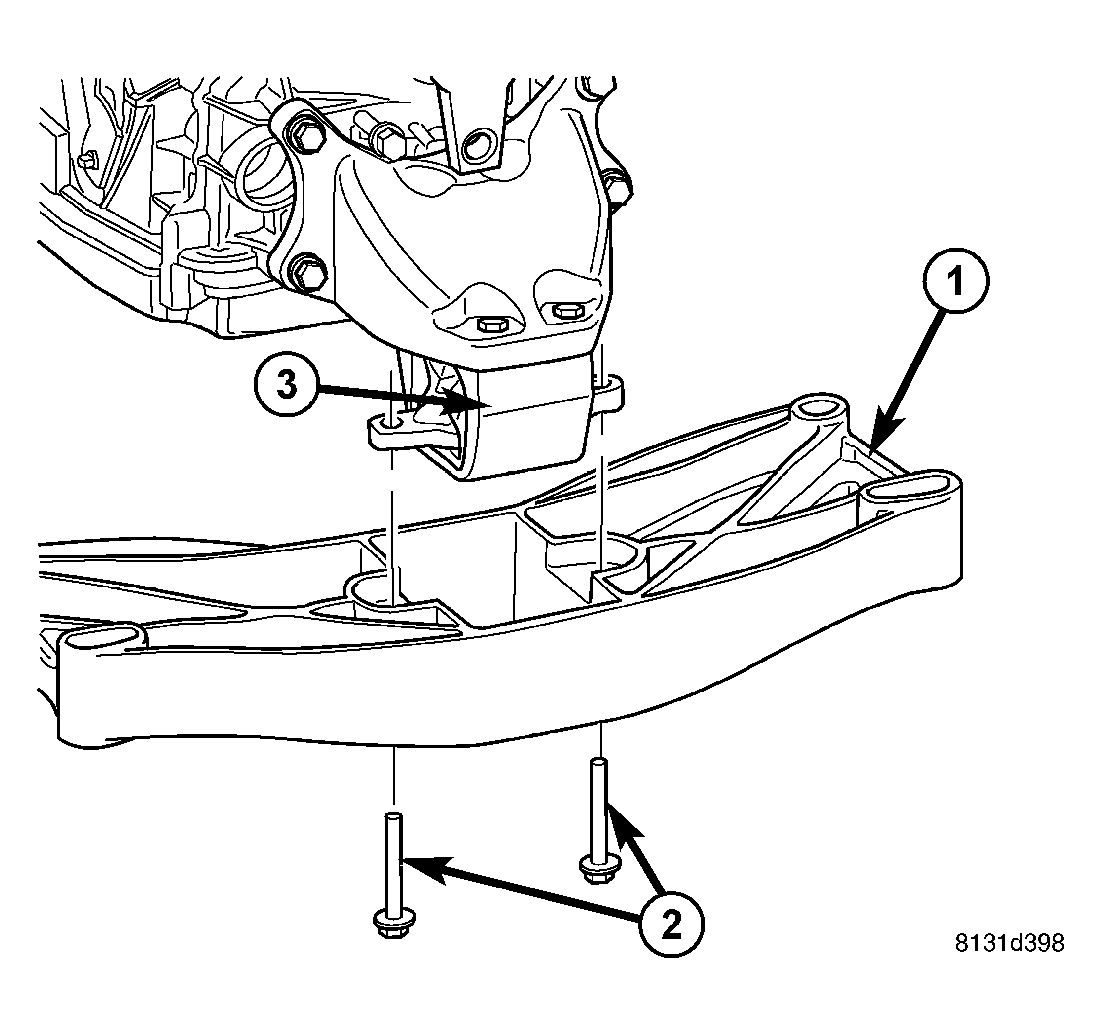
- Install rear support (3) to transmission. Tighten bolts to 47 N.m (35 ft.lbs.)
- Install rear transmission crossmember (1). Tighten crossmember to frame bolts to 68 N.m (50 ft.lbs.).
- Lower transmission onto crossmember and install bolts attaching transmission mount to crossmember. Tighten clevis bracket to crossmember bolts (2) to 47 N.m (35 ft.lbs.).
- Install exhaust components.
- Install any necessary splash shields.
- Adjust gearshift cable if necessary.
- Lower vehicle.
- Connect negative battery cable.
- Fill the transmission with the appropriate transmission fluid according to the standard procedure. See STANDARD PROCEDURE .
NOTE:
If the transmission is being reconditioned (clutch/seal replacement) or replaced, it is necessary to perform the TCM Adaptation Procedure using the scan tool. Refer to STANDARD PROCEDURE
.
- Verify proper operation.