Body & Frame: Windows: Interior/Exterior: Sunroof: Assembly-Module: Installation
 Courtesy of DAIMLERCHRYSLER CORP.
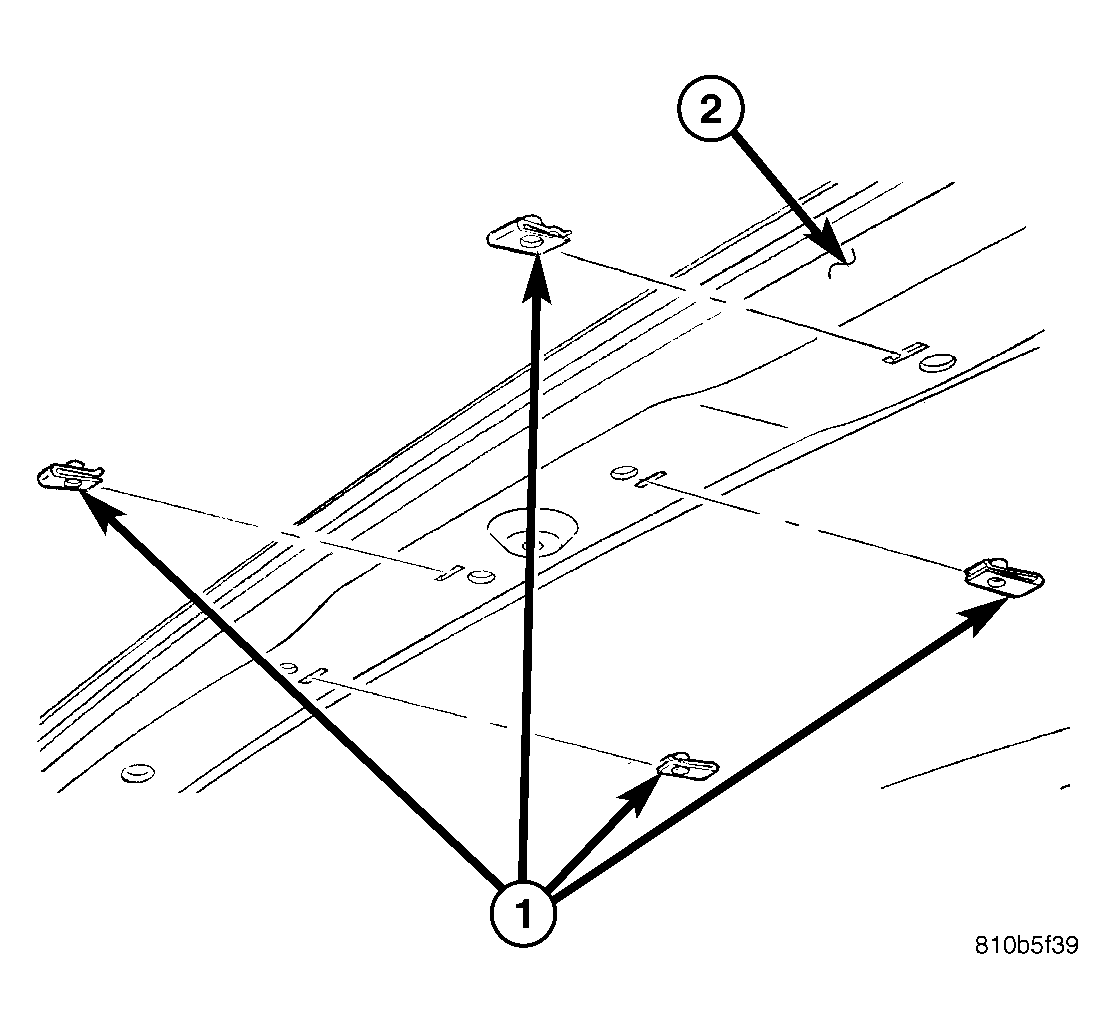
- Verify that U-nuts (1) are in position in the roof bow #2 (2).
- Verify that glass panel is loose and slightly retracted.
 Courtesy of DAIMLERCHRYSLER CORP.
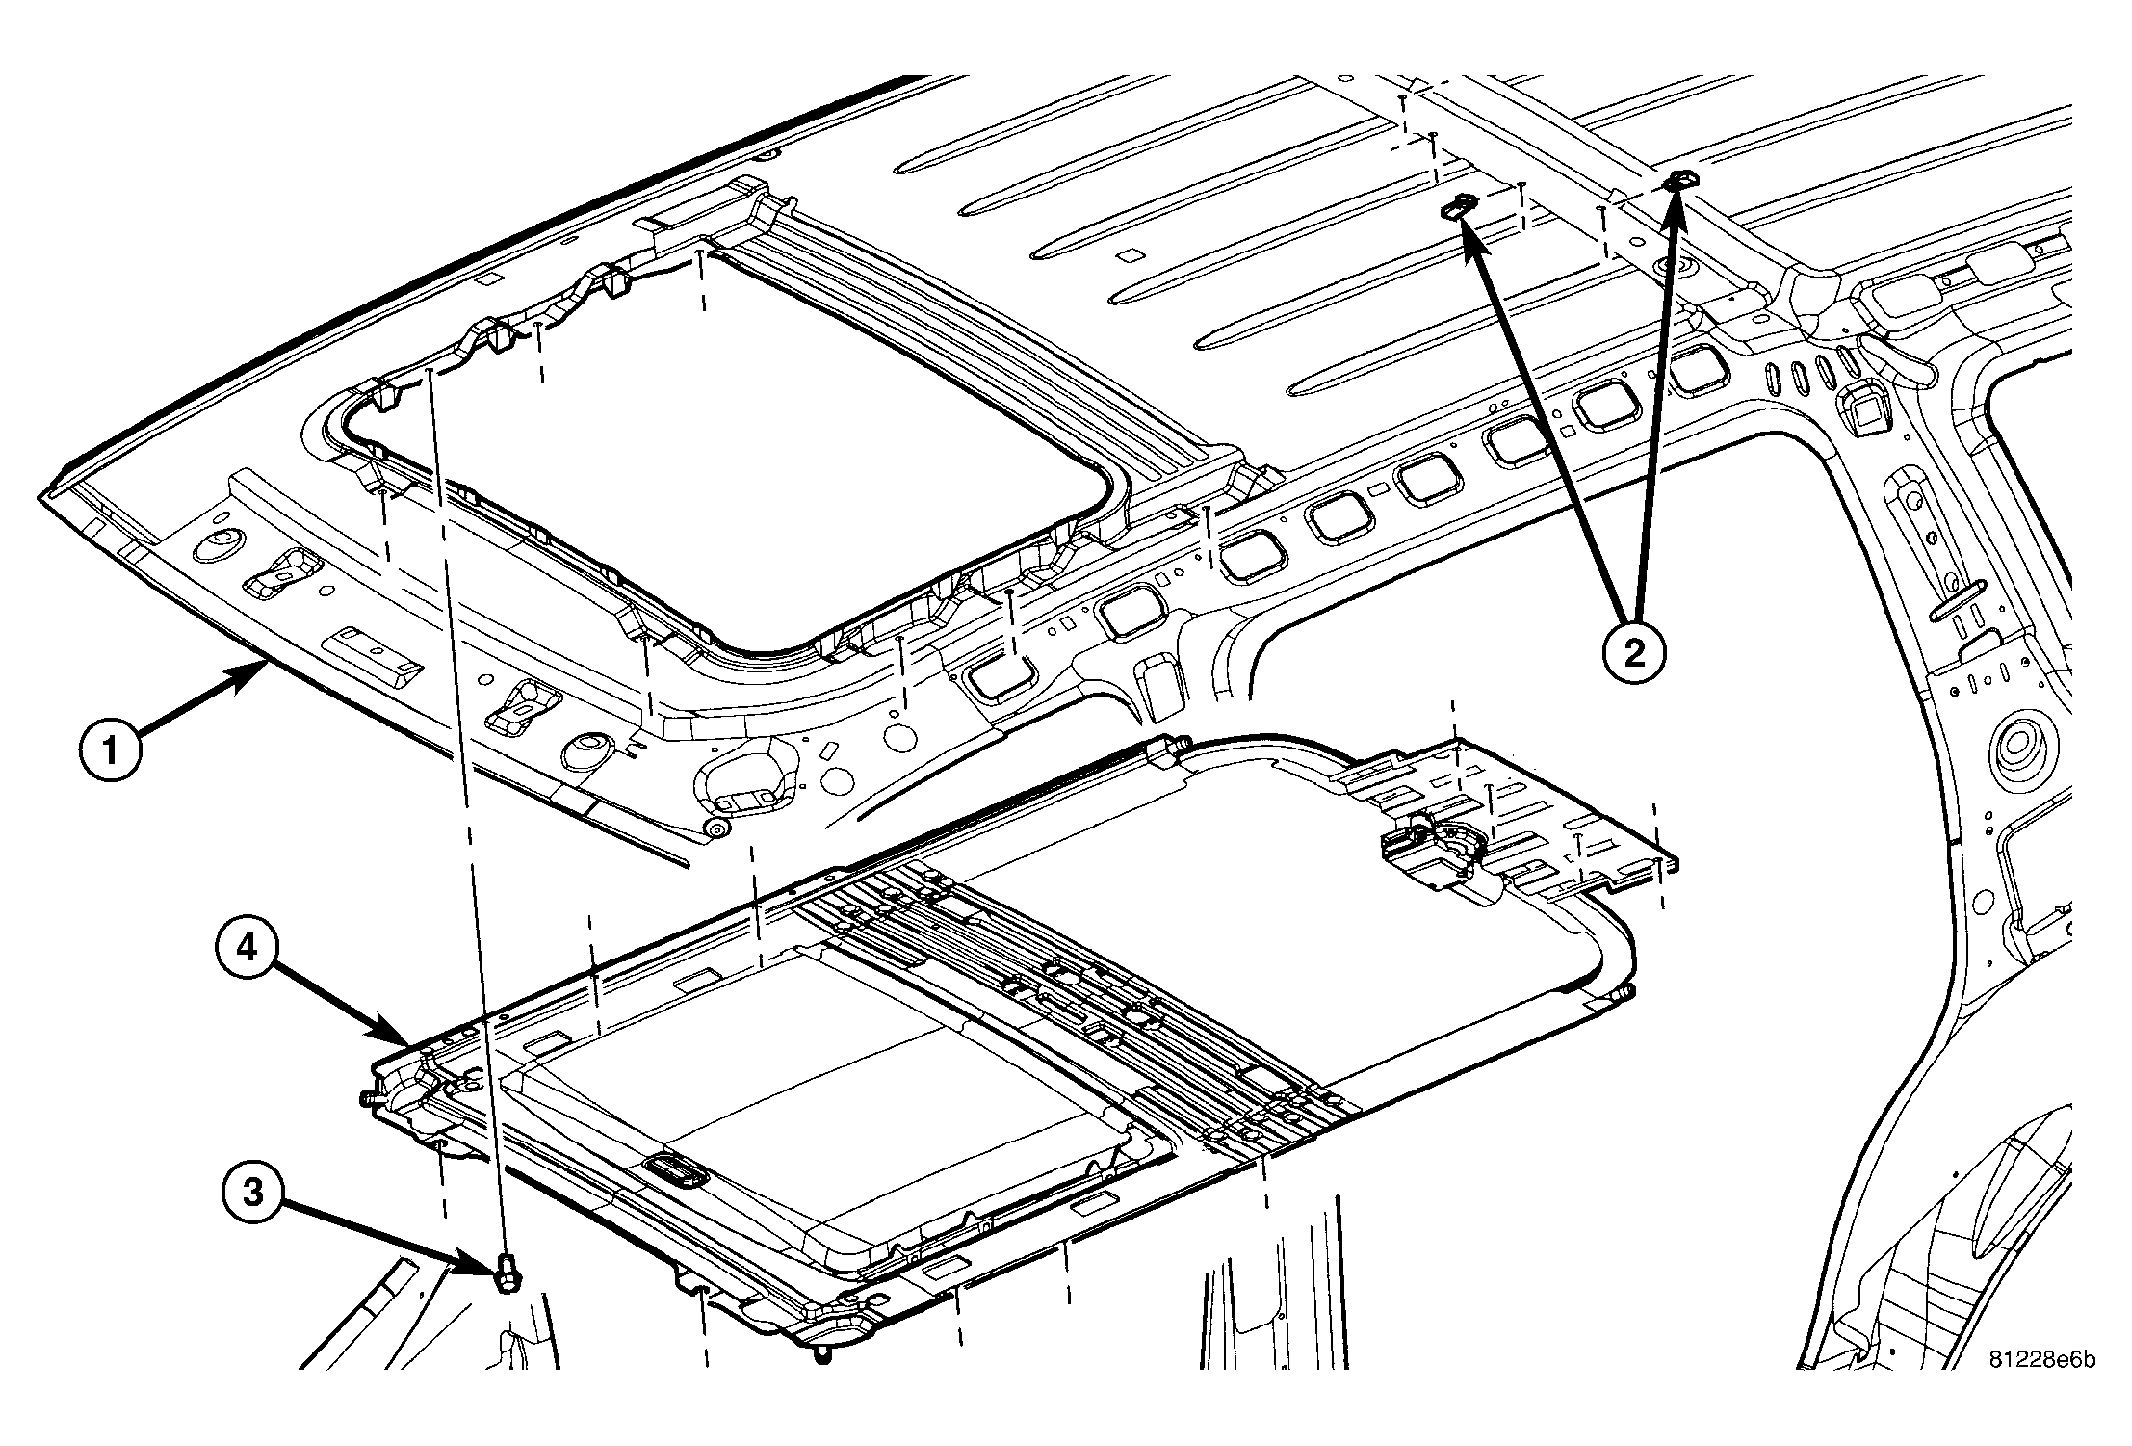
- Raise sunroof module assembly (4) and guide it carefully into position.
- While supporting the sunroof assembly, start the 12 attaching screws, three along each side rail, two along the front trough and four along the motor bracket.
- Locate the alignment holes along the sides of the module assembly and position the holes so that they line up with the holes located in the roof top support brackets.
 Courtesy of DAIMLERCHRYSLER CORP.
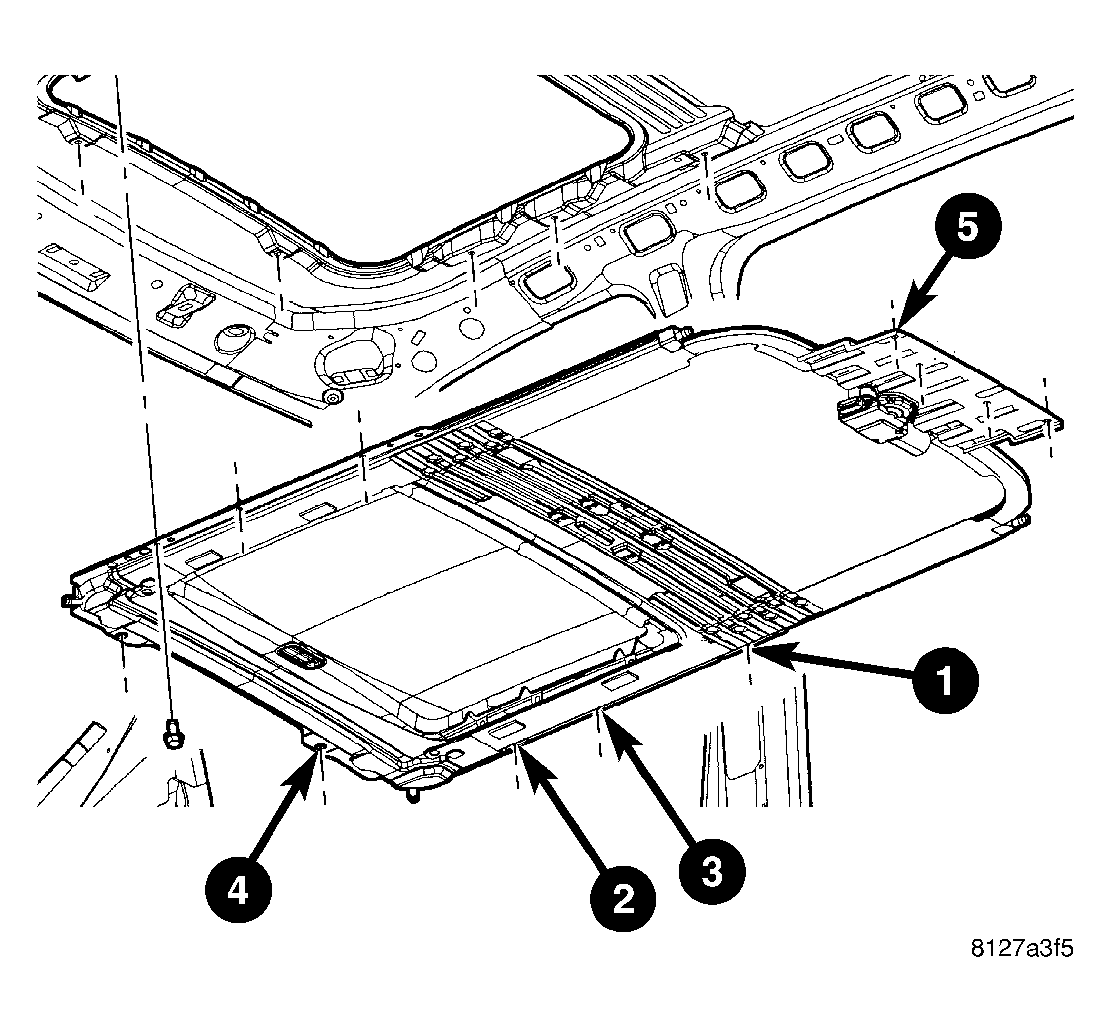
- Tighten the attaching screws to 6 N.m (53 in. lbs.) using the sequence shown.
 Courtesy of DAIMLERCHRYSLER CORP.
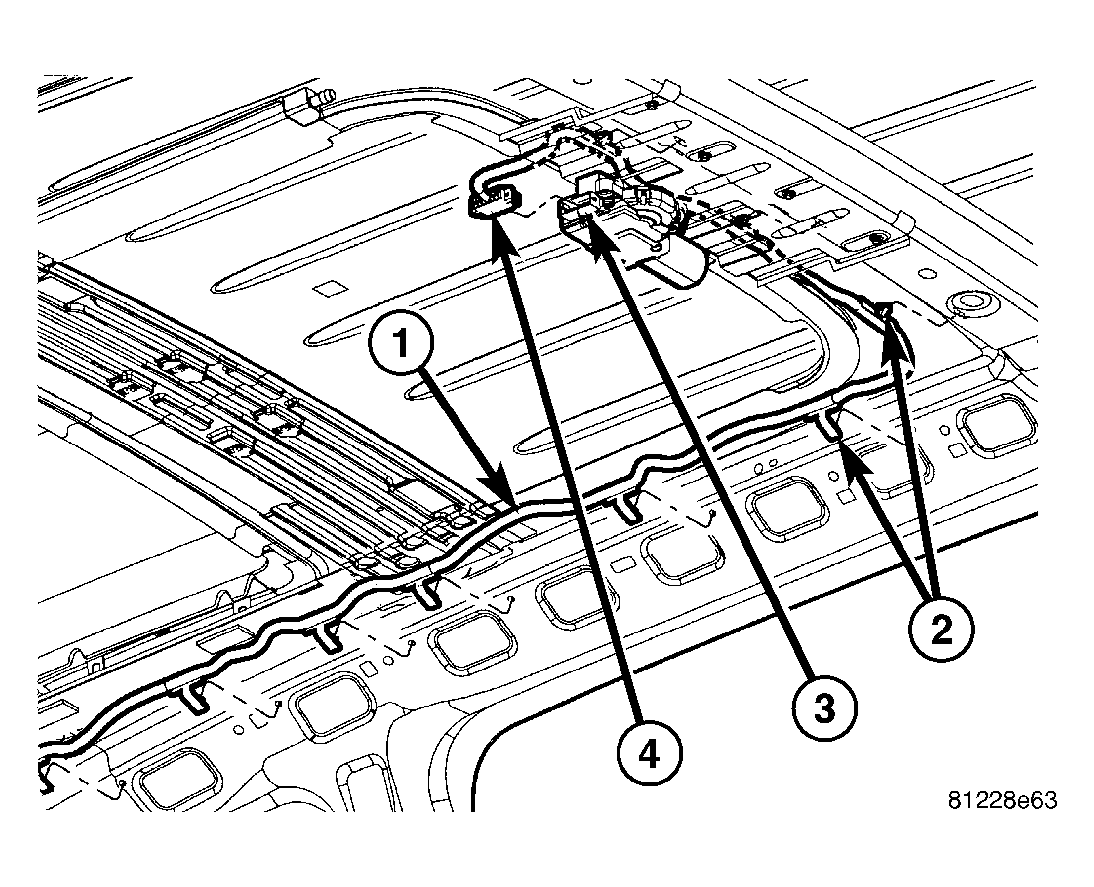
- Connect the electrical connector (4).
 Courtesy of DAIMLERCHRYSLER CORP.
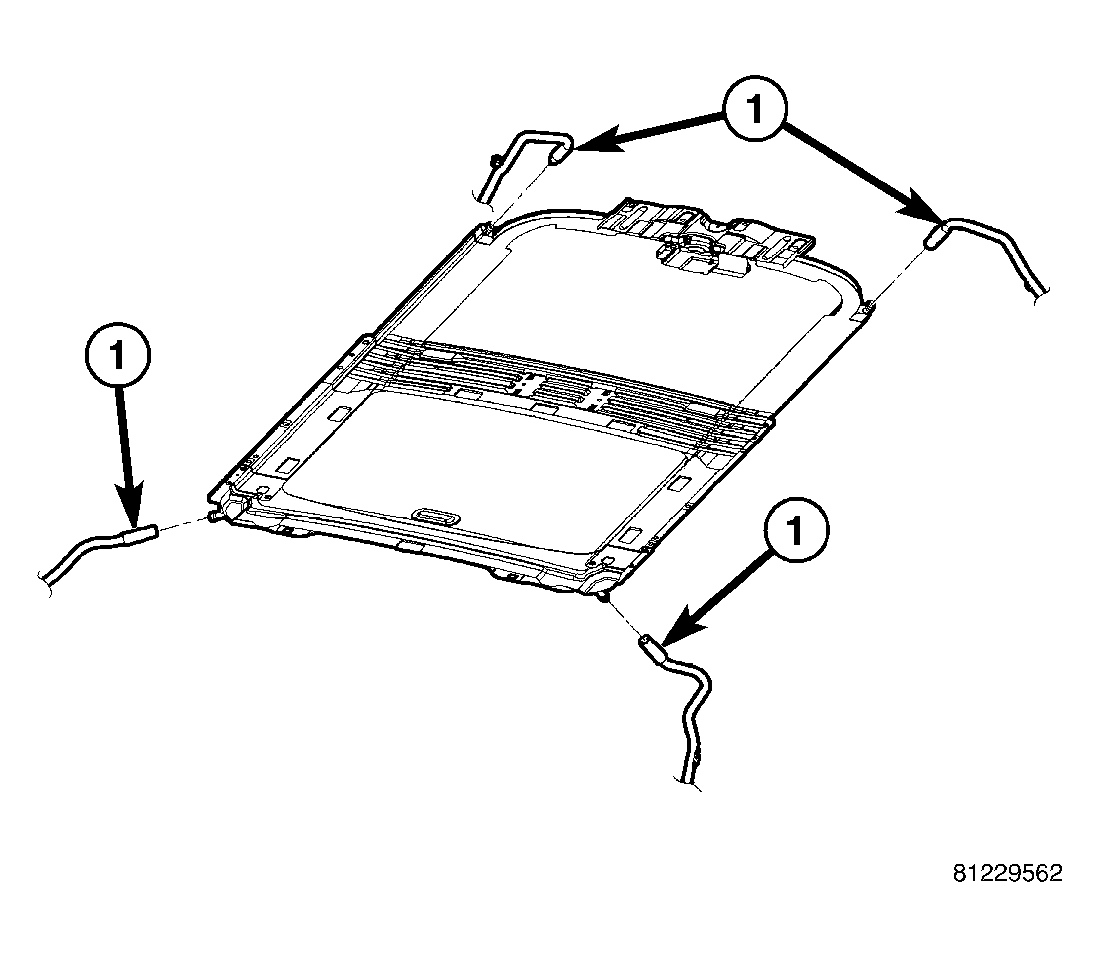
- Connect the drain tubes to the sunroof (1).
 Courtesy of DAIMLERCHRYSLER CORP.
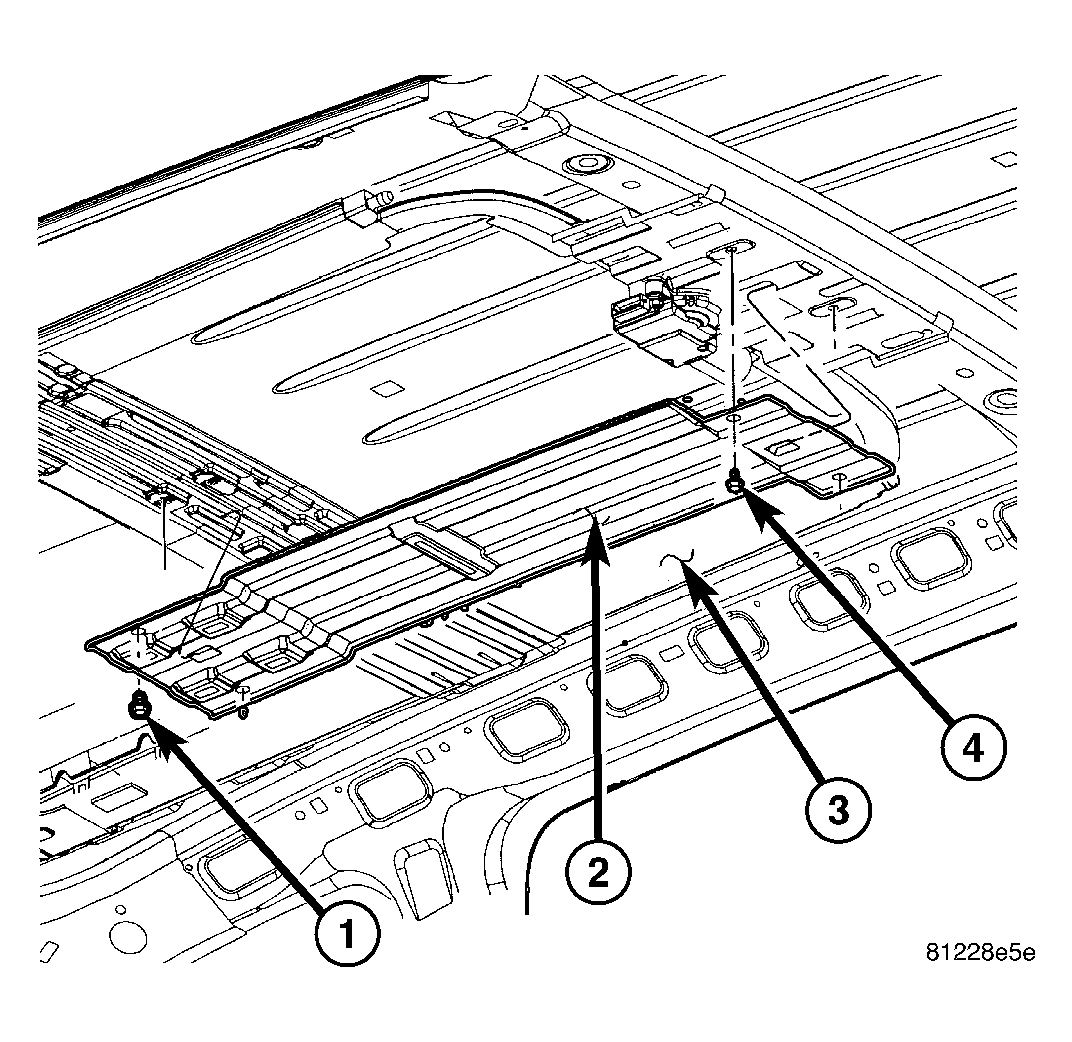
- Position the video display support bracket (2), if equipped, and install the bolts (1 & 4). Tighten the bolts to 6 N.m (53 in. lbs.).
- Connect battery negative cable.
- Test sunroof operation, adjust if necessary. (Refer to BODY/SUNROOF/GLASS PANEL - ADJUSTMENTS)
- Install headliner. (Refer to BODY/INTERIOR/HEADLINER - INSTALLATION)