Pump, Water: Installation: 6.2L
 Courtesy of CHRYSLER GROUP, LLC
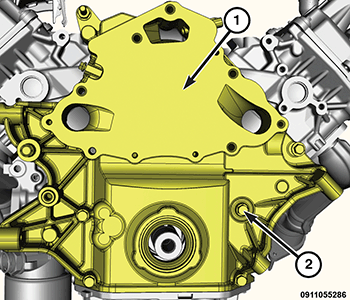
- Clean and inspect the mating surfaces of the timing chain cover (1) and the water pump.
 Courtesy of CHRYSLER GROUP, LLC
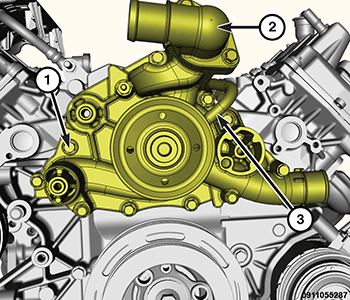
- Install the water pump and tighten the bolts (1) to the proper torque specification. Refer to SPECIFICATIONS .
- Install the lower radiator hose.
- Install the upper radiator hose to the thermostat housing (2).
 Courtesy of CHRYSLER GROUP, LLC
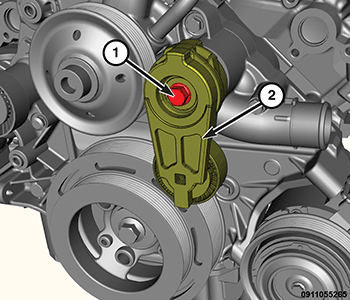
- Install the belt tensioner assembly (2) and tighten the bolt (1) to the proper torque specification. Refer to SPECIFICATIONS .
 Courtesy of CHRYSLER GROUP, LLC
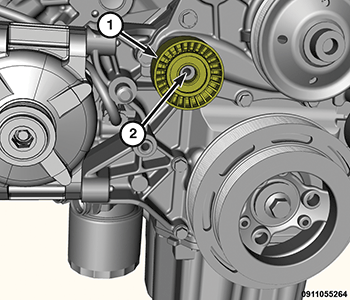
- Install the idler pulley (1) and tighten the bolt (2) to the proper torque specification. Refer to SPECIFICATIONS .
 Courtesy of CHRYSLER GROUP, LLC
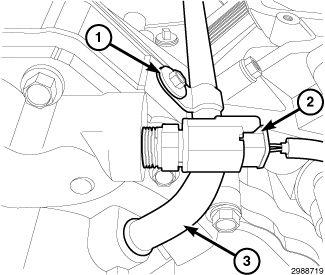
- Connect the temperature sensor (2) wire hire harness connector (5).
- Using a new O-ring seal, install heater tube (3). Tighten the bolt (1) to the proper torque specification. Refer to SPECIFICATIONS .
- Install serpentine belt. Refer to BELT, SERPENTINE, INSTALLATION .
- Install cooling fan assembly. Refer to FAN, COOLING, INSTALLATION .
- Install the air cleaner body. Refer to BODY, AIR CLEANER, INSTALLATION
.
- Connect the negative battery cable.
- Evacuate air and refill cooling system. Refer to STANDARD PROCEDURE .
- Check cooling system for leaks. Refer to DIAGNOSIS AND TESTING .