Cooling Module: Removal
- With the vehicle in NEUTRAL, position it on a hoist. For additional information, refer to
JACKING & LIFTING
article.
- Drain the engine cooling system. For additional information, refer to COOLING SYSTEM DRAINING, FILLING AND BLEEDING .
- Recover the A/C system refrigerant. For additional information, refer to
CLIMATE CONTROL SYSTEM - GENERAL INFORMATION AND DIAGNOSTICS
article.
- Disconnect the battery ground cable. For additional information, refer to
BATTERY, MOUNTING AND CABLES
article.
- Remove the RH and LH headlamp assemblies. For additional information, refer to
EXTERIOR LIGHTING
article.
- Remove the front bumper cover. For additional information, refer to
BUMPERS
article.
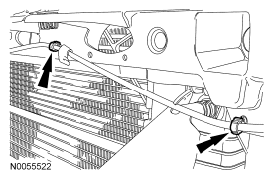
- Release the 2 clamps and disconnect the 2 power steering fluid cooler hoses from the condenser core.
- Remove the cooling fan shroud. For additional information, refer to COOLING FAN SHROUD .
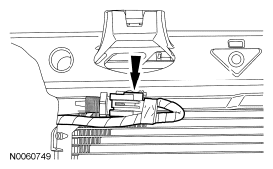
- Remove the 2 hood latch assembly bolts.
- Disconnect the 2 cable position retainers and position the hood latch assembly aside.
 Courtesy of FORD MOTOR CO.
- Remove the pushpin and move the air deflector aside.
 Courtesy of FORD MOTOR CO.
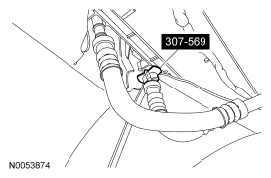
- Remove the 2 transmission cooler tube secondary latches.
- Using the Transmission Cooler Line Disconnect Tool, disconnect the transmission fluid cooler tubes from the transmission fluid cooler hoses.
 Courtesy of FORD MOTOR CO.
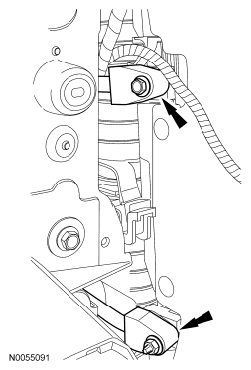
- Remove the condenser inlet fitting bolt, the condenser outlet fitting nut and disconnect the 2 fittings.
- Discard the O-ring seals.
 Courtesy of FORD MOTOR CO.
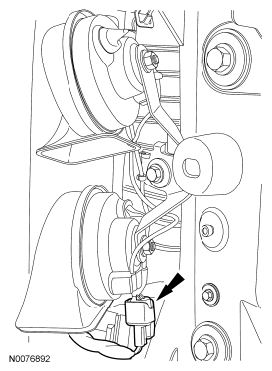
- Disconnect the horn assembly electrical connector.
 Courtesy of FORD MOTOR CO.
- Disconnect the ambient temperature sensor electrical connector.
 Courtesy of FORD MOTOR CO.
- Remove the 6 cooling module bolts and remove the cooling module from the vehicle.