Hood Alignment
WARNING: This page is about a different car, the 2017 Ford Edge. However, it is still accessible from the selected car via links, so may be relevant.
Inspection
NOTE:
Removal steps in this procedure may contain installation details.
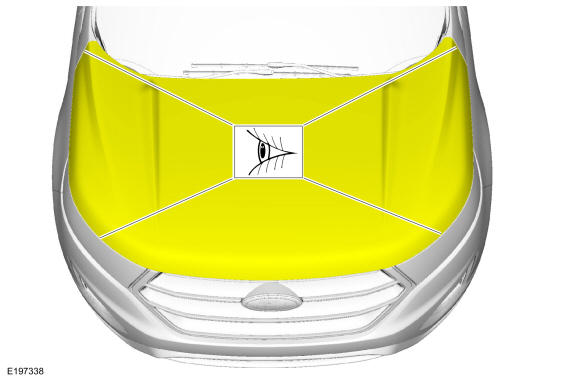
- 1.
Inspect the hood-to-body dimensions. REFER to: Body and Frame
.
All alignments
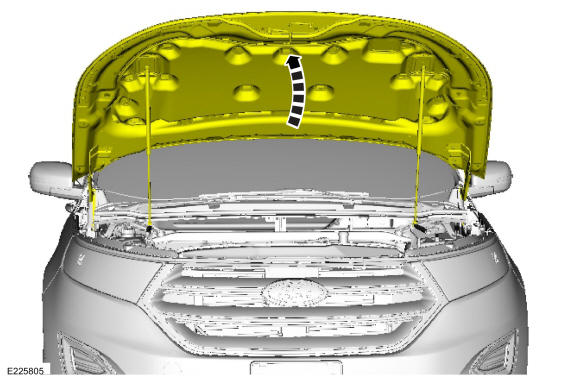
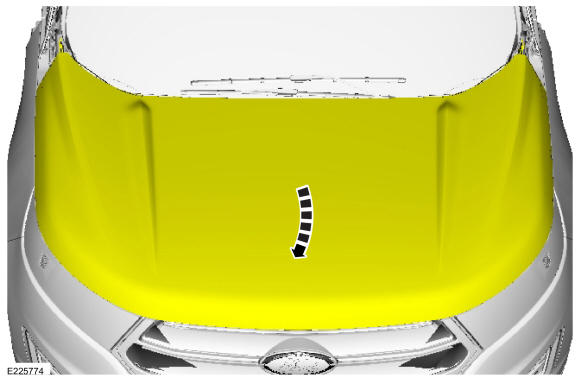
- 2.
Open the hood.
 Courtesy of FORD MOTOR COMPANY Courtesy of FORD MOTOR COMPANY
|
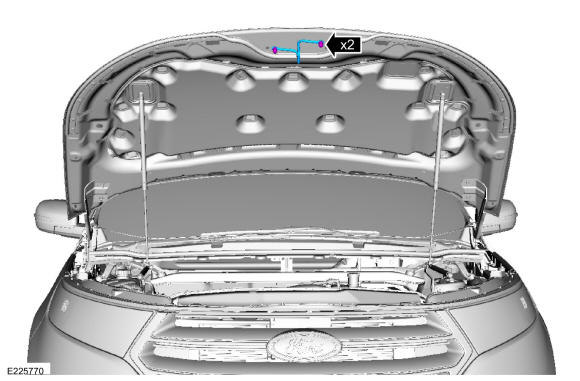
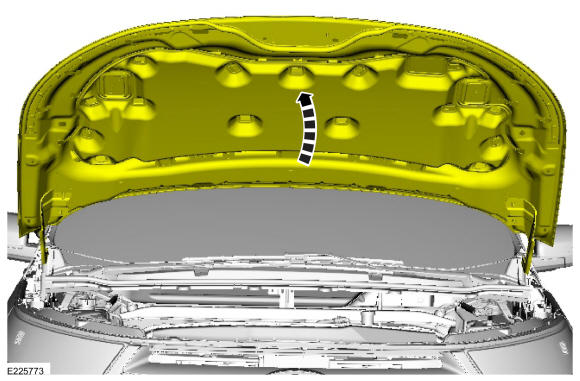
- 3.
Remove the striker.
 Courtesy of FORD MOTOR COMPANY Courtesy of FORD MOTOR COMPANY
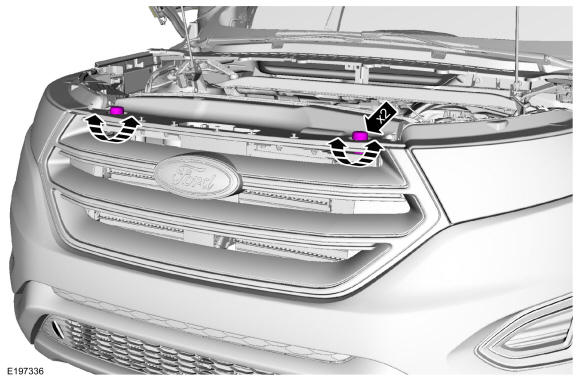
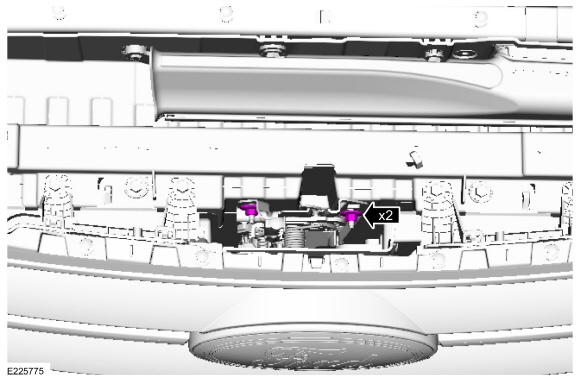
|
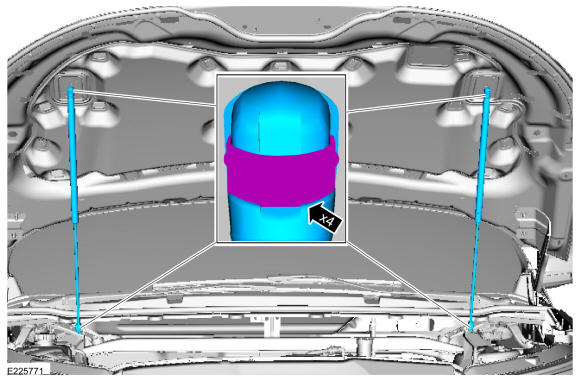
- 4.
NOTE:
Support the hood before removing the struts. Failure to follow this direction may result in damage to the components.
Release the clips and remove the struts.
 Courtesy of FORD MOTOR COMPANY Courtesy of FORD MOTOR COMPANY
|
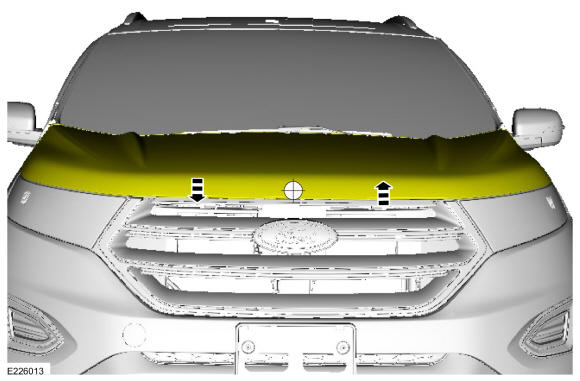
Hood fore and aft, left and right alignments
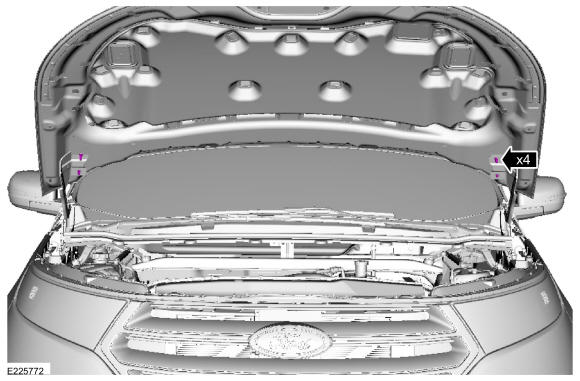
- 5.
Loosen the nuts enough to permit movement of the hood.
 Courtesy of FORD MOTOR COMPANY Courtesy of FORD MOTOR COMPANY
|
- 6.
Carefully close the hood.
 Courtesy of FORD MOTOR COMPANY Courtesy of FORD MOTOR COMPANY
|
- 7.
Adjust the hood to specification. REFER to: Body and Frame
.
 Courtesy of FORD MOTOR COMPANY Courtesy of FORD MOTOR COMPANY
|
- 8.
Carefully open the hood.
 Courtesy of FORD MOTOR COMPANY Courtesy of FORD MOTOR COMPANY
|
- 9.
Tighten the nuts.Torque: 18 lb.ft (25 Nm)
Courtesy of FORD MOTOR COMPANY
|
Hood front up and down alignments
- 10.
Adjust the bump stop rubbers.
 Courtesy of FORD MOTOR COMPANY Courtesy of FORD MOTOR COMPANY
|
- 11.
Carefully close the hood.
Courtesy of FORD MOTOR COMPANY
|
- 12.
Adjust the hood to specification. REFER to: Body and Frame
.
 Courtesy of FORD MOTOR COMPANY Courtesy of FORD MOTOR COMPANY
|
All alignments
- 13.
Carefully open the hood.
Courtesy of FORD MOTOR COMPANY
|
- 14.
Install the struts and secure the clips.
Courtesy of FORD MOTOR COMPANY
|
- 15.
Install the striker.Torque: 71 lb.in (8 Nm)
Courtesy of FORD MOTOR COMPANY
|
- 16.
Loosen the nuts enough to permit movement of the hood latch.
 Courtesy of FORD MOTOR COMPANY Courtesy of FORD MOTOR COMPANY
|
- 17.
NOTE:
Active grille shutter shown in illustration removed for clarity.
Adjust the hood latch as necessary.
 Courtesy of FORD MOTOR COMPANY Courtesy of FORD MOTOR COMPANY
|
- 18.
Tighten the nuts.Torque: 106 lb.in (12 Nm)
Courtesy of FORD MOTOR COMPANY
|
- 19.
Inspect the body-to-hood dimensions. REFER to: Body and Frame
.
 Courtesy of FORD MOTOR COMPANY Courtesy of FORD MOTOR COMPANY
|