Transaxle Support Insulator: Removal
- With the vehicle in NEUTRAL, position it on a hoist. For additional information, refer to JACKING & LIFTING
.
- Remove the battery. For additional information, refer to BATTERY AND BATTERY TRAY -- EXPLODED VIEW
.
- Remove the cowl assembly. For additional information, refer to COWL PANEL GRILLE
.
- Remove the Air Cleaner (ACL) assembly and outlet pipe. For additional information, refer to INTAKE AIR DISTRIBUTION SYSTEM & INTAKE AIR FILTERING SYSTEM
.
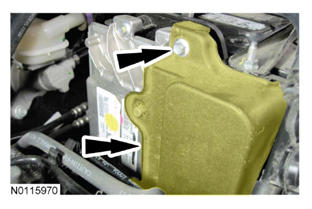
- Remove the PCM cover bolt and the PCM cover.
 Courtesy of FORD MOTOR CO.
- Disconnect the 3 PCM electrical connectors.
 Courtesy of FORD MOTOR CO.
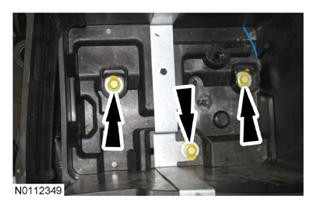
- Remove the 3 battery tray bolts and the battery tray.
 Courtesy of FORD MOTOR CO.
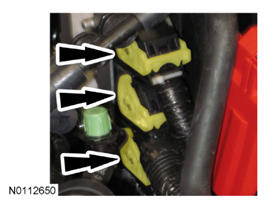
- Using a suitable tool, detach the wiring harness from the battery tray bracket.
 Courtesy of FORD MOTOR CO.
- Remove the 3 battery tray bracket nuts and remove the battery tray bracket.
 Courtesy of FORD MOTOR CO.
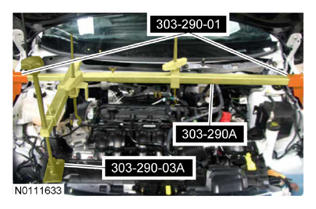
- Install the special tools and support the engine.
 Courtesy of FORD MOTOR CO.
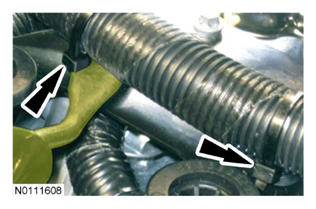
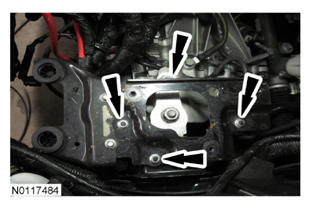
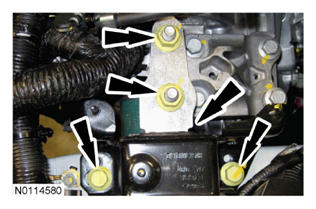
- Remove the 2 transaxle support insulator bolts and nuts and remove the transaxle support insulator.
 Courtesy of FORD MOTOR CO.