Damper/Spring Replacement: Installation
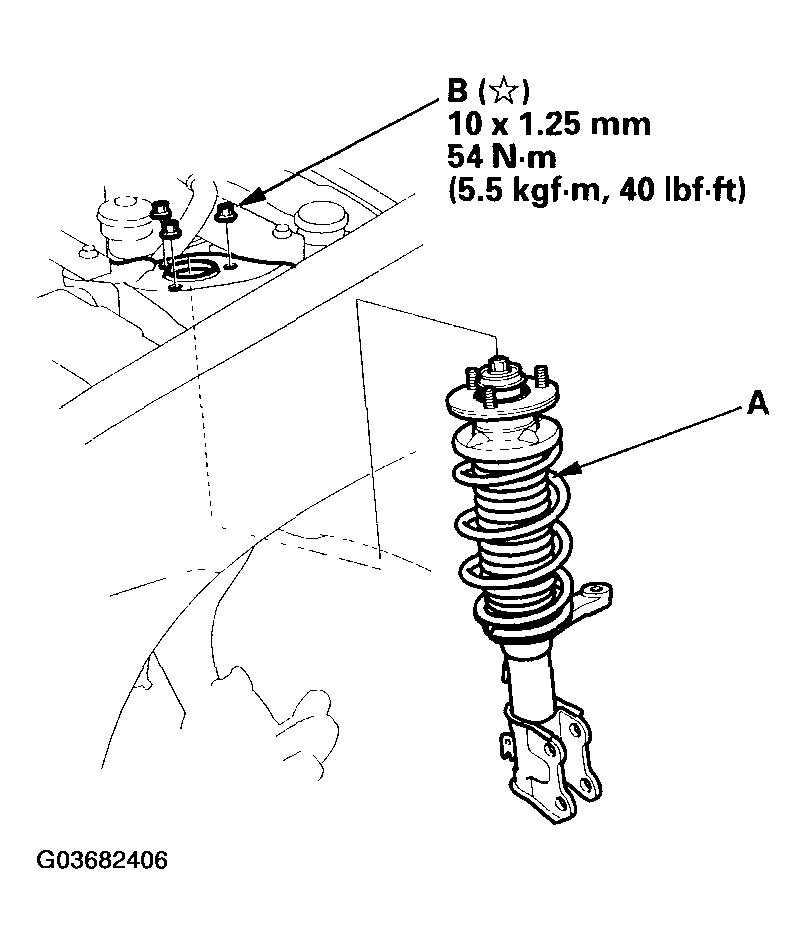
- Lower the lower arm, and position the damper assembly (A) in the body.
 Courtesy of AMERICAN HONDA MOTOR CO., INC.
- Loosely install new self-locking nuts (B) onto the top of the damper.
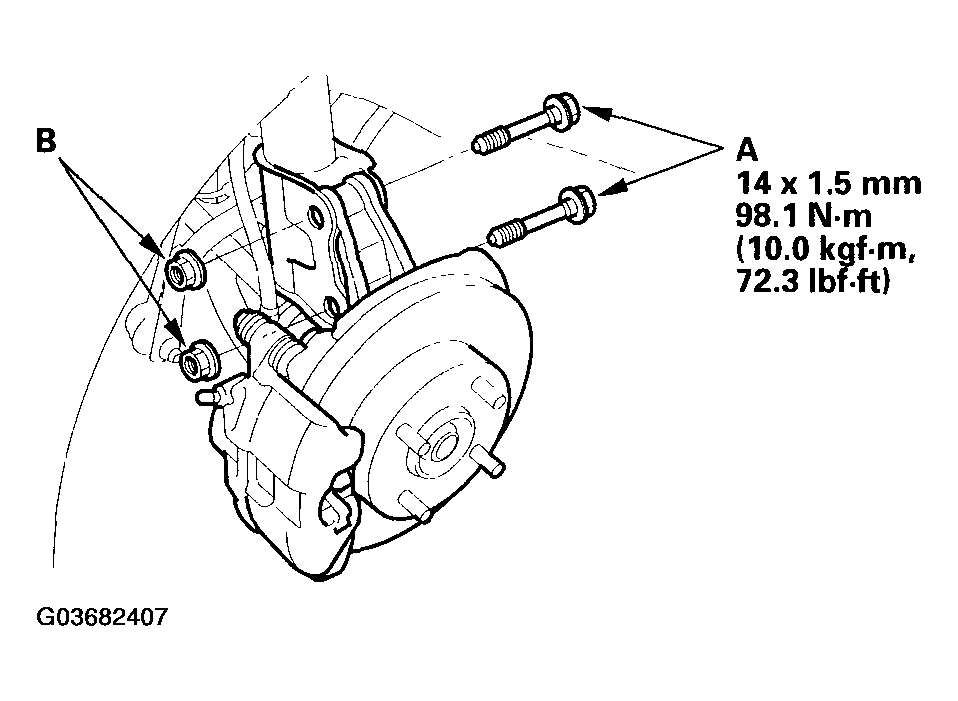
- Position the damper bottom on the knuckle, install the new damper pinch bolts (A) and nuts (B), and lightly tighten the bolts.
 Courtesy of AMERICAN HONDA MOTOR CO., INC.
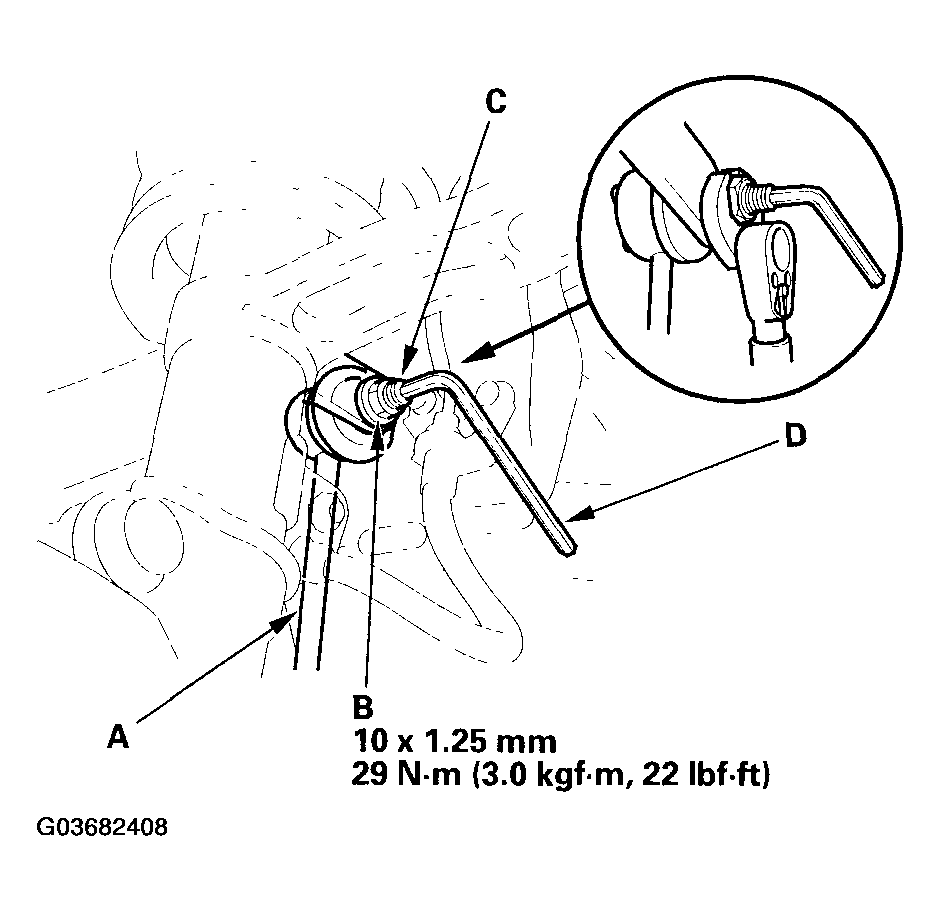
- Connect the stabilizer link to the damper, and lightly tighten the nuts.
- Place a jack with a wood block under the lower arm ball joint, and raise the suspension to load the suspension.
- Tighten the flange nuts on the top of the damper to the specified torque value.
- Tighten the damper pinch bolts to the specified torque value.
- Connect the stabilizer link (A) to the damper, and tighten the flange nut (B) while holding the joint pin (C) with a hex wrench (D).
 Courtesy of AMERICAN HONDA MOTOR CO., INC.
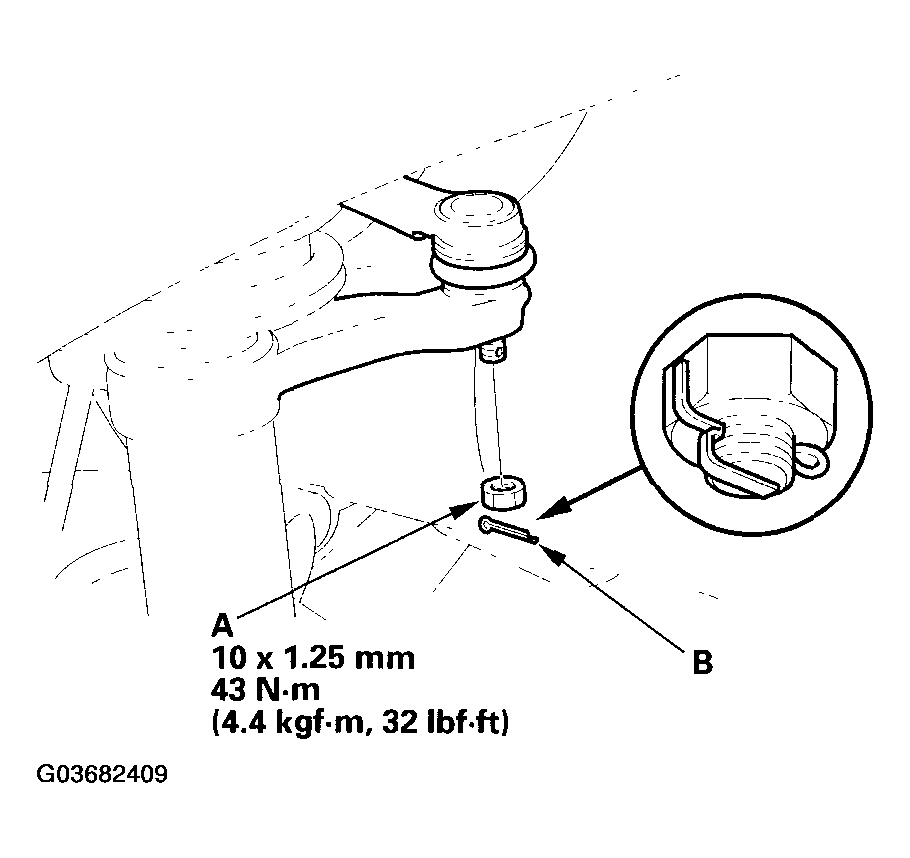
- Connect the tie-rod to the steering arm, and tighten the nut (A) to the specified torque value. Install the new cotter pin (B) after tightening, and bend its end as shown.
 Courtesy of AMERICAN HONDA MOTOR CO., INC.
- Install the brake hose bracket and the flange bolt to the damper, and tighten the bolt to the specified torque value.
- Clean the mating surface of the brake disc and the inside of the wheel, then install the front wheels.
- Check the wheel alignment, and adjust it if necessary (see WHEEL ALIGNMENT
).