Damper/Spring Replacement: Reassembly
- Install the dust cover end inside the top of the dust cover sleeve, and install the dust cover lower mount on the bottom of the dust cover sleeve.
- Install the bump stop on the damper shaft, then install the set of the dust cover (assembled in step 1) over it.
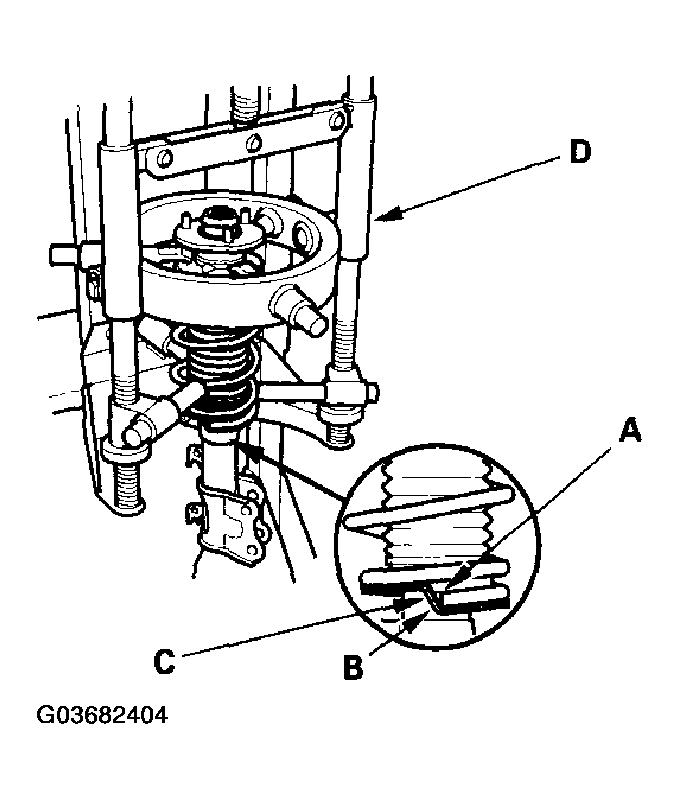
- Install the rest of the parts except for the washer and self-locking nut onto the damper unit referring to the Exploded View. Align the spring bottom end (A), the stepped part of the dust cover lower mount (B), and the step on the lower spring seat (C).
 Courtesy of AMERICAN HONDA MOTOR CO., INC.
- Install the damper assembly on a commercially available strut spring compressor (D).
- Compress the damper spring with the strut spring compressor.
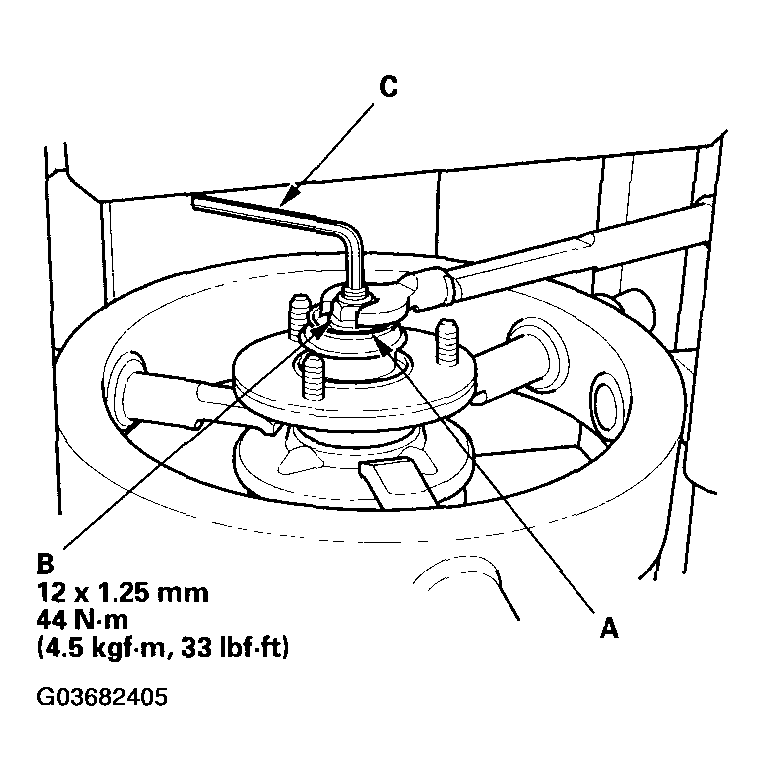
- Install a new washer (A) and a new self-locking nut (B) on the damper shaft.
 Courtesy of AMERICAN HONDA MOTOR CO., INC.
- Hold the damper shaft with a hex wrench (C), and tighten the self-locking nut to the specified torque value.