Alternator Removal and Installation: Removal
- Make sure you have the anti-theft codes for the radio and the navigation system, then write down the customer's audio presets. Make sure the ignition switch is OFF.
- Disconnect the negative cable from the battery first, then disconnect the positive cable.
- Remove the intake manifold cover (see step 1 in IGNITION COIL REMOVAL/INSTALLATION
).
- Remove the drive belt (see DRIVE BELT REPLACEMENT
).
- Remove the harness clamp (A), then remove the bracket (B).
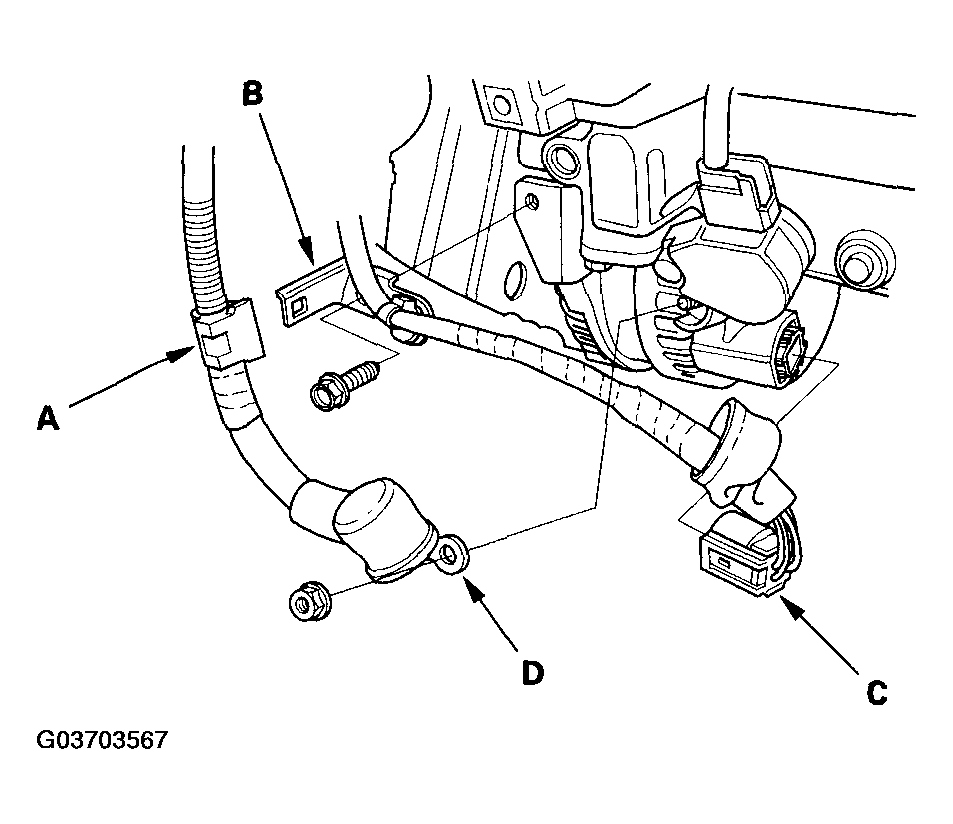 Courtesy of AMERICAN HONDA MOTOR CO., INC.
- Disconnect the alternator connector (C) and BLK wire (D) from the alternator.
- Remove the bolt (A), then disconnect the A/C suction line clamp (B) and the A/C receiver line stay (c).
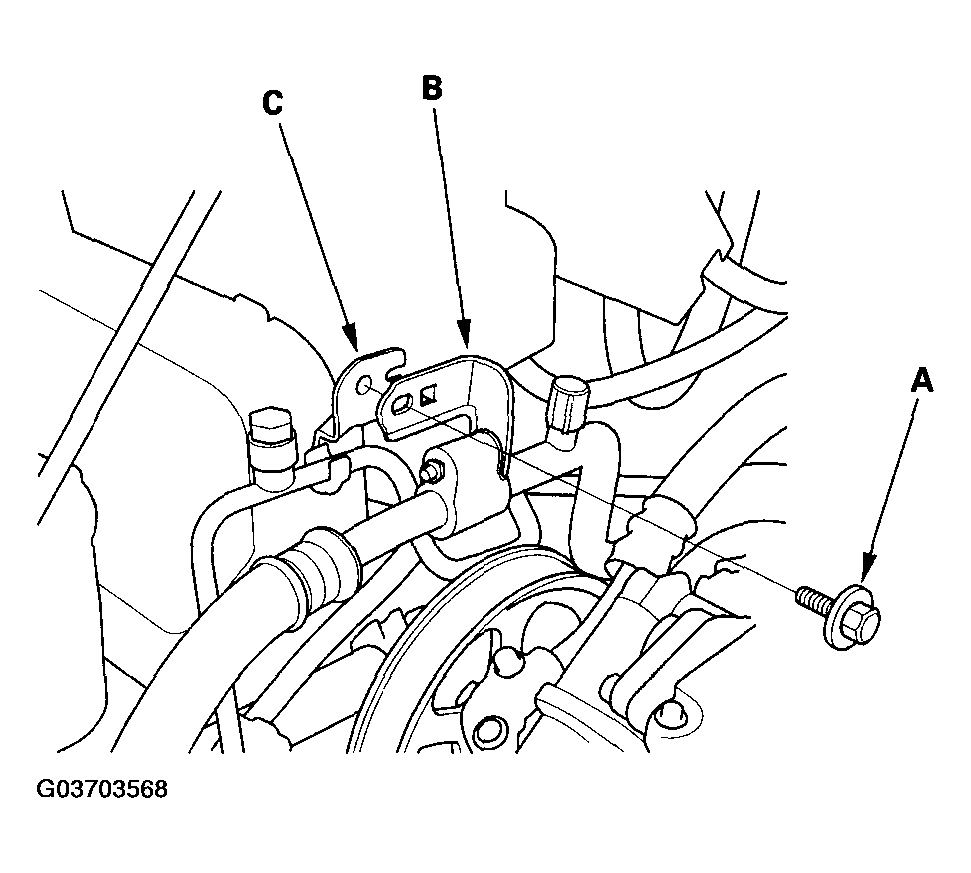 Courtesy of AMERICAN HONDA MOTOR CO., INC.
- Remove the washer reservoir mount bolt.
- Remove the mounting bolt (A) and alternator bracket mounting bolt (B), then remove the alternator.
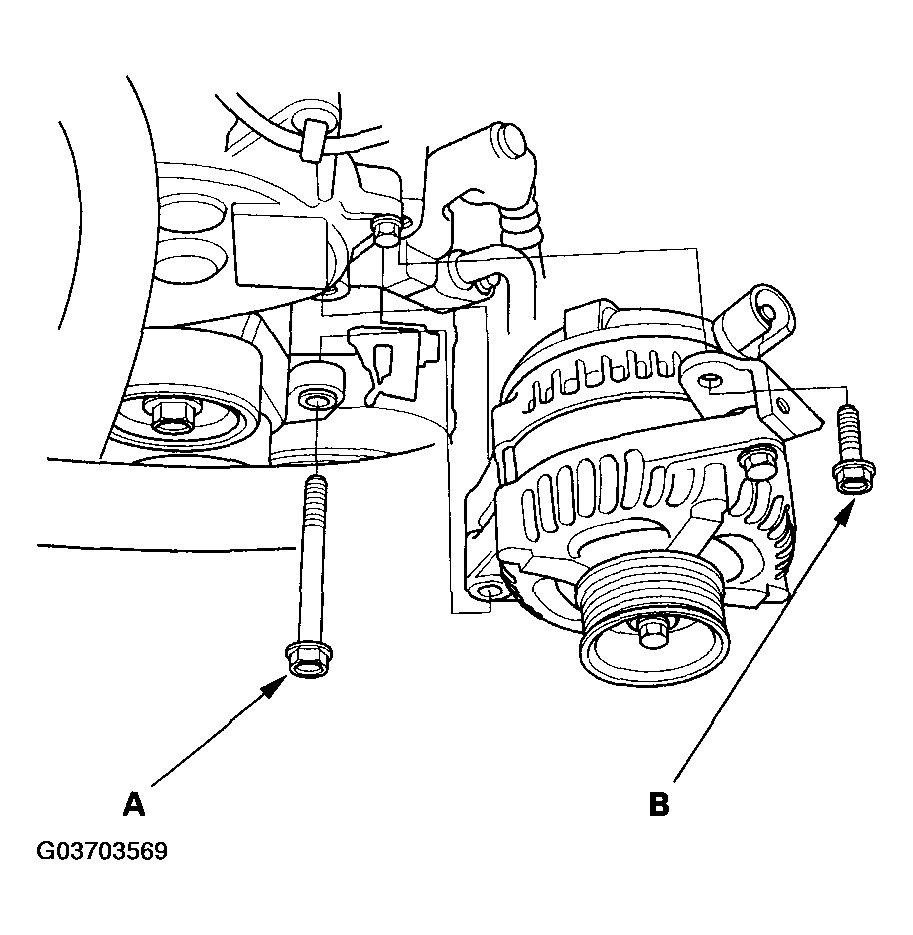 Courtesy of AMERICAN HONDA MOTOR CO., INC.