Side Engine Mount Bracket Replacement
- Support the engine with a jack and a wood block under the oil pan.
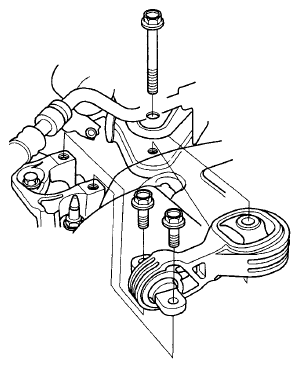
- Remove the upper torque rod.
 Courtesy of AMERICAN HONDA MOTOR CO., INC.
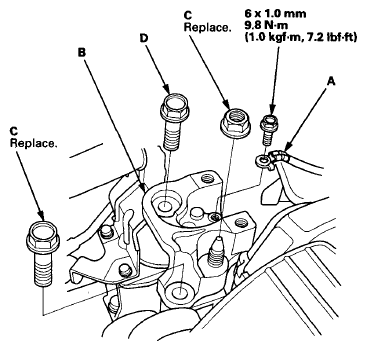
- Remove the ground cable (A), then remove the side engine mount bracket (B).
 Courtesy of AMERICAN HONDA MOTOR CO., INC.
- Install the side engine mount bracket, then loosely tighten the new bolt and nut (C), and loosely tighten the bolt (D).
- Install the ground cable.
- Remove the air cleaner housing assembly.
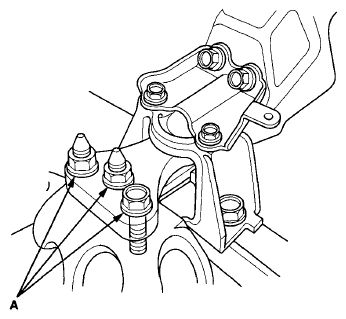
- Loosen the transmission mounting bolt and nuts (A).
 Courtesy of AMERICAN HONDA MOTOR CO., INC.
- Raise the vehicle on the lift.
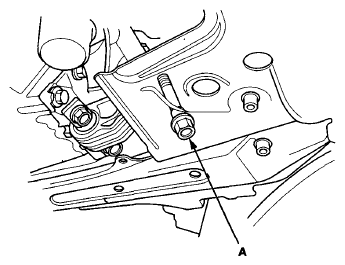
- Loosen the lower torque rod mounting bolt (A).
 Courtesy of AMERICAN HONDA MOTOR CO., INC.
- Lower the vehicle on the lift.
- Tighten the side engine mount mounting bolts and nut.
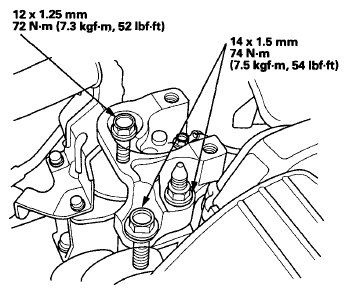 Courtesy of AMERICAN HONDA MOTOR CO., INC.
- Tighten the transmission mounting bolt and nuts.
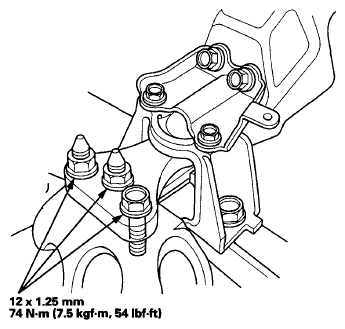 Courtesy of AMERICAN HONDA MOTOR CO., INC.
- Raise the vehicle on the lift.
- Tighten the lower torque rod mounting bolt.
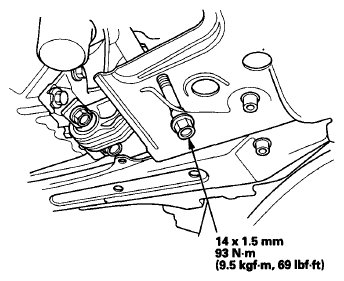 Courtesy of AMERICAN HONDA MOTOR CO., INC.
- Lower the vehicle on the lift.
- Install the air cleaner housing assembly.
- Install the upper torque rod, then tighten the new upper torque rod mounting bolts in the numbered sequence shown.
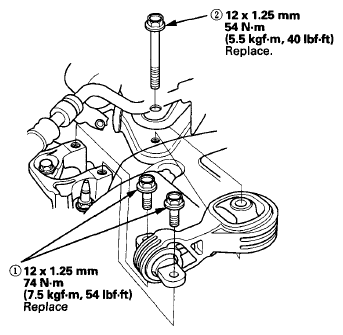 Courtesy of AMERICAN HONDA MOTOR CO., INC.