EGR Passage Replacement
- Drain the engine coolant (see COOLANT REPLACEMENT
).
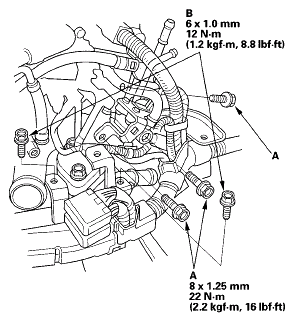
- Remove the three bolts (A) securing the evaporative emission (EVAP) canister purge valve bracket and remove the two bolts (B) securing the harness bracket.
 Courtesy of AMERICAN HONDA MOTOR CO., INC.
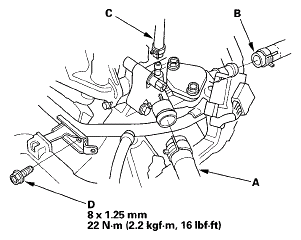
- Remove the upper radiator hose (A), heater hose (B), water bypass hose (C), and connecting pipe mounting bolt (D).
 Courtesy of AMERICAN HONDA MOTOR CO., INC.
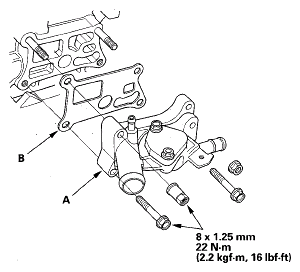
- Remove the exhaust gas recirculation (EGR) passage (A).
 Courtesy of AMERICAN HONDA MOTOR CO., INC.
- Install the EGR passage with a new gasket (B).
- Install the other parts in the reverse order of removal.
- Refill the radiator with engine coolant, and bleed air from the cooling system with the heater valve open (see step 10 on COOLANT REPLACEMENT
).
- Clean up any spilled engine coolant.