Windshield Wiper Motor Replacement
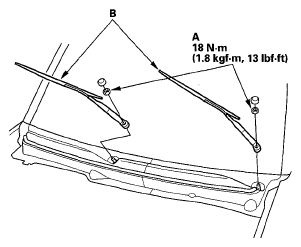
- Remove the nuts (A) and the windshield wiper arms (B).
 Courtesy of AMERICAN HONDA MOTOR CO., INC.
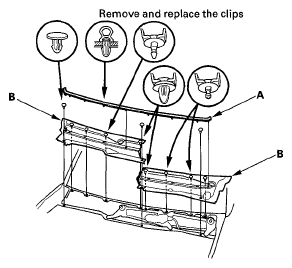
- Remove the hood seal (A) and cowl covers (B). Remove and replace the clips
 Courtesy of AMERICAN HONDA MOTOR CO., INC.
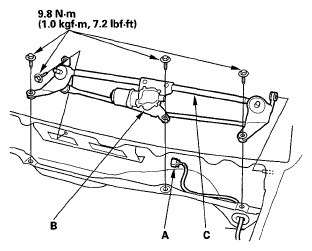
- Disconnect the 5P connector (A) from the windshield wiper motor (B).
 Courtesy of AMERICAN HONDA MOTOR CO., INC.
- Remove the mounting bolts and the wiper linkage assembly (C).
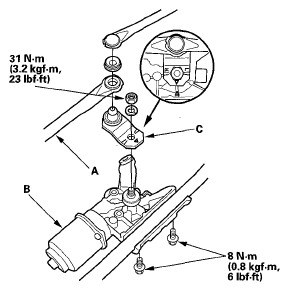
- Remove the two mounting bolts and nut from the wiper linkage (A) to remove the wiper motor (B).
 Courtesy of AMERICAN HONDA MOTOR CO., INC.
- Align the "up triangle" mark on the wiper link (C) and the "down triangle" mark on the wiper motor to show the original arrangement.
- Install in the reverse order of removal, and note these items:
- Apply multipurpose grease to the moving parts.
- Before reinstalling the wiper arms, turn the wiper switch ON, then OFF to return the wiper shafts to the park position.
- If necessary, replace any damaged clips.
- Make sure the wiper motor operates properly.