J35Z1 Engine
- Remove the air cleaner housing assembly (see AIR CLEANER REMOVAL/INSTALLATION
).
- Raise the vehicle on the hoist to full height.
- Disconnect the active control engine mount (ACM) actuator connector (A) from the rear engine mount, then remove the harness clamp (B). Remove the bolt (C) securing the P/S line.
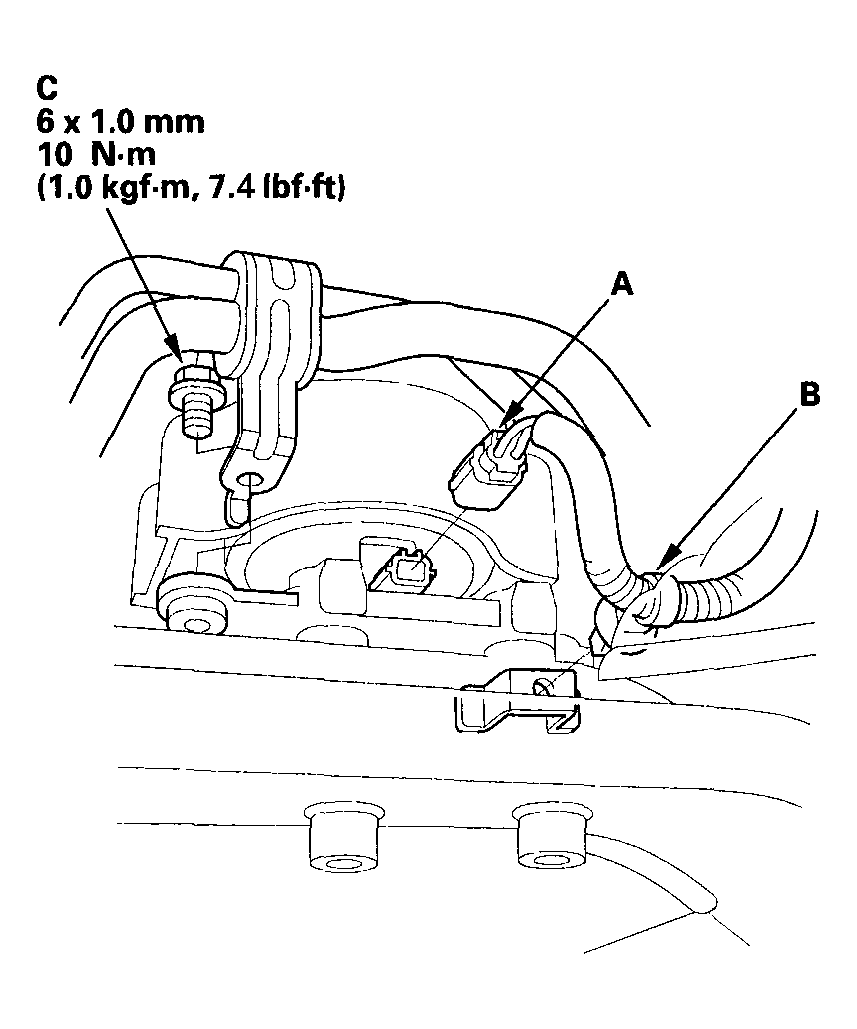 Courtesy of AMERICAN HONDA MOTOR CO., INC.
- Remove the rear engine mount bolts.
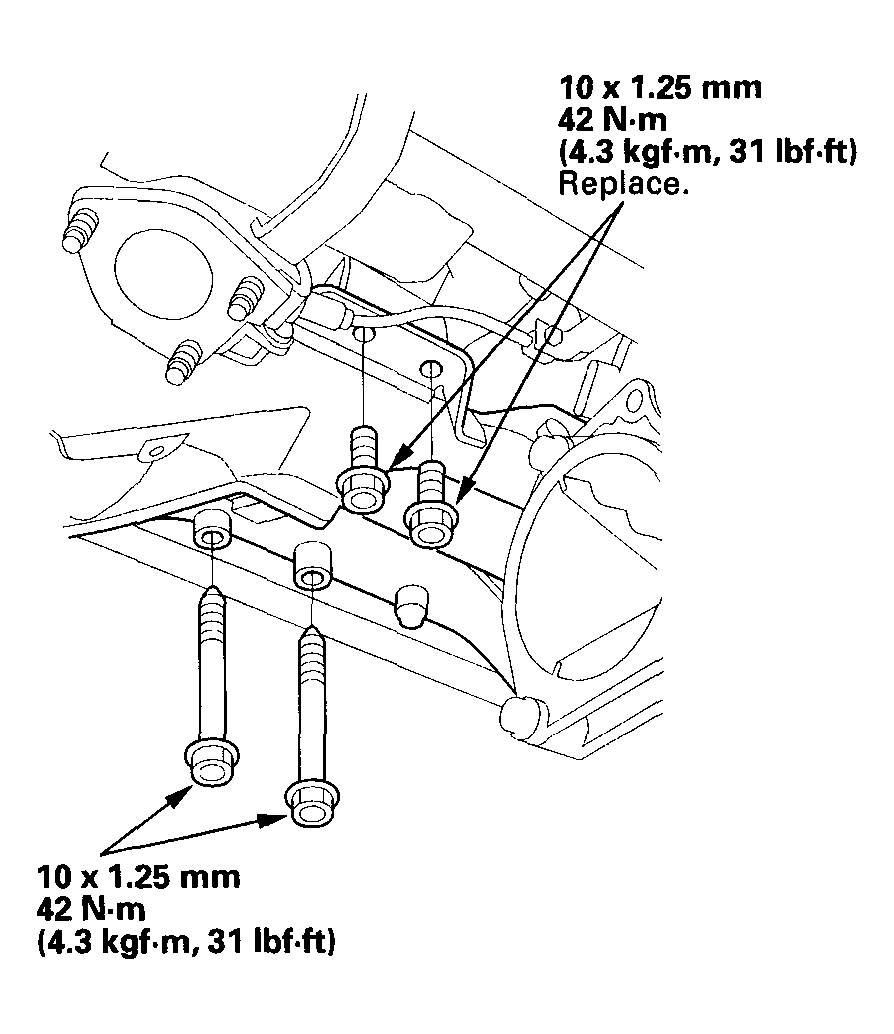 Courtesy of AMERICAN HONDA MOTOR CO., INC.
- Lower the vehicle on the hoist.
- Support the engine with a jack and wood block under the oil pan.
- Remove the rear mount stop (A), then remove the front mount bolt (B).
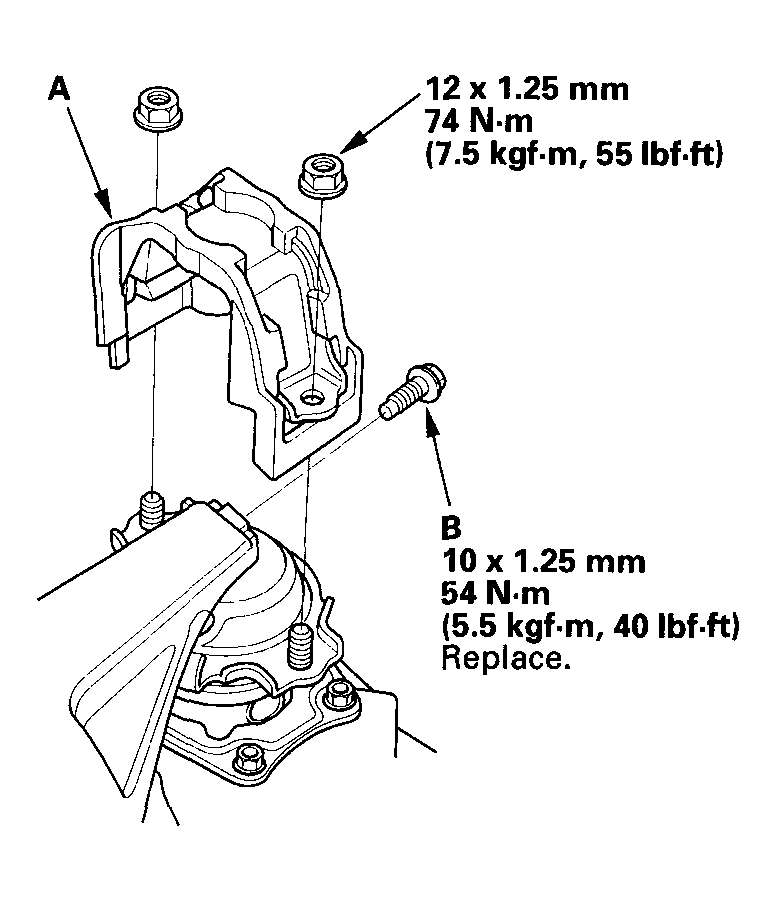 Courtesy of AMERICAN HONDA MOTOR CO., INC.
- Remove the rear mount.
- Remove the rear mount base.
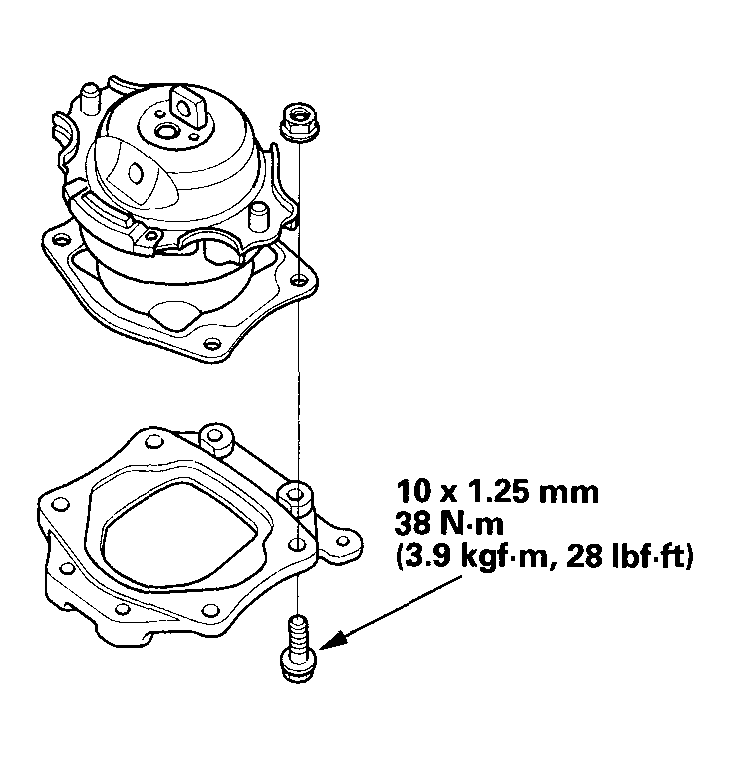 Courtesy of AMERICAN HONDA MOTOR CO., INC.
- Install the rear mount in the reverse order of removal.