With the HDS
- Make sure you have the anti-theft codes for the radio and the navigation system (if equipped).
- Remove the fuel fill cap, and relieve the pressure in the fuel tank.
- Turn the ignition switch ON (II).
- From the INSPECTION MENU of the HDS, select Fuel Pump OFF, then start the engine, and let it idle until it stalls.
- Turn the ignition switch OFF.
NOTE:
- Do not allow the engine to idle above 1,000 RPM or the PCM will continue to operate the fuel pump.
- A DTC or a Temporary DTC may be set during this procedure. Check for DTCs, and clear them as needed (see GENERAL TROUBLESHOOTING INFORMATION
).
- Turn the ignition switch OFF.
- Disconnect the negative cable from the battery.
- Remove the quick-connect fitting cover (A).
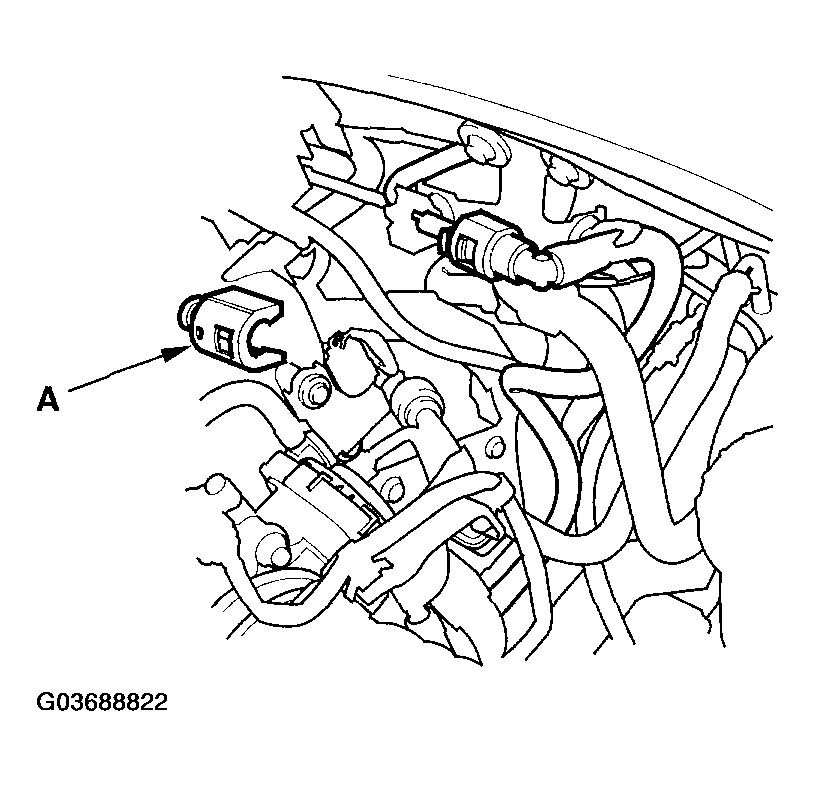 Courtesy of AMERICAN HONDA MOTOR CO., INC.
- Check the fuel quick-connect fitting for dirt, and clean it if needed.
- Place a rag or shop towel over the quick-connect fitting (A).
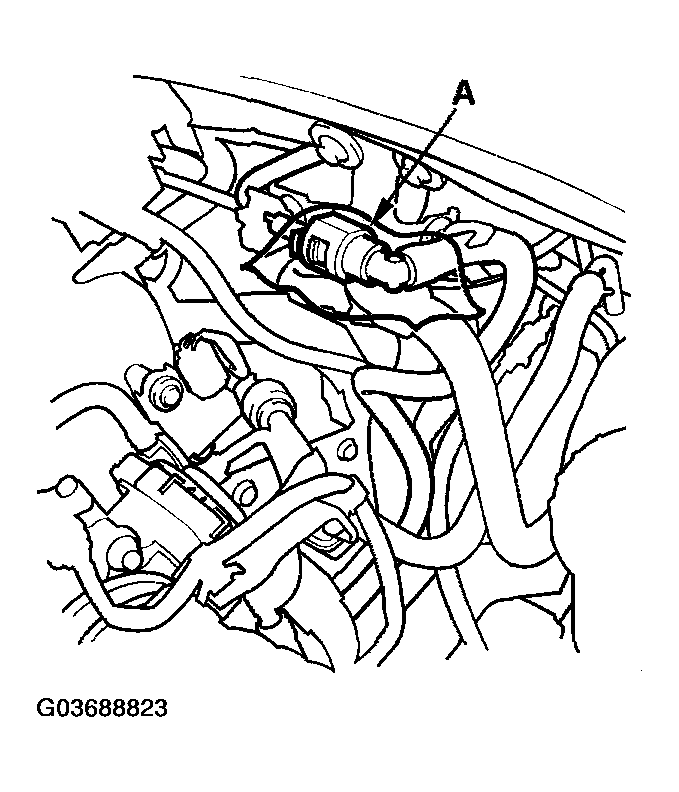 Courtesy of AMERICAN HONDA MOTOR CO., INC.
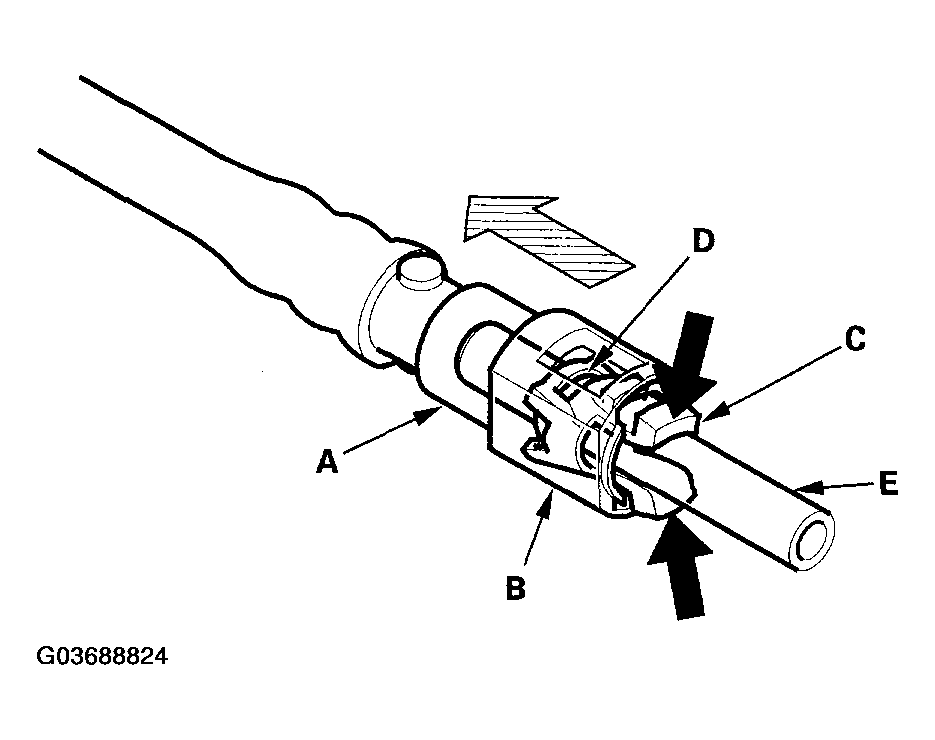
- Disconnect the quick-connect fitting (A) Hold the connector (B) with one hand, and squeeze the retainer tabs (C) with the other hand to release them from the locking tabs (D). Pull the connector off.
NOTE:
- Be careful not to damage the line (E) or other parts.
- Do not use tools.
- If the connector does not move, keep the retainer tabs pressed down, and alternately pull and push the connector until it comes off easily.
- Do not remove the retainer from the line; once removed, the retainer must be replaced with a new one.
 Courtesy of AMERICAN HONDA MOTOR CO., INC.
- After disconnecting the quick-connect fitting, check it for dirt or damage (see step 4).
- Reconnect the negative cable to the battery, then do this: