Alternator Removal and Installation: Installation
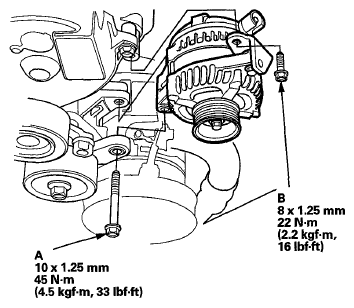
- Install the alternator, then tighten the mounting bolt (A) and the alternator bracket mounting bolt (B).
 Courtesy of AMERICAN HONDA MOTOR CO., INC.
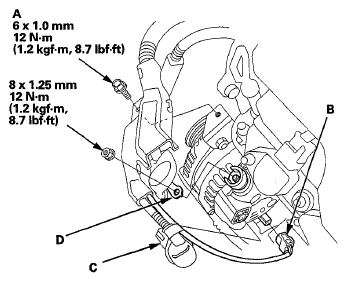
- Install the bolt (A) securing the harness holder.
 Courtesy of AMERICAN HONDA MOTOR CO., INC.
- Connect the A/C compressor clutch connector (B) to the A/C compressor.
- Connect the alternator connector (C) and the positive alternator cable (D) to the alternator. Make sure the crimped it side of the ring terminal faces away from the alternator when you connect it.
- Install the drive belt (see DRIVE BELT REPLACEMENT
).
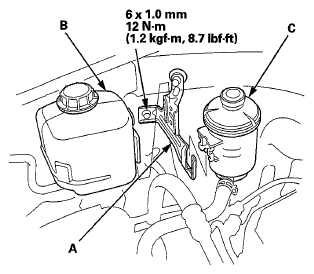
- Install the holder bracket (A), then install the coolant reservoir (B) and the power steering (P/S) fluid reservoir (C).
 Courtesy of AMERICAN HONDA MOTOR CO., INC.
- Install the engine cover (see IGNITION COIL REMOVAL/INSTALLATION
).
- Do the battery terminal reconnection procedure (see BATTERY TERMINAL DISCONNECTION AND RECONNECTION
).
- Install the air intake duct (see FRONT BULKHEAD COVER REPLACEMENT
).