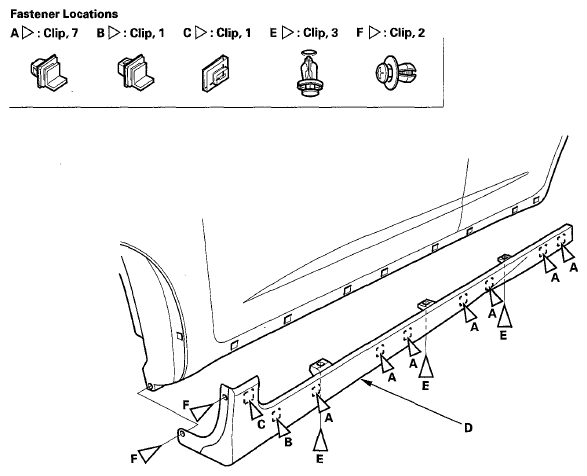
For Some Models
- Remove the side sill panel (A).
- Remove the clips (B) on the back of the front wheel arch.
- Remove the expansion clips (C).
- Slide the side sill panel forward, and remove it. The side clips (D, E, F) will stay in the body.
- Remove the side clips (D, E) from the body by turning them 45°.
- If necessary, use a utility knife to cut the double-sided adhesive tape (G) that holds the side clips (F) to the body. Take care not to scratch the body.
 Courtesy of AMERICAN HONDA MOTOR CO., INC.
- If the clips are damaged or stress-whitened, replace them with new ones.
- Prepare the side clips (F) for installation by removing any remaining adhesive tape. Clean the side clip bonding surfaces with a shop towel dampened in isopropyl alcohol. Apply primer to the side clips, then attach new adhesive tape.
- Clean the side clip body bonding surface with a shop towel dampened in isopropyl alcohol where adhesive tape will be attached.
- Install the side clips (A, B, C) on the side sill panel (D).
 Courtesy of AMERICAN HONDA MOTOR CO., INC.
- Hold the panel up, and fit all the side clips into the holes in the body. Push on the panel until the clips snap into place, and press the adhesive tape into place.
- Install the expansion clips (E).
- Install the clips (F) on the back of the front wheel arch.