Expansion Valve Replacement
- Recover the refrigerant with a recovery/recycling/charging station (see REFRIGERANT RECOVERY
).
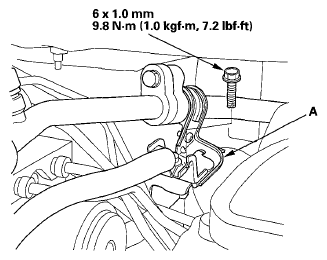
- Remove the bolt from the A/C line clamp (A).
 Courtesy of AMERICAN HONDA MOTOR CO., INC.
- Remove the blower unit (see BLOWER UNIT REMOVAL/INSTALLATION
).
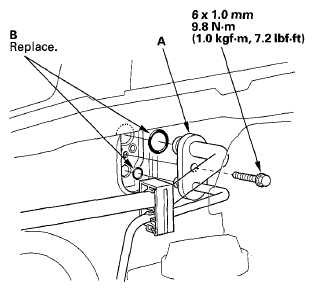
- Remove the bolt, then disconnect the A/C line (A) from the evaporator core and remove the O-rings (B).
 Courtesy of AMERICAN HONDA MOTOR CO., INC.
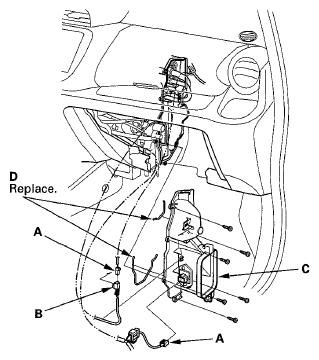
- Disconnect the connectors (A) from the evaporator temperature sensor and the blower resistor, then remove the connector clip (B). Remove the self-tapping screws, the expansion valve cover (C), and the seals (D).
 Courtesy of AMERICAN HONDA MOTOR CO., INC.
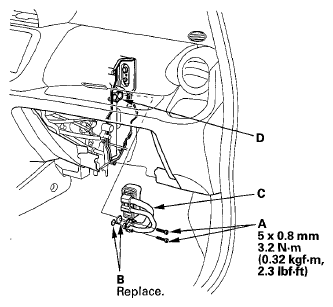
- Remove the bolts (A), the O-rings (B), the expansion valve (C) and the inlet and outlet lines (D) from the evaporator core (E). Be careful not to bend the lines.
 Courtesy of AMERICAN HONDA MOTOR CO., INC.
- Remove the bolts, O-rings (A) and the expansion valve (B) from the inlet and outlet lines (C).
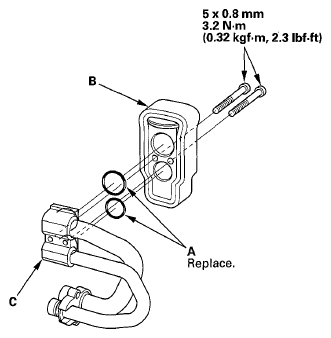 Courtesy of AMERICAN HONDA MOTOR CO., INC.
- Install the expansion valve in the reverse order of removal, and note these items:
- Replace the O-rings with new ones at each fitting, and apply a thin coat of refrigerant oil before installing them. Be sure to use the correct O-rings for HFC-134a (R-134a) to avoid leakage.
- Immediately after using the oil, reinstall the cap on the container, and seal it to avoid moisture absorption.
- Do not spill the refrigerant oil on the vehicle; it may damage the paint; if the refrigerant oil contacts the paint, wash it off immediately.
- Make sure that there is no air leakage.
- Charge the system (see SYSTEM CHARGING
).