Removal Procedure
 Courtesy of GENERAL MOTORS CORP.
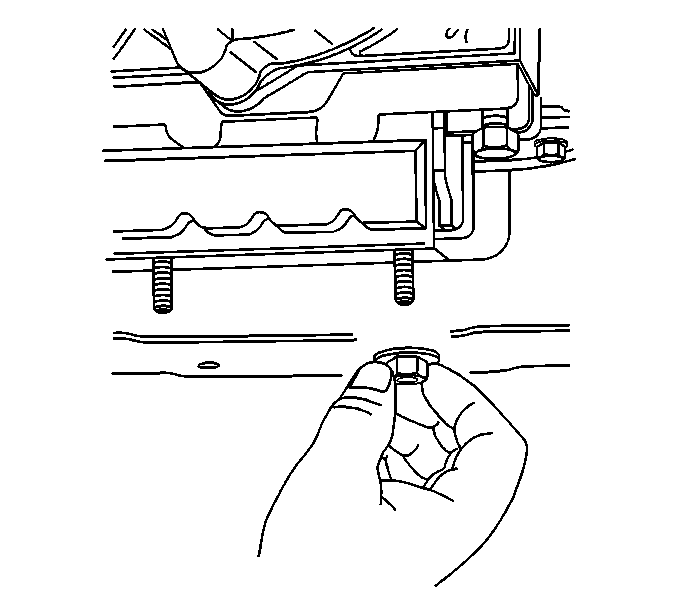
- Raise and suitably support the vehicle. Refer to Lifting and Jacking the Vehicle
.
- Support the transmission with a suitable transmission jack.
- Remove the transmission mount to transmission support nuts.
- Raise the transmission off of the transmission support.
 Courtesy of GENERAL MOTORS CORP.
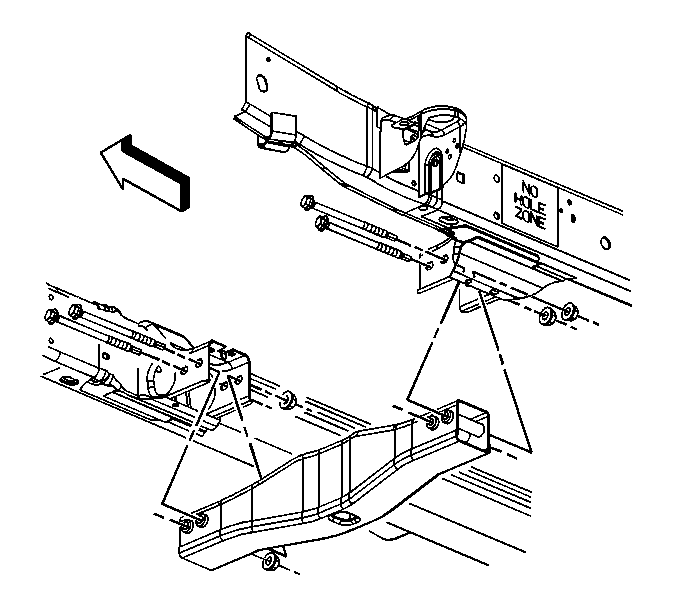
- Remove the transmission support crossmember bolts and nuts.
- Remove the transmission support crossmember.
 Courtesy of GENERAL MOTORS CORP.
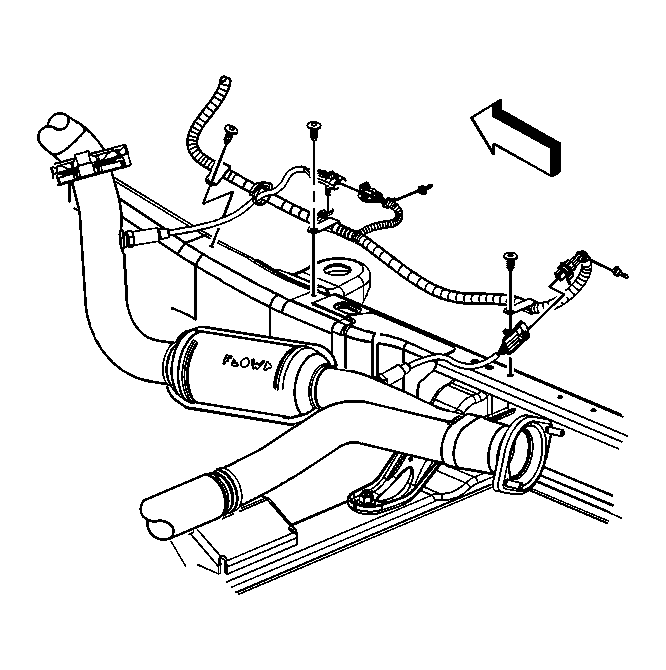
- Remove the clip from around the engine harness and the oxygen sensor pigtail.
- Disconnect the connector position assurance (CPA) retainers.
- Disconnect the oxygen sensor electrical connectors.
 Courtesy of GENERAL MOTORS CORP.
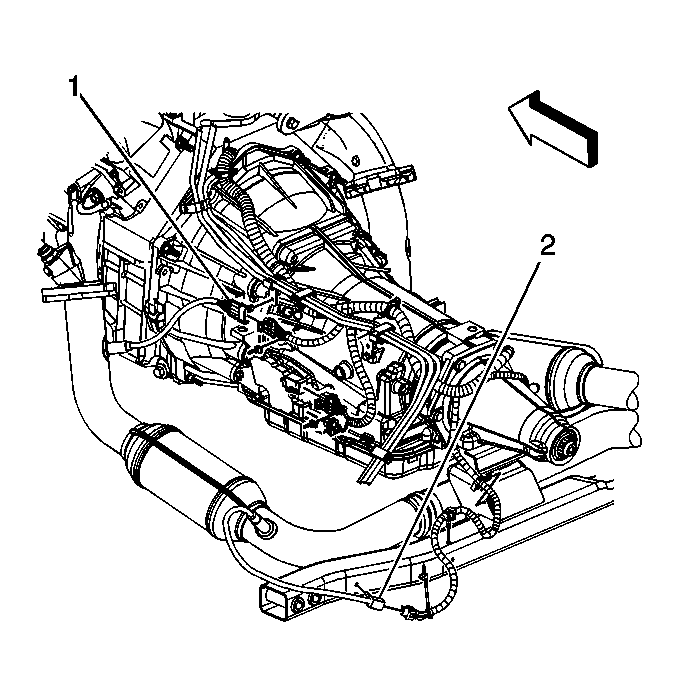
- Unclip the oxygen sensor electrical connectors from the following:
- Hose clip
- Transmission crossmember
- Disconnect the CPA retainers.
- Disconnect the oxygen sensor electrical connectors (1, 2).
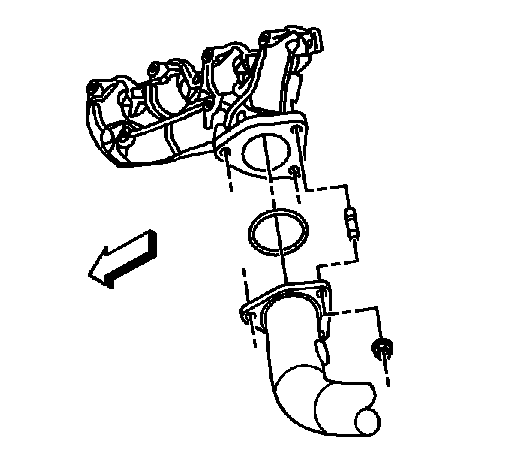 Courtesy of GENERAL MOTORS CORP.
- Remove the left exhaust manifold pipe nuts.
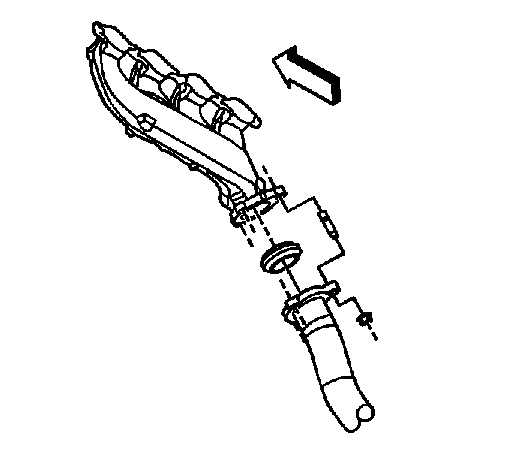 Courtesy of GENERAL MOTORS CORP.
- Remove the right exhaust manifold pipe nuts.
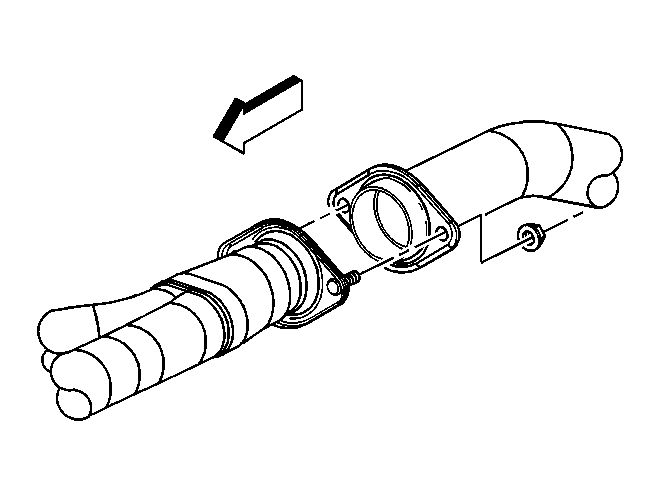 Courtesy of GENERAL MOTORS CORP.
- Remove the exhaust muffler nuts.
- Remove the catalytic converter.
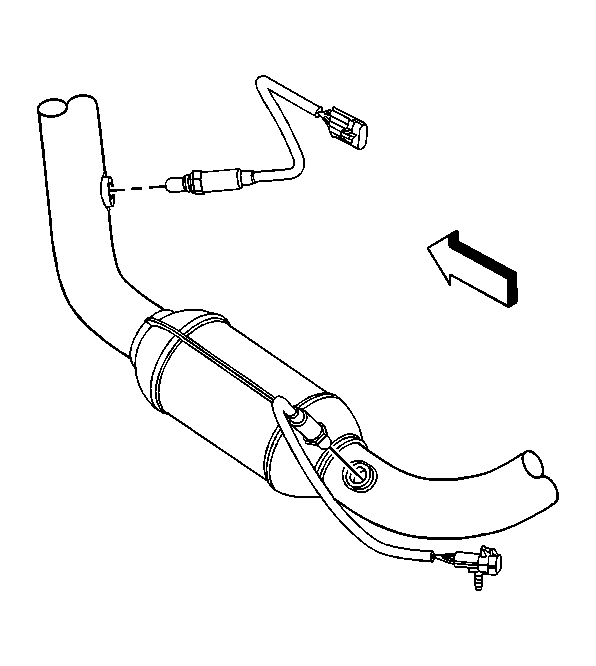 Courtesy of GENERAL MOTORS CORP.
- Remove the oxygen sensors if the catalytic converter is to be replaced.