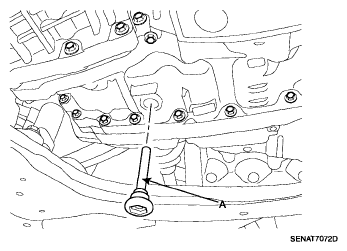
- Drain the oil by removing the overflow plug and the O-ring using a torx wrench (T40), and the drain plug (A) and the gasket by using a hexagon wrench (17mm).
 Courtesy of HYUNDAI MOTOR CO.
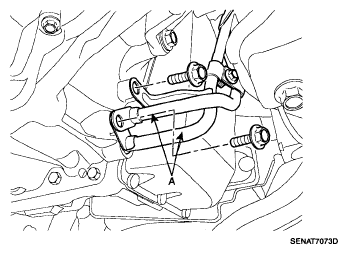
- Disconnect the oil cooler hoses from the tubes.
- Remove the 2 bolts to remove the oil cooler tubes (A) and the O-rings.
 Courtesy of HYUNDAI MOTOR CO.
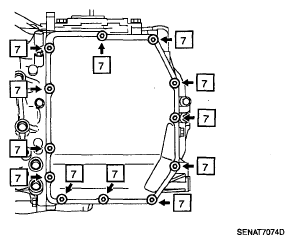
- Using a torx wrench, remove the 12 seal bolts. Using a plastic hammer, tap the transaxle side cover to remove it.
CAUTION:
- Be careful not to damage the fitting surface of the transaxle case and the transaxle side cover.
- Be careful not to deform the transaxle side cover.
 Courtesy of HYUNDAI MOTOR CO.
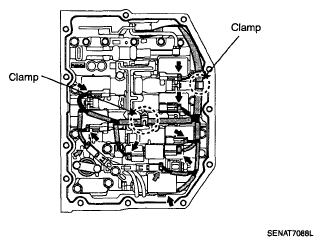
- Disconnect the 8 solenoid connectors and the 2 speed sensor connectors. Disconnect the wire from the 2 clamps.
 Courtesy of HYUNDAI MOTOR CO.
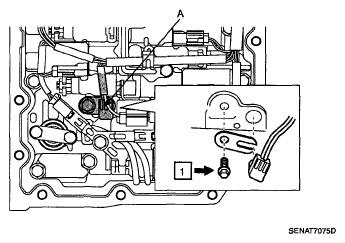
- Remove the bolt and the lock plate, and pull out the oil temperature sensor (A) and the O-ring from the valve body assembly.
 Courtesy of HYUNDAI MOTOR CO.
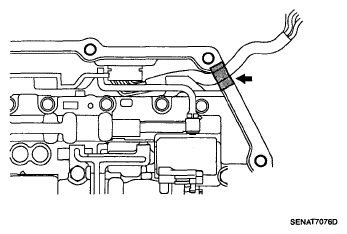
- Fix the wire with tape to the transaxle case as shown in the figure.
NOTE:
Be sure to secure the wire with tape so that it will not interfere with the valve body assembly.
 Courtesy of HYUNDAI MOTOR CO.
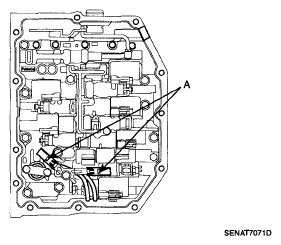
- Remove the 2 speed sensor wires (A) from the solenoid clamp.
 Courtesy of HYUNDAI MOTOR CO.
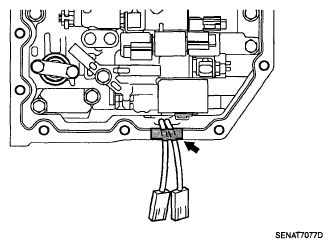
- Fix the 2 speed sensor wires with tape to the transaxle case as shown in the figure.
NOTE:
Be sure to secure the 2 speed sensor wires with tape so that they will not interfere with the valve body assembly.
 Courtesy of HYUNDAI MOTOR CO.
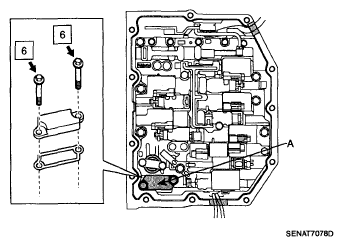
- Remove the 2 bolts to remove the suction cover (A) and the gasket.
 Courtesy of HYUNDAI MOTOR CO.
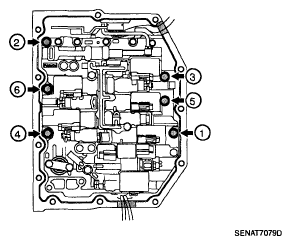
- Remove the 6 bolts as shown in the figure.
 Courtesy of HYUNDAI MOTOR CO.
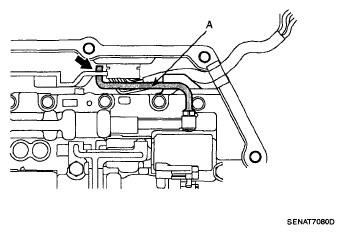
- Disconnect the manual valve link (A) and remove the valve body assembly.
CAUTION:
Be careful not to drop the valve body assembly.
 Courtesy of HYUNDAI MOTOR CO.