Repair Procedures: Replacement
- Recover the refrigerant with a recovery/recycling/charging station.
- Disconnect the negative (-) battery terminal.
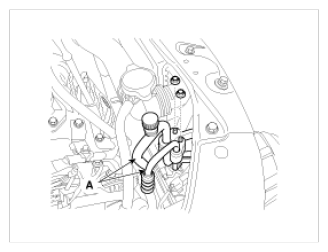
- Remove the discharge line and liquid line (A) from the condenser.
 Courtesy of HYUNDAI MOTOR AMERICA
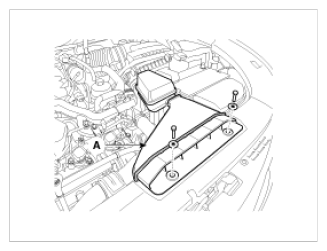
- Remove the intake air duct (A).
 Courtesy of HYUNDAI MOTOR AMERICA
- Remove the front bumper. (Refer to "FRONT BUMPER
")
- Remove the hood latch. (Refer to "HOOD
")
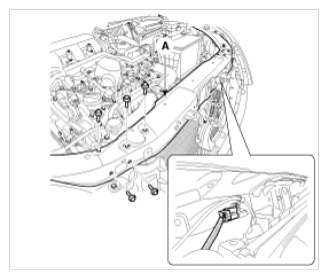
- Remove the radiator support upper panel (A).
 Courtesy of HYUNDAI MOTOR AMERICA
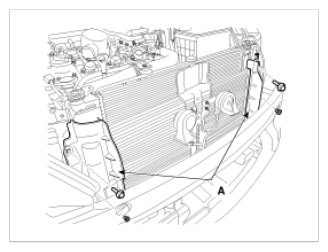
- Disconnect the mounting clip and then remove the condenser air guard (A).
 Courtesy of HYUNDAI MOTOR AMERICA
- Remove the condenser (B) by lifting it up. Be careful not to damage the radiator and condenser fins when removing the condenser.
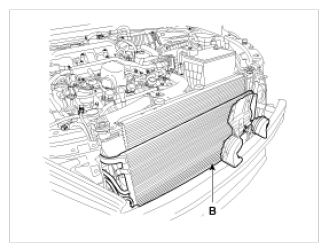 Courtesy of HYUNDAI MOTOR AMERICA
- Install in the reverse order of removal, and note these items:
- If you're installing a new condenser, add refrigerant oil ND-OIL8.
- Replace the O-rings with new ones at each fitting, and apply a thin coat of refrigerant oil before installing them. Be sure to use the right O-rings for R-134a to avoid leakage.
- Be careful not to damage the radiator and condenser fins when installing the condenser.
- Be sure to install the lower mount cushions of condenser securely into the holes.
- Charge the system, and test its performance.