Repair Procedures: Removal
- Release the residual pressure in fuel line. (Refer to the Fuel Delivery System - "Release Residual Pressure in Fuel Line ")
- Remove the rear seat cushion. (Refer to Body - "Rear Seat Assembly
")
- Remove the fuel pump service cover (A) in the trunk.
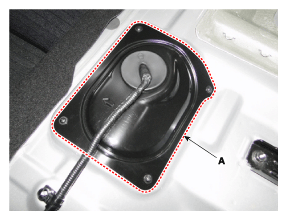 Courtesy of HYUNDAI MOTOR AMERICA
- Disconnect the fuel feed tube quick-connector (A).
- Disconnect the fuel pressure sensor connector (B).
- Disconnect the fuel pump control module (C).
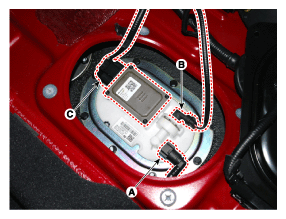 Courtesy of HYUNDAI MOTOR AMERICA
- Lift the vehicle.
- Remove the main muffler. (Refer to Engine Mechanical System - "Muffler
")
- Support the fuel tank with a jack.
- Disconnect the fuel filler hose (A) and leveling hose (B).
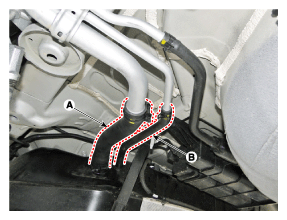 Courtesy of HYUNDAI MOTOR AMERICA
- Disconnect the vapor hose quick-connector (A).
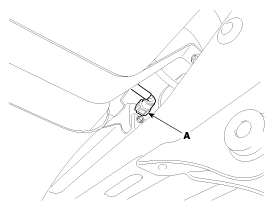 Courtesy of HYUNDAI MOTOR AMERICA
- Disconnect the fuel tank pressure sensor extension connector (A).
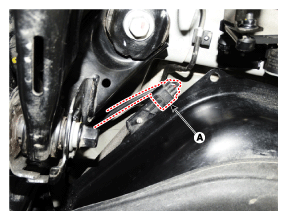 Courtesy of HYUNDAI MOTOR AMERICA
- Remove the fuel tank bands (A) installation nuts.
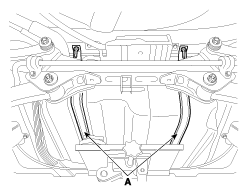 Courtesy of HYUNDAI MOTOR AMERICA
- Remove the fuel tank after removing the fuel tank band (A) shown below.
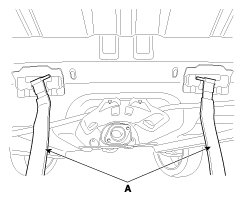 Courtesy of HYUNDAI MOTOR AMERICA