Diagnostic Procedure
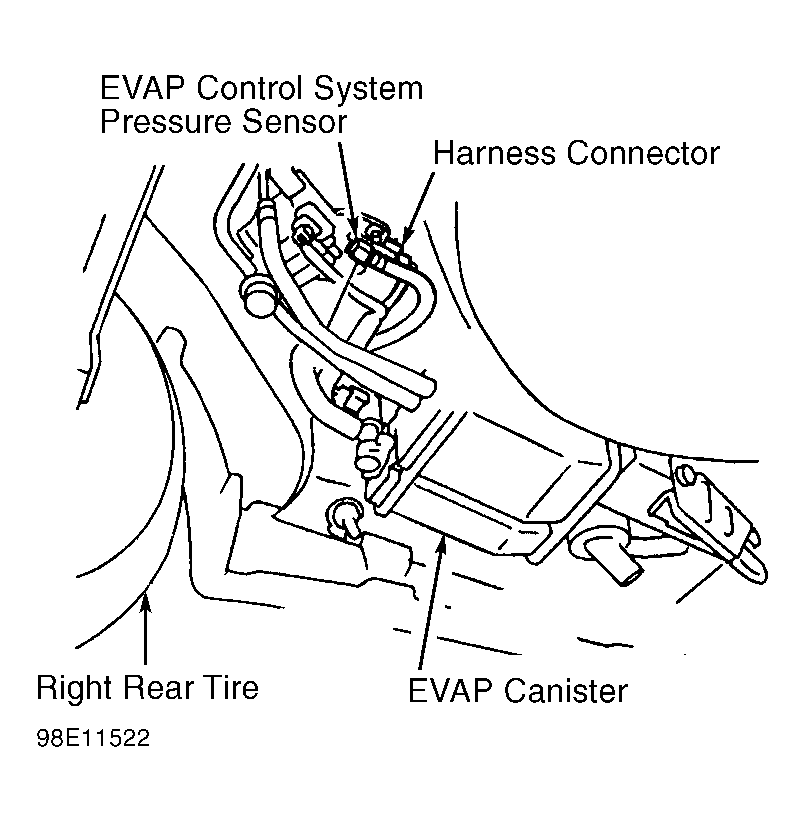
- Turn ignition off. Inspect vacuum hose for bends, kinks, clogging and ensure hoses are properly routed and securely connected. Loosen and retighten engine ground bolts. See Figure. Disconnect and inspect EVAP control system pressure sensor harness connector. If poor connection or water is present, repair or replace as necessary. If okay, go to next step.
- Check Power Supply
- Turn ignition off. Disconnect EVAP control system pressure sensor harness connector. See Fig 1. Turn ignition on. Using DVOM, measure voltage between EVAP control system pressure sensor harness connector Brown/White wire terminal and ground. If reading is about 5 volts, go to next step. If reading is not about 5 volts, check for faulty connections or fault in Brown/White wire. Repair or replace as required.
- Check Ground Circuit
- Turn ignition off. Disconnect EVAP control system pressure sensor harness connector. Using a DVOM, check continuity between EVAP control system pressure sensor harness connector Black wire terminal and engine ground. If continuity does not exist, repair open in Black wire. If continuity exists, go to next step.
- Check Input Signal Circuit
- Disconnect PCM harness connector. Using DVOM, check continuity of White/Red wire between PCM terminal No. 92 and EVAP control system pressure sensor harness connector terminal No. 2. If continuity does not exist, repair open in White/Red wire. If continuity exists, go to next step.
- Check EVAP Canister Purge Volume Control Valve
- See step 3) in DTC P0443: EVAP CANISTER PURGE VOLUME CONTROL VALVE . Replace as necessary. If okay, go to next step.
- Check EVAP Canister Vent Control Valve
- Remove and inspect EVAP canister vent control valve for obstructions. Clear or clean as required. Check "O" ring for proper sealing. Using fused jumper wires, apply battery voltage to terminal No. 1 and ground to terminal No. 2. See Fig 1. If air passes through valve, go to next step. Replace valve if air does not pass through valve.
- Remove jumper wires from valve. If air does not pass through valve, valve is okay. Replace valve if air passes through valve. Ensure NEW "O" ring is installed properly. See Fig 1.
- Check Pressure Sensor
- Remove EVAP control system pressure sensor with harness connected. Remove hose from EVAP control system pressure sensor. Connect a DVOM between PCM harness terminals No. 92 and 128. Turn ignition on. With no pressure present, reading should indicate 3.0-3.6 volts. Using hand-held vacuum pump apply -2.75 in. Hg of pressure, reading should indicate .4-.6 volt. If reading is not as specified, replace EVAP control system pressure sensor. If reading is as specified, go to next step.
- Check EVAP Purge Line
- Check EVAP purge line for cracks. Inspect EVAP system components for damage or poor connections. Disconnect and reconnect harness connectors in circuit. Check PCM connector for damage or corrosion and perform final check. See FINAL CHECK in TESTS W/CODES - INTRODUCTION
article.
- Check Canister
- Remove EVAP canister. Check if water will drain from EVAP canister. Weigh EVAP canister with vent control valve attached. Replace if EVAP canister weighs more than 4 lbs. (1.8 Kg). If EVAP canister weighs less than 4 lbs. (1.8 Kg), inspection is complete.
 Courtesy of NISSAN MOTOR CO., U.S.A.