Disassembly and Assembly of Combination Meter: Disassembly
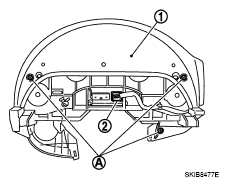
- Remove screws (A) and remove rear cover (1).
 Courtesy of NISSAN MOTOR CO., U.S.A.
- Disconnect odo/trip meter and illumination control switch connector (2).
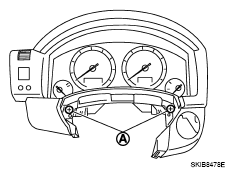
- Remove screws (A).
 Courtesy of NISSAN MOTOR CO., U.S.A.
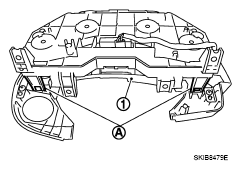
- Remove tabs (A) and remove switch and meter housing (1).
 Courtesy of NISSAN MOTOR CO., U.S.A.
- Remove screws (A) and remove reinforcing metal (1).
 Courtesy of NISSAN MOTOR CO., U.S.A.
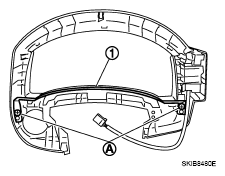
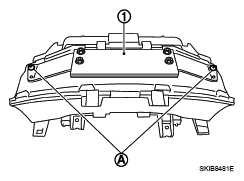
- Remove screws (A) and remove plate (1).
 Courtesy of NISSAN MOTOR CO., U.S.A.
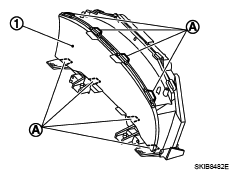
- Disengage tabs (A) to separate front cover (1).
 Courtesy of NISSAN MOTOR CO., U.S.A.