Dimmer Switch Circuit
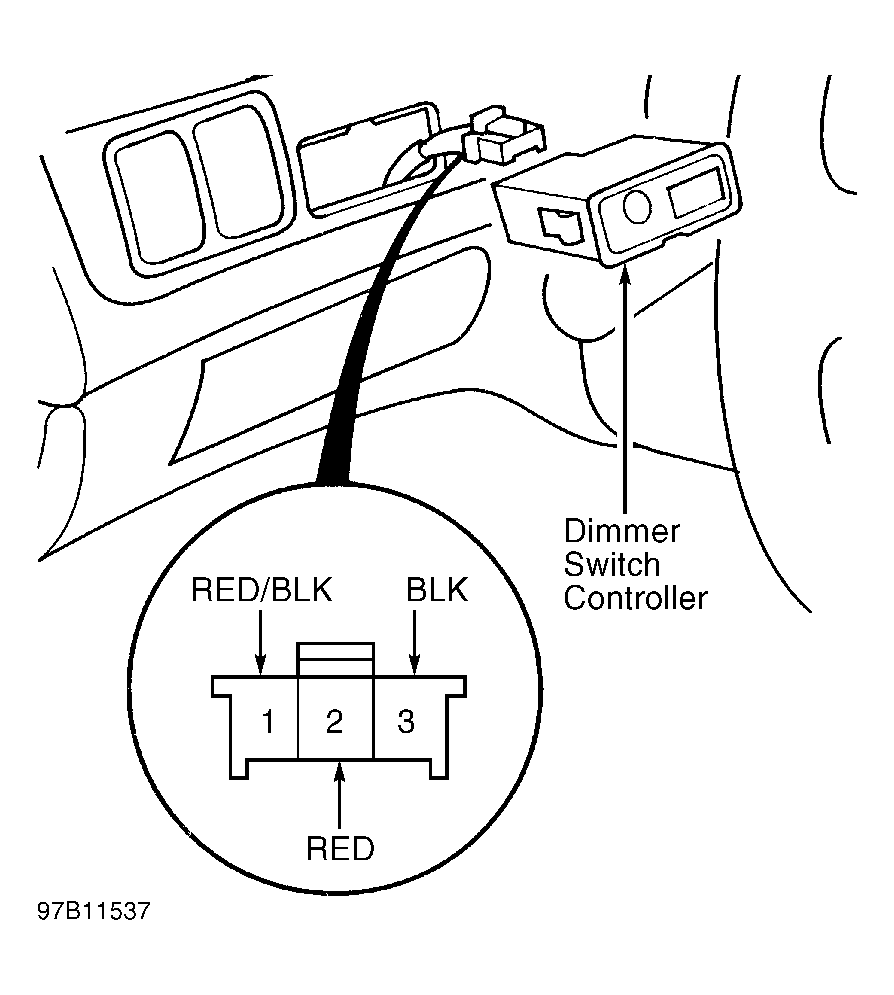
- Turn ignition off. Carefully pry dimmer switch controller from dashboard. SeeFig 1
. Dimmer switch is built into dimmer switch controller. Disconnect dimmer switch 3-pin connector. Inspect connector terminals for good contact.
- Using a DVOM, check for continuity between dimmer switch 3-pin connector terminal No. 3 (Black wire) and ground. SeeFig 1
. If continuity exists, go to next step. If continuity does not exist, repair open in Black wire. Check ground connections G401, G402, G403 and G404. See COMPONENT LOCATIONS
.
- Turn headlight switch to ON position, check for battery voltage between dimmer switch 3-pin connector terminal No. 1 (Red/Black wire) and ground. If battery voltage exists, go to next step. If battery voltage does not exist, replace blown fuse (underhood No. 1 (10-amp) fuse). If fuse is okay, check for faulty headlight switch or open in Red/Black wire. Repair as necessary.
- With headlight switch on, use a jumper wire to connect dimmer switch 3-pin connector terminal No. 2 (Red wire) to ground. SeeFig 1
. Dash lights should be on maximum brightness. If dash lights come on, dimmer switch circuit is okay, replace dimmer switch. If dash lights do not come on, repair open in Red wire. See WIRING DIAGRAMS
.
 Courtesy of AMERICAN HONDA MOTOR CO., INC.