Defogger Switch Circuit Test
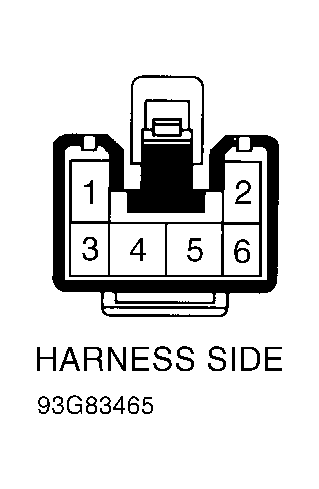
- Turn ignition off. Remove defogger switch from console. Using an ohmmeter, check for continuity between ground and terminals No. 3 (Black wire) and No. 2 (Red/Green wire) of defogger switch harness connector. See Fig 1
. If continuity exists, go to next step. If continuity does not exist, locate and repair open in related wire.
- Turn ignition switch to ACC position. Using a voltmeter, check for voltage between ground and terminal No. 4 (White/Green wire). See Fig 1
. If battery voltage exists, go to next step. If battery voltage does not exist, check BACK-UP/TURN (15-amp) fuse. If fuse is okay, check for an open in White/Green wire for an open.
- Turn ignition off. Using an ohmmeter, check for continuity between terminal No. 5 (Pink/Green wire) and ground. See Fig 1
. If continuity exists, go to next step. If continuity does not exist, check for an open in Pink/Green wire between connector and both mirror assemblies. If Pink/Green wire is okay, check for faulty heating element in mirror assembly. Repair as necessary.
- Turn light switch to ON position. Using a voltmeter, check for voltage at terminal No. 6 (Green/Red wire). See Fig 1
. If battery voltage exists, circuit test is complete. If battery voltage does not exist, check for faulty Tail relay located behind left kick panel. Check for an open or short in Green/Red wire between connector and Tail relay. Repair or replace as necessary.
 Courtesy of ISUZU MOTOR CO.