Body Structure: Windshield: Removal
- Disconnect the battery ground cable.
- Remove the front pillar trim cover.
- Turn up the finisher and pry the trim cover clips free from the body panel.
- Remove the sunvisors and sunvisor holders. Refer to HEADLINING (LWB)
or HEADLINING (SWB)
.
- Remove the rear view mirror.
- Remove the clip (1) and disconnect the connector (2).
- Turn the channel mount (3) 90 degrees clockwise and pull down.
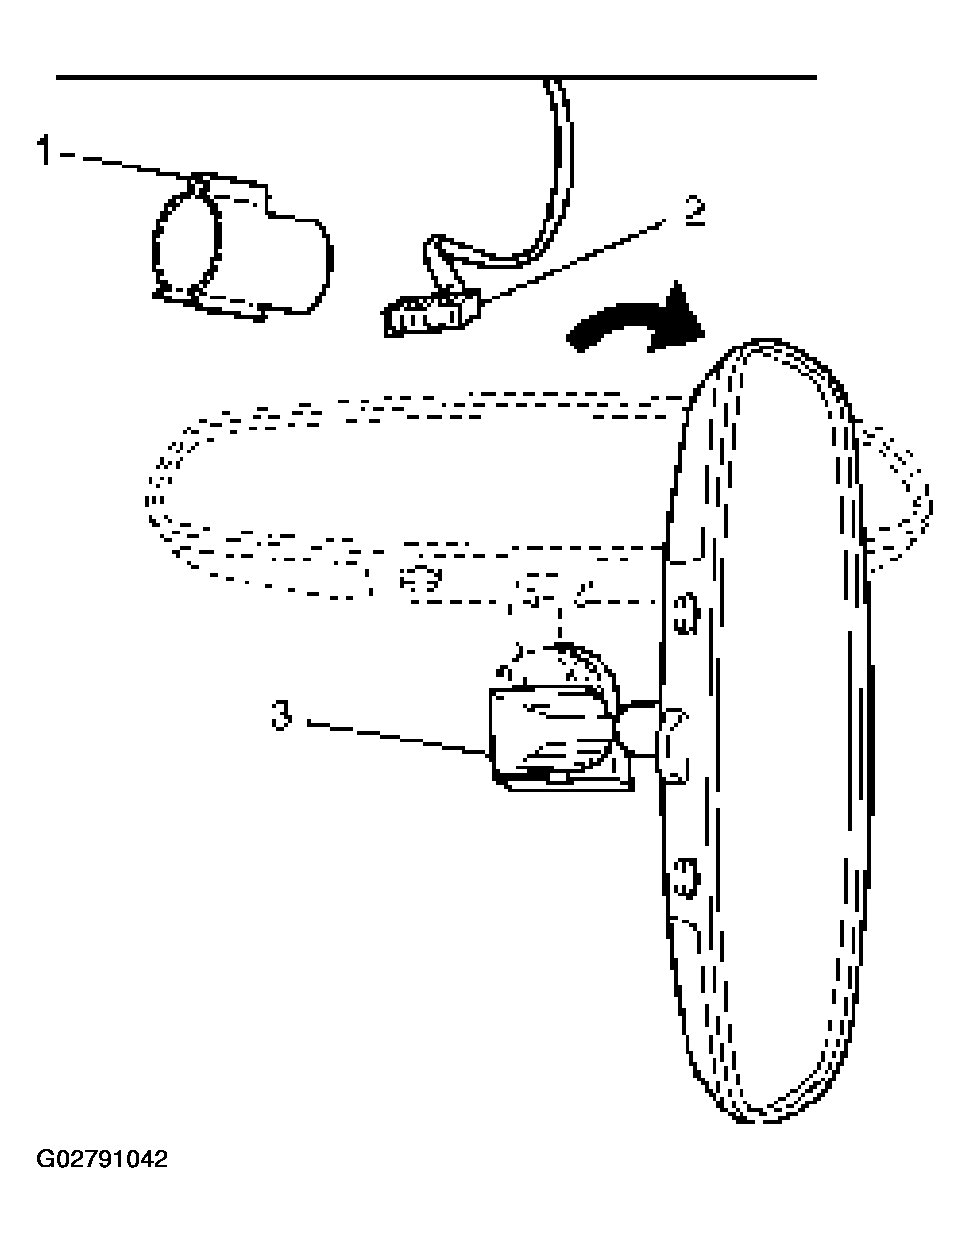 Courtesy of ISUZU MOTOR CO.
- Remove the windshield wiper arm.
- Remove the windshield side molding.
- Pull the molding out from drip rail.
- Remove the front cowl cover.
- Remove the windshield support.
- Remove the upper molding.
- Remove the windshield.
- Use a knife to cut through part of the adhesive caulking material.
- Secure one end of a piece of steel piano wire (0.02 inches in diameter) to a piece of wood that can serve as a handle.
- Use a pair of needle nose pliers to insert the other end of the piano wire through the adhesive caulking material at the edge of the windshield glass.
- Secure the other end of the piano wire to another piece of wood.
- With the aid of an assistant, carefully move the piano wire with a sawing motion to cut through the adhesive caulking material around the entire circumference of the windshield glass.
- Attach some cloth tape (1) on the body for protecting the painting surface.
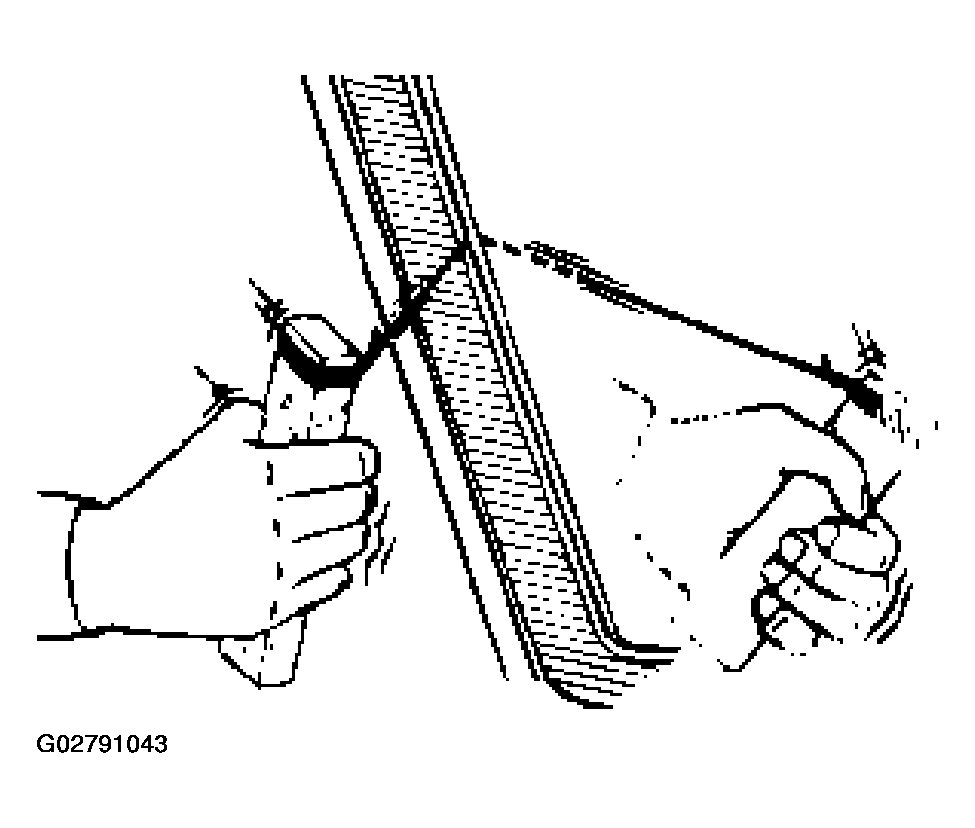 Courtesy of ISUZU MOTOR CO.
- Clean the remaining adhesive caulking material from the area of the body which holds the windshield.