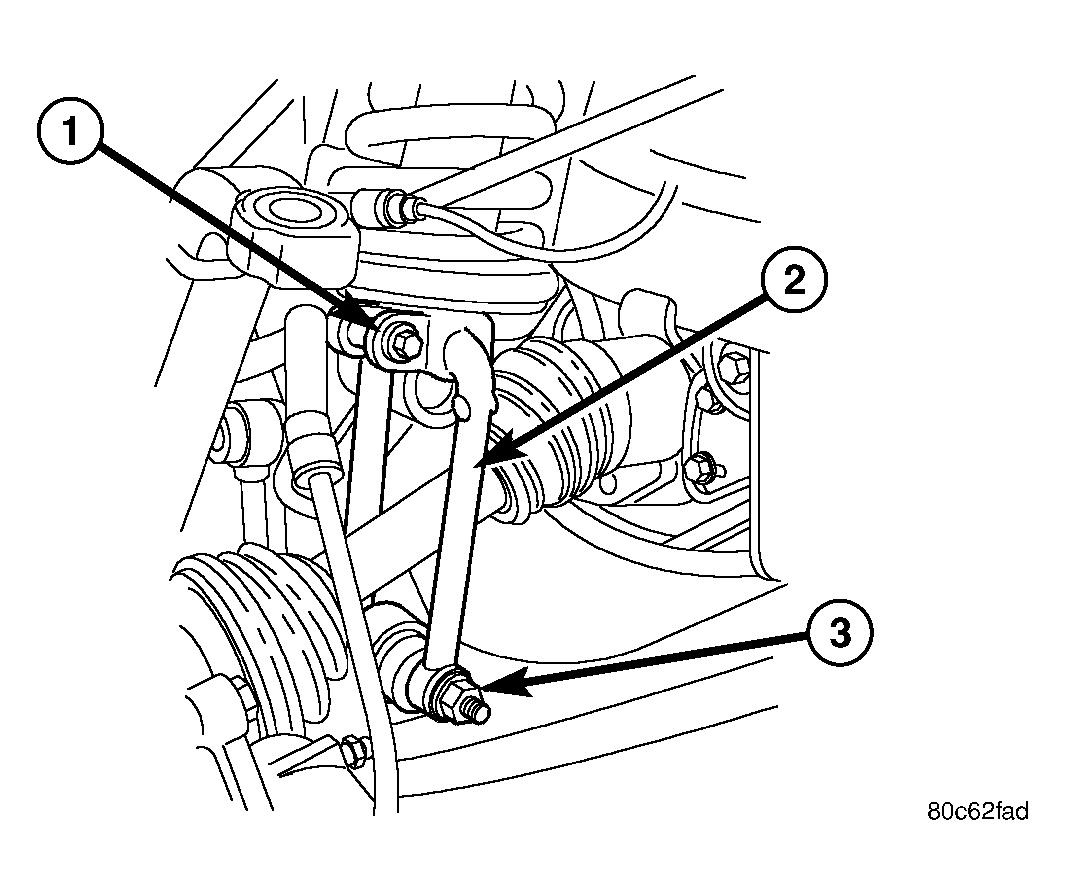
Clevis Bracket
- Raise and support the vehicle.
- Remove the tire and wheel assembly.
 Courtesy of CHRYSLER LLC
- Remove the lower clevis bolt (3) at the lower control arm. See Fig 1.
- Remove the upper clevis bolt (1) at the shock. See Fig 1.
- Remove the lower stabilizer link bolt at the lower control arm.
- Remove the lower ball joint nut.
- Separate the lower ball joint from the lower control arm using remover C-4150A.
- Swing the lower control arm downward to allow clearance to remove the clevis bracket (2).
- Remove the clevis bracket (2) from the vehicle.