Clutch Assembly: Installation
- Flywheel bolts are pre-coated from manufacturer with thread sealant. If flywheel bolt threads are not pre-coated, apply thread sealant to threads before installing. Install and alternately tighten flywheel bolts in a crisscross pattern to specification. See TORQUE SPECIFICATIONS .
- Install clutch disc and clutch cover on flywheel using the following steps:
- Insert Clutch Guide (09301-00110) in clutch disc, then insert them in the flywheel taking care not to insert them in the wrong direction.
- Align matchmarks on clutch cover and flywheel. See Figure.
- Use clutch aligner to center clutch disc on flywheel. Install 6 bolts on clutch cover in crisscross pattern to specification. See TORQUE SPECIFICATIONS .
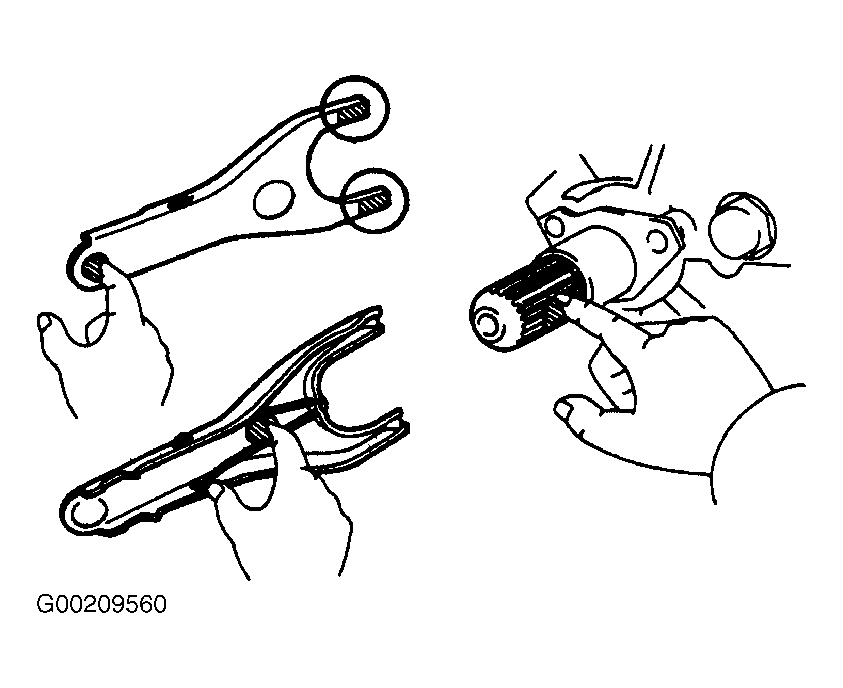
- Apply appropriate grease to clutch release fork and hub contact surfaces, release fork and push rod contact and release fork pivot points. See Fig 1.
- Apply appropriate grease to input spline shaft. See Fig 1.
- Install boot and release bearing to release fork, and install them to transmission. See Figure.
- Install transmission using the following steps:
- Raise front side of engine.
- Turn the transmission a little in the clockwise and jack up until just before the transmission housing touches the body. Align the input spline with a clutch disc and install the transmission to the engine.
- Install the transmission and wire harness clamp with 8 bolts. See Figure.
- Install rear engine mounting with 4 bolts. See Figure.
- Install rear engine mounting member with 4 bolts. See Figure.
- Install starter using the following steps:
- Install starter with 2 bolts.
- Install wire with nut.
- Connect starter connector harness.
- Connect speed sensor connector and wire harness using the following steps:
- Connect wire harness to clamp. See Figure.
- Connect speed sensor connector.
- Connect back-up light switch connector. See Figure.
- Connect clutch release cylinder, clutch line bracket and ground wire using the following steps:
- Connect clutch line and ground wire with bolt. See Figure.
- Connect clutch release cylinder with 2 bolts.
- Install drive shaft. See appropriate DRIVE SHAFTS & UNIVERSAL JOINTS article in DRIVELINE/AXLES.
- Install front and center exhaust pipes. See appropriate MECHANICAL article in ENGINES.
- Fill transmission with oil. See appropriate SERVICING article.
- Install No. 1 rear floor board. See Figure.
- Lower vehicle.
- Install exhaust manifold using the following steps:
- Install 2 new gaskets to cylinder head.
- Install exhaust manifold with 8 nuts. Tighten nuts uniformly in several passes.
- Connect heated oxygen sensor connector. See Figure.
- Install case clamp.
- Install air intake connector using the following steps:
- Install air intake resonator to throttle body and tighten 2 hose clamp bolts.
- Connect PCV hose to No. 2 cylinder head cover.
- Connect engine wire harness clamp to air cleaner case. See Figure.
- Connect MAF meter connector.
- Connect upper radiator hose No. 1 to engine. See Figure.
- Fill engine with coolant.
- Install No. 1 engine cover. See Figure.
- Install No. 1 and No. 2 engine under covers. See Figure.
- Install transmission shift lever using the following steps:
- Install washer.
- Apply appropriate grease to tip of shift lever.
- Install shift lever with 4 bolts. See Figure.
- Install shift boot.
- Install shift boot retainer using the following steps:
- Install shift boot retainer with 4 bolts.
- Connect 2 wire harness clamps. See Figure.
- Reverse removal procedure to install upper console panel and console box. See REMOVAL .
- Perform road test. Check for abnormal noises and smooth shifting.
 Courtesy of © TOYOTA, LICENSE AGREEMENT TMS1002