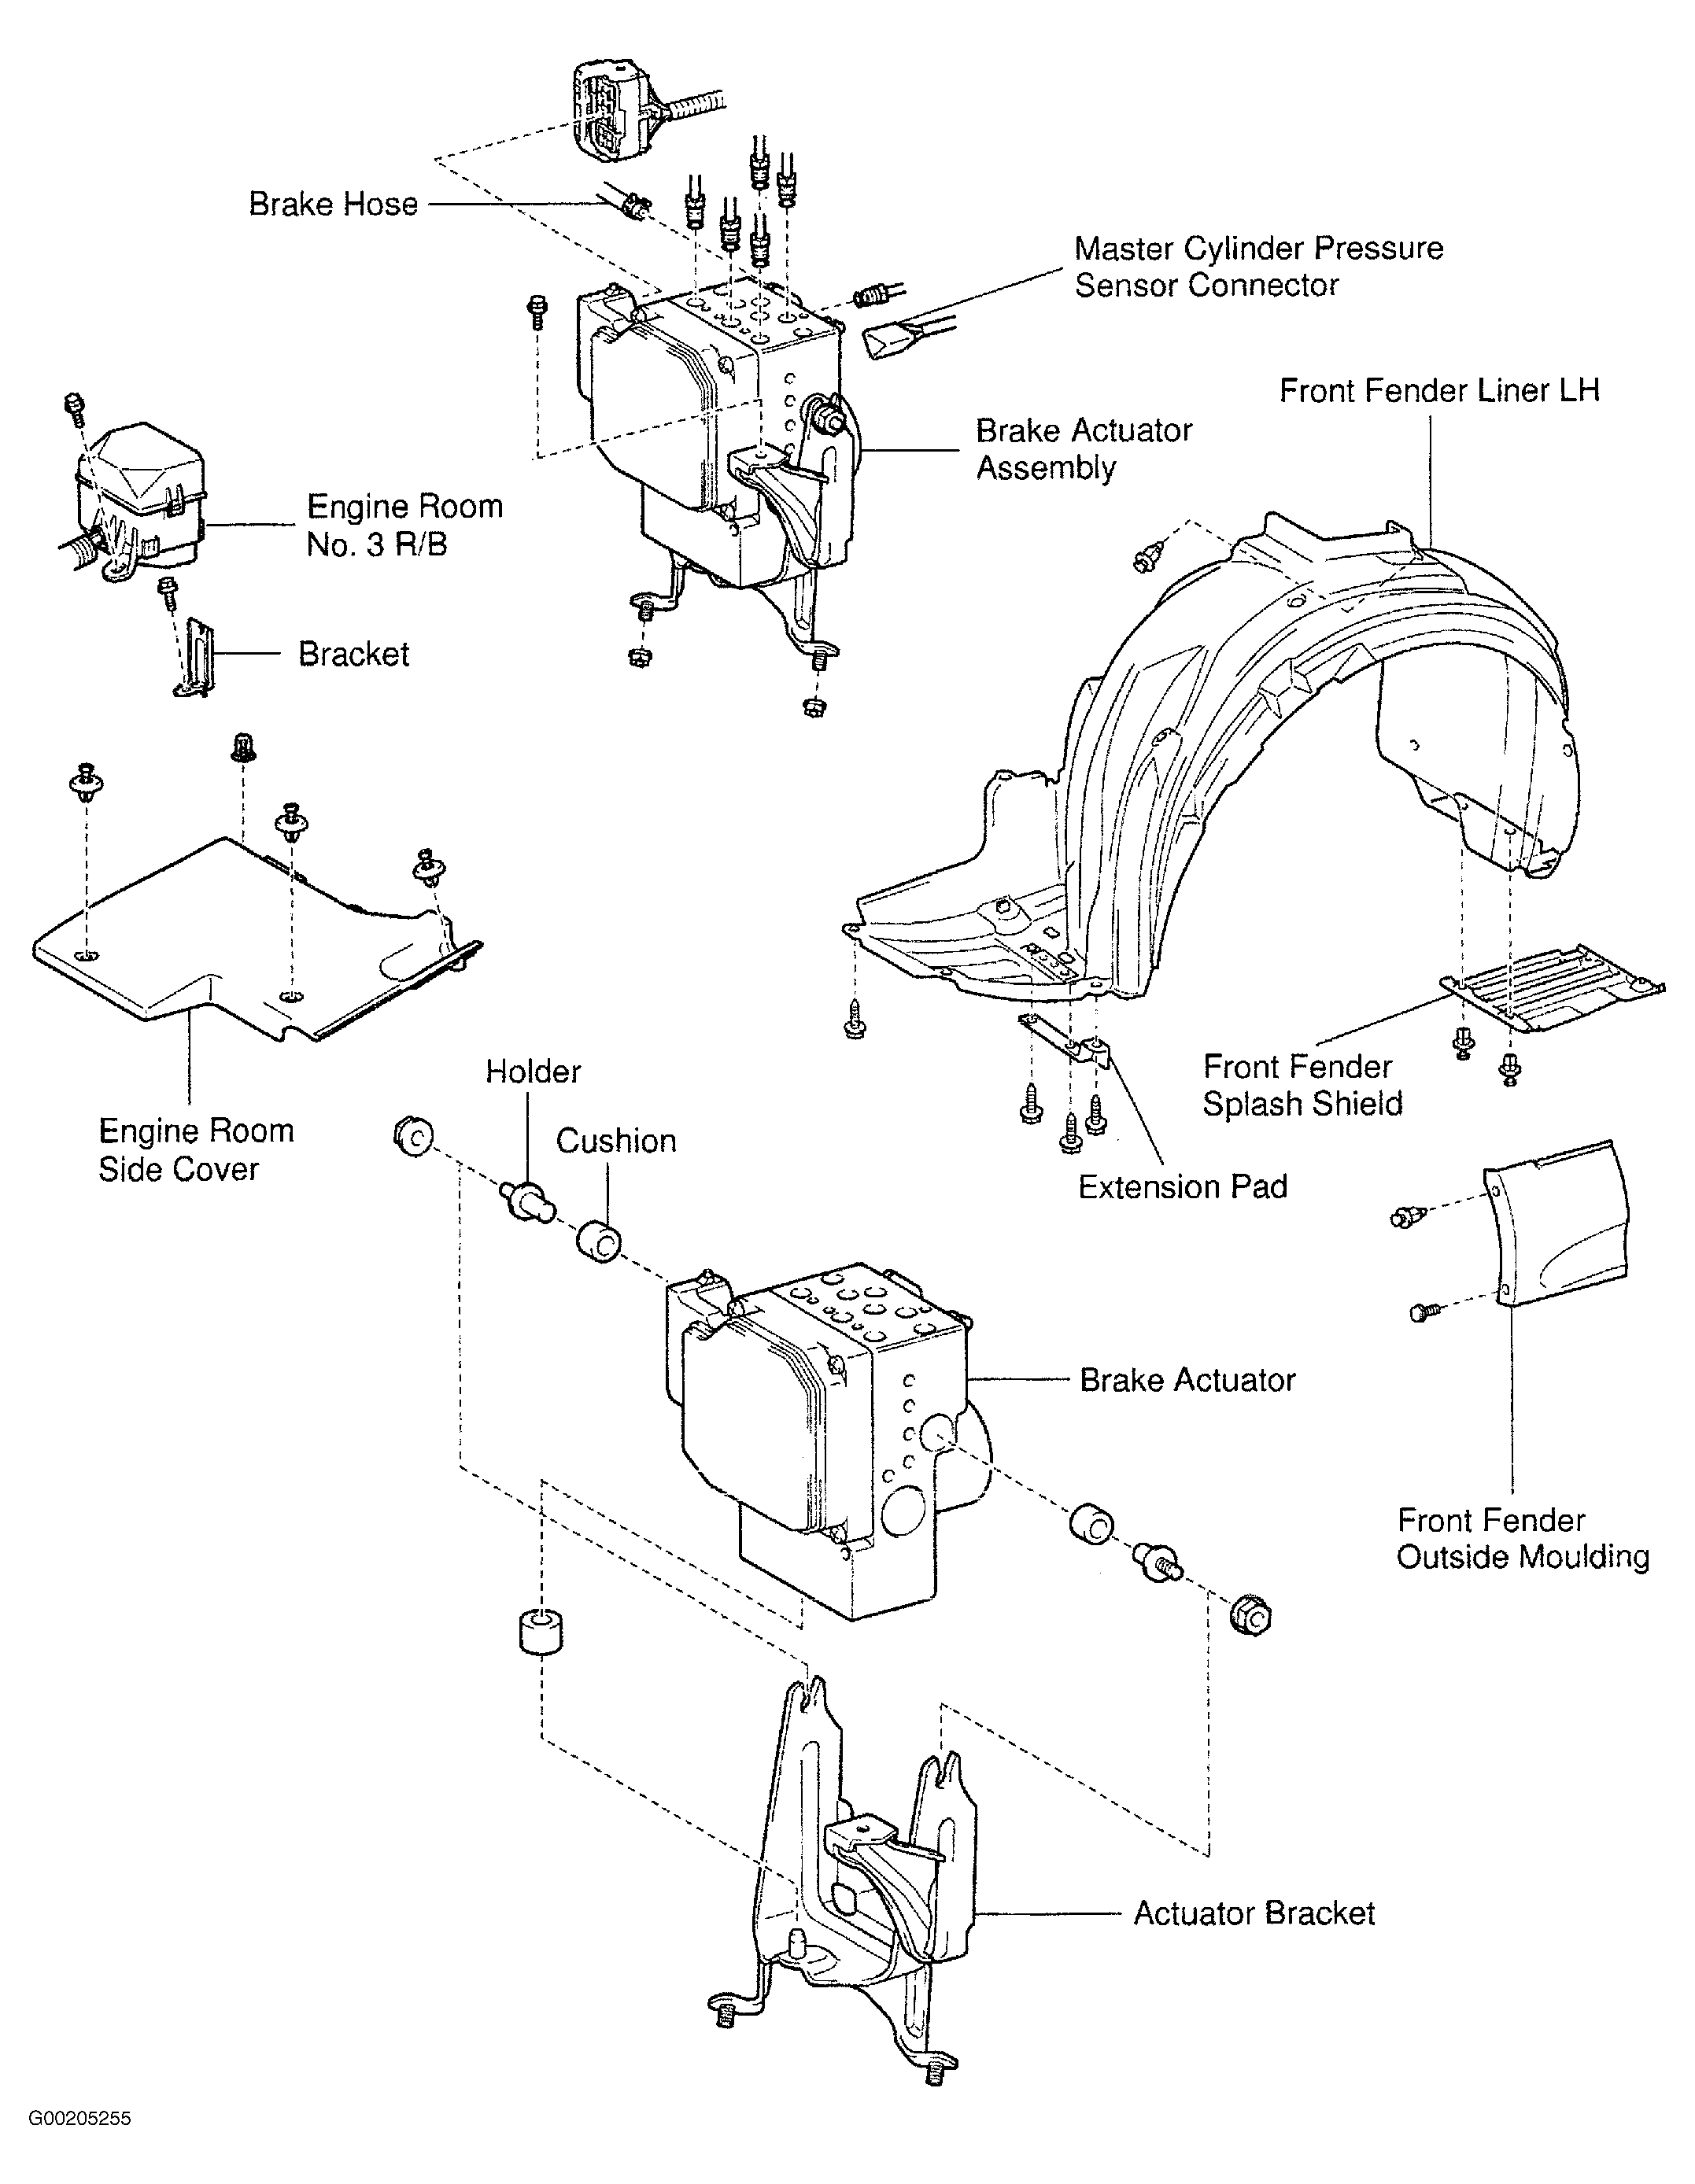
Brake Actuator Assembly: Removal
- Remove engine room side cover. See Fig 1.
- Remove the 2 bolts and bracket and move aside the engine room No. 3 R/B.
- Remove the front fender outside molding, front fender splash shield and front fender liner on the left side.
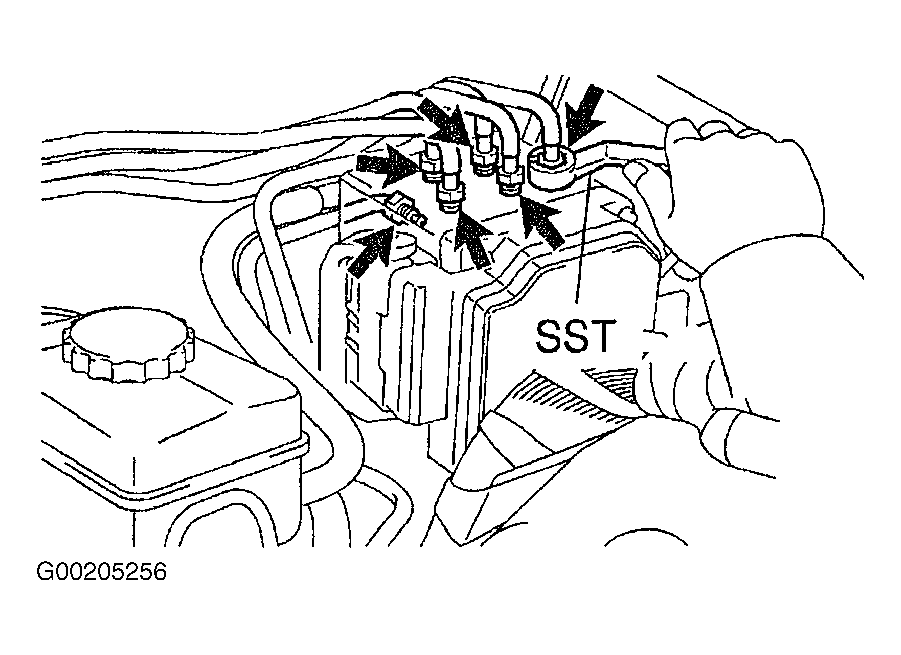
- Using special tool (09751-36011), disconnect the 6 brake lines from the actuator. Use tags or make a note to identify the place to reconnect brake lines. See Fig 2.
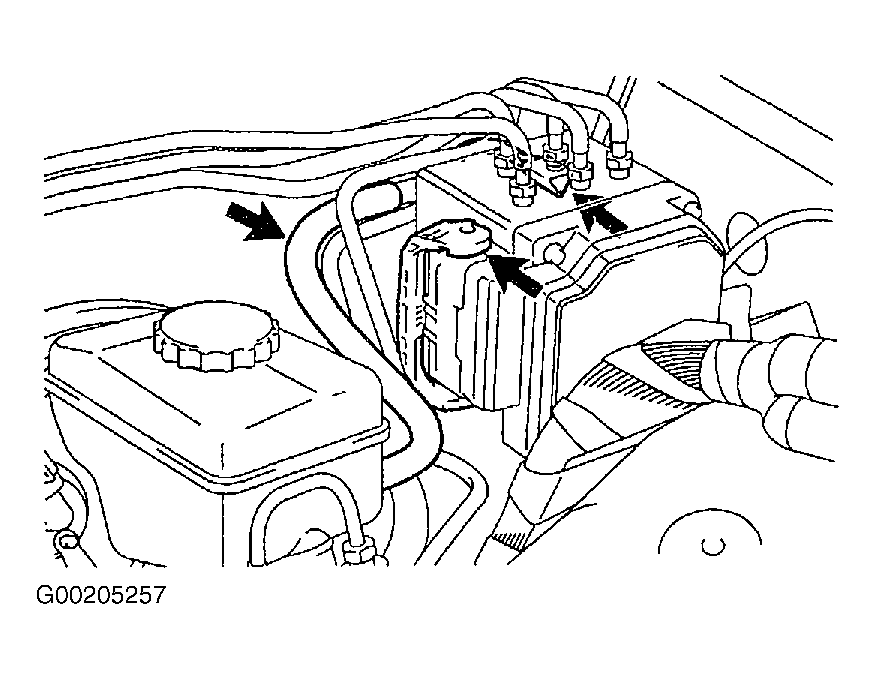
- Disconnect the 2 connectors and brake hose from the brake actuator. See Fig 3.
- Remove the bolt, 2 nuts and brake actuator assembly. Remove the 2 nuts and actuator from the actuator bracket.
- Remove the 2 holders and 3 cushions from the brake actuator.
 Courtesy of © TOYOTA, LICENSE AGREEMENT TMS1002
 Courtesy of © TOYOTA, LICENSE AGREEMENT TMS1002
 Courtesy of © TOYOTA, LICENSE AGREEMENT TMS1002