Navigation Ecu: Installation
- INSTALL NAVIGATION ECU
- Install the navigation ECU as shown in the illustration.
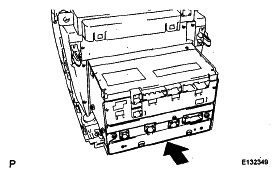 Courtesy of © TOYOTA, LICENSE AGREEMENT TMS1002
- Install the 2 screws.
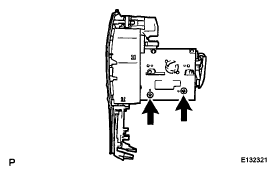 Courtesy of © TOYOTA, LICENSE AGREEMENT TMS1002
- Install the 2 screws.
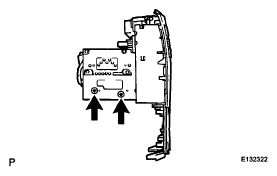 Courtesy of © TOYOTA, LICENSE AGREEMENT TMS1002
- Connect each connector.
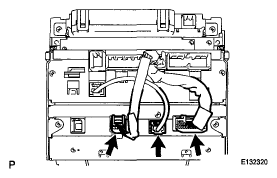 Courtesy of © TOYOTA, LICENSE AGREEMENT TMS1002
- INSTALL MULTI-DISPLAY ASSEMBLY
- Engage the 2 claws and 4 clips and install the multi-display assembly.
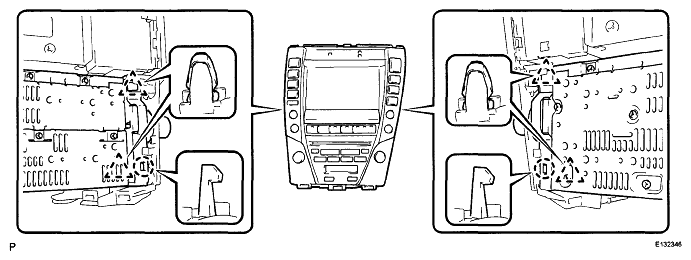 Courtesy of © TOYOTA, LICENSE AGREEMENT TMS1002
- INSTALL NO. 2 RADIO BRACKET
(See
INSTALLATION
)
- INSTALL NO. 1 RADIO BRACKET
(See
INSTALLATION
)
- INSTALL MULTI-DISPLAY WITH RADIO RECEIVER ASSEMBLY
(See
INSTALLATION
)
- INSTALL INSTRUMENT PANEL FINISH PANEL END LH
(See
INSTALLATION
)
- INSTALL INSTRUMENT PANEL FINISH PANEL END RH
(See
INSTALLATION
)
- INSTALL UPPER CONSOLE PANEL ASSEMBLY WITH FRONT ASH RECEPTACLE
(See
INSTALLATION
)
- INSTALL NO. 2 INSTRUMENT PANEL REGISTER ASSEMBLY
(See
INSTALLATION
)
- INSTALL SHIFT LEVER KNOB SUB-ASSEMBLY
(See
INSTALLATION
)
- INSERT MAP DISC
- Turn the engine switch on (ACC).
- Insert the map disc.
- Engage the 8 claws and install the cover as shown in the illustration.
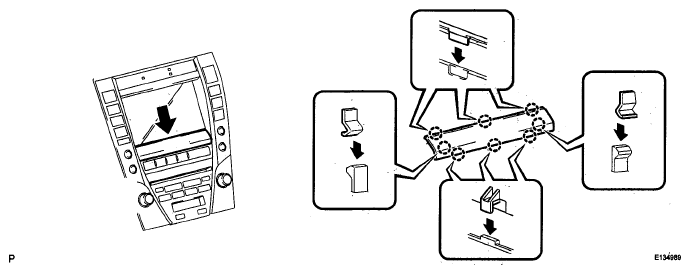 Courtesy of © TOYOTA, LICENSE AGREEMENT TMS1002
- Turn the engine switch off.
- ADJUST CLOCK